Mincemeat Pastry Cookies Recipe
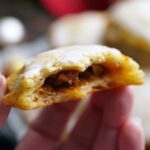
Cookie-sized hand pies with buttery, crispy pastry and classic mincemeat pie filling. Think of these festive treats as Christmas pop tarts; they're equally delicious for holiday brunch or dessert.
Servings 16 servings
Calories 244kcal
Ingredients
- 2 1/2 cups all-purpose flour plus more for rolling out the dough
- 3/4 teaspoon salt
- 1 cup unsalted butter chilled and diced small
- 3/4 cup ice-cold water added a little at a time (plus more as needed)
- 1 cup mincemeat filling cooled completely if homemade
- 1 large egg lightly beaten with 1 tablespoon water (for egg wash)
- 1 cup powdered sugar sifted, mixed with 4 teaspoons water to make a glaze (optional)
Instructions
- Make the dough. Whisk together the flour and salt in a large bowl. Cut in the butter with a fork, a pastry cutter, 2 butter knives, or your fingertips. It should look crumbly, with some pieces of butter the size of small peas. Drizzle the water in a little at a time, mixing as you go (you can use a fork to mix, but it works best mixing with your fingertips). Add just enough water so it comes together to form a ball of dough. (TIP: You may need more or less water than stated; the exact amount of water it takes to hydrate the dough depends on multiple factors, including the age of the flour and the humidity level.)
- Chill the dough. Divide the dough into 2 equal parts. Roll each into a ball, flatten each ball slightly into a disk, wrap them in plastic wrap, and refrigerate until chilled, about 30 minutes (or up to 3 days).
- Roll out the dough and stamp into circles. Place 1 disk of dough onto a floured work surface. Working from the center out, roll the dough out to a rectangle about 11 to 12-inches by 16 to 18-inches. Use a 3-inch cookie cutter (or a glass or bowl with that diameter) to stamp out circles in the dough. Gather the scraps of dough, re-roll them, and repeat until the dough is gone. Repeat this process with the second disk of dough. (TIP: You should get about 16 circles from each disk of dough for a total of 32 circles from this recipe.)
- Assemble the pastries. Place 1 tablespoon of mincemeat pie filling in the center of 16 dough circles. Lightly wet your finger with water and run it on the dough along the outside of the mincemeat filling (to help the other piece of dough stick on top). Place another circle of dough on top, and crimp it with a fork to seal the outside. Continue this way until all the pies are formed. You should get 16 pies. Use a thin metal spatula to lift up each pastry and arrange them on a large baking tray lined with parchment paper or a silpat liner. Use a paring knife to make a couple small slits in the top of each pie (or poke the top of each pie a couple times with a fork) so steam can escape. Lightly brush the top of each pie with egg wash.
- Chill the pastries and preheat the oven. Transfer the baking try to the fridge to chill for 30 minutes. Preheat the oven to 375F.
- Bake. Bake the pies until they’re golden and flaky, about 25 to 30 minutes at 375F, rotating the tray once halfway through. Cool completely before glazing.
- Glaze (optional). Once the pastries are cool, mix together the powdered sugar and water for the glaze in a shallow bowl. Dip the top of each pastry in the glaze, and place it in a rack set on a baking tray so any excess can drip off. Let the glaze set before serving or storing. (TIP: You can skip the glaze if you like and enjoy them as-is, or with a dusting of powdered sugar on top.)
Video
Notes
- Storage: After the glaze is set, you can store these layered between pieces of parchment paper in an airtight container at room temperature for up to 2 days or in the fridge for up to 5 days.
- Freezing: If you leave off the glaze, you can freeze them for up to 3 months. To re-crisp the thawed pastry cookies after freezing before glazing, put them on a baking tray in a preheated 350F oven until warm, about 5 minutes. After that, let them cool, dip the tops in glaze, and let the glaze set before serving.
- Reheating: You can reheat these unglazed pastries from frozen in a regular toaster (set to medium), toaster oven or regular oven (preheated to 375F for about 8 to 10 minutes), or air fryer (at 350F for about 6 minutes, flipping once).
- Making the Pie Dough: If you want more guidance on making homemade pie dough, I have a full post on how to make a flaky all-butter pie crust with a video, step-by-step photo guide, and tons of tips.
Nutrition
Serving: 1pastry | Calories: 244kcal | Carbohydrates: 33g | Protein: 2g | Fat: 12g | Saturated Fat: 7g | Polyunsaturated Fat: 1g | Monounsaturated Fat: 3g | Trans Fat: 0.5g | Cholesterol: 31mg | Sodium: 190mg | Potassium: 24mg | Fiber: 1g | Sugar: 17g | Vitamin A: 355IU | Calcium: 7mg | Iron: 1mg