This post may contain affiliate links, view our disclosure.
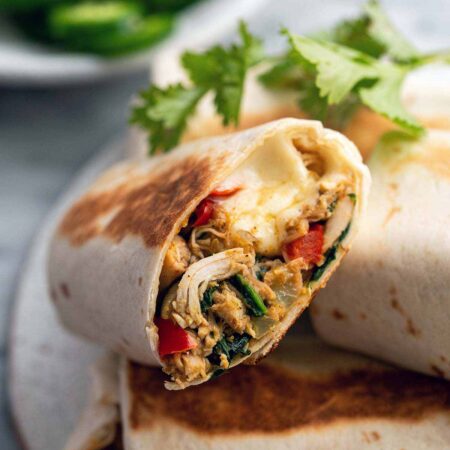
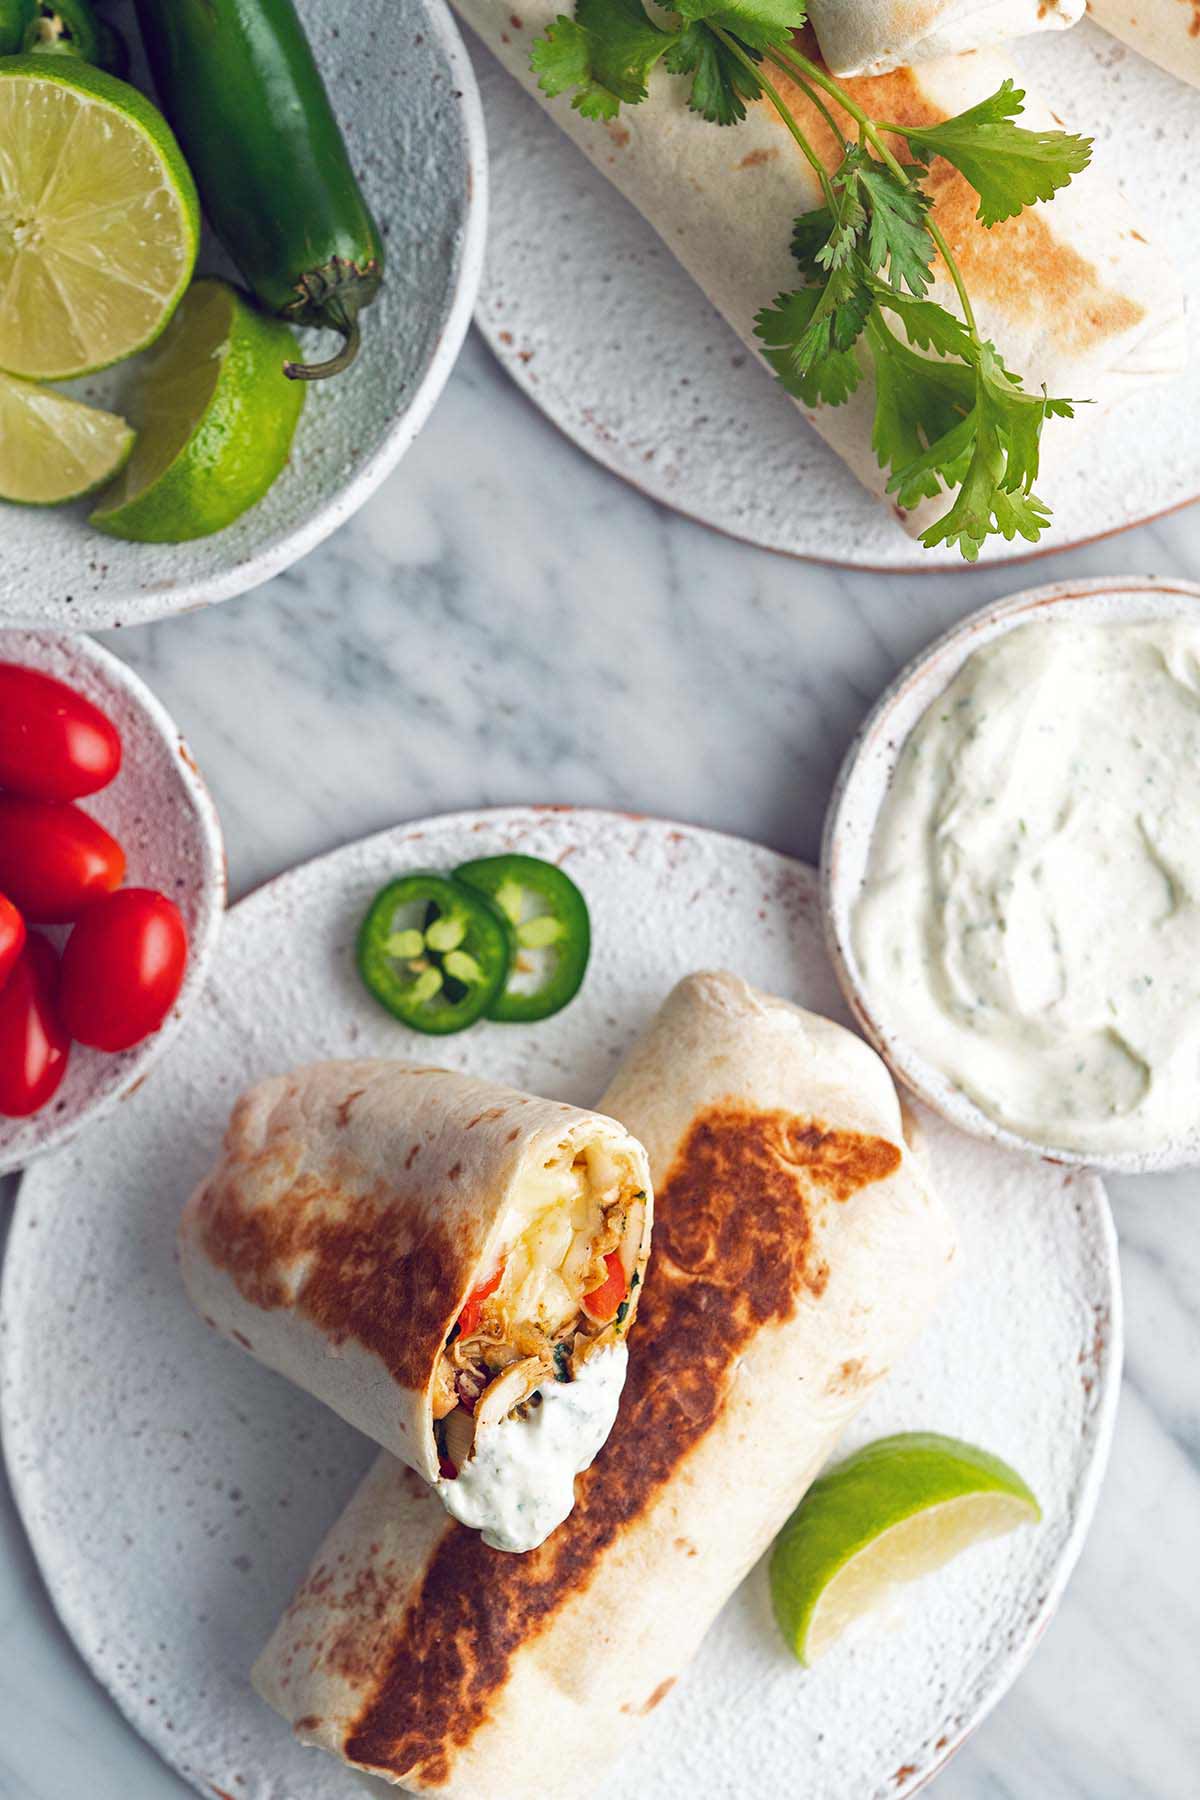
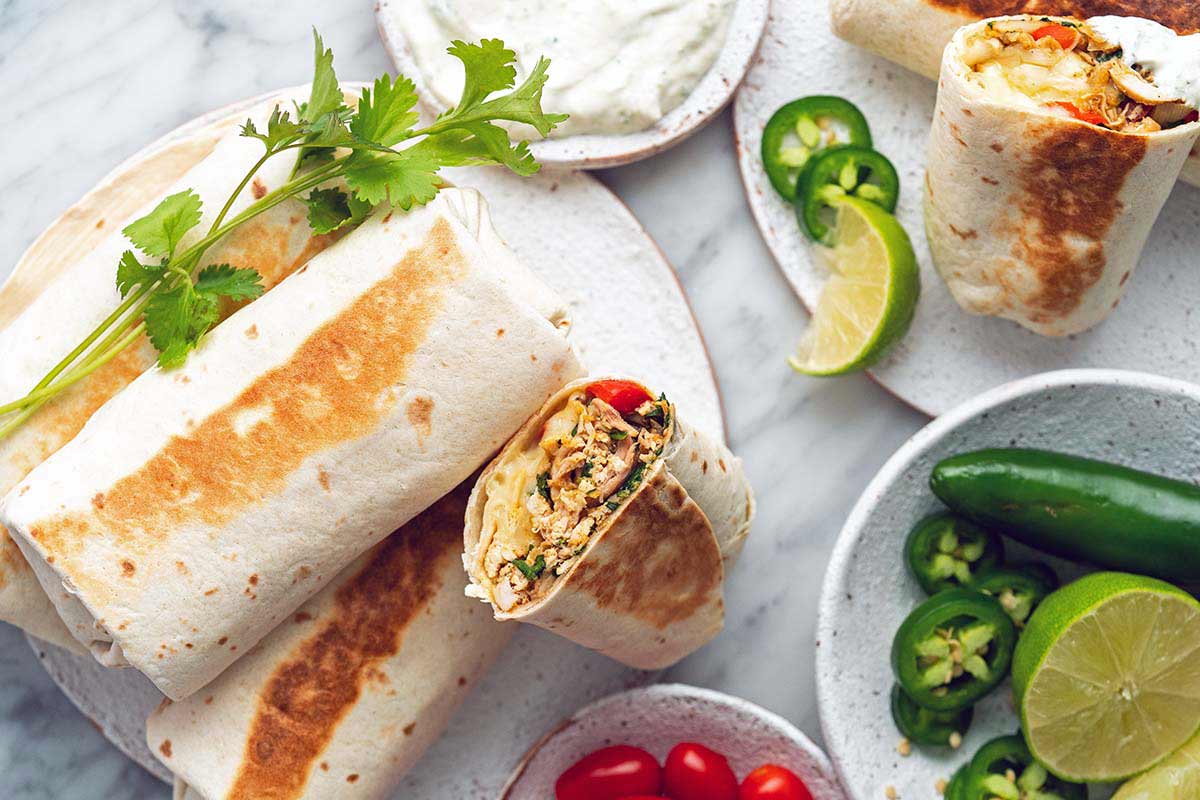
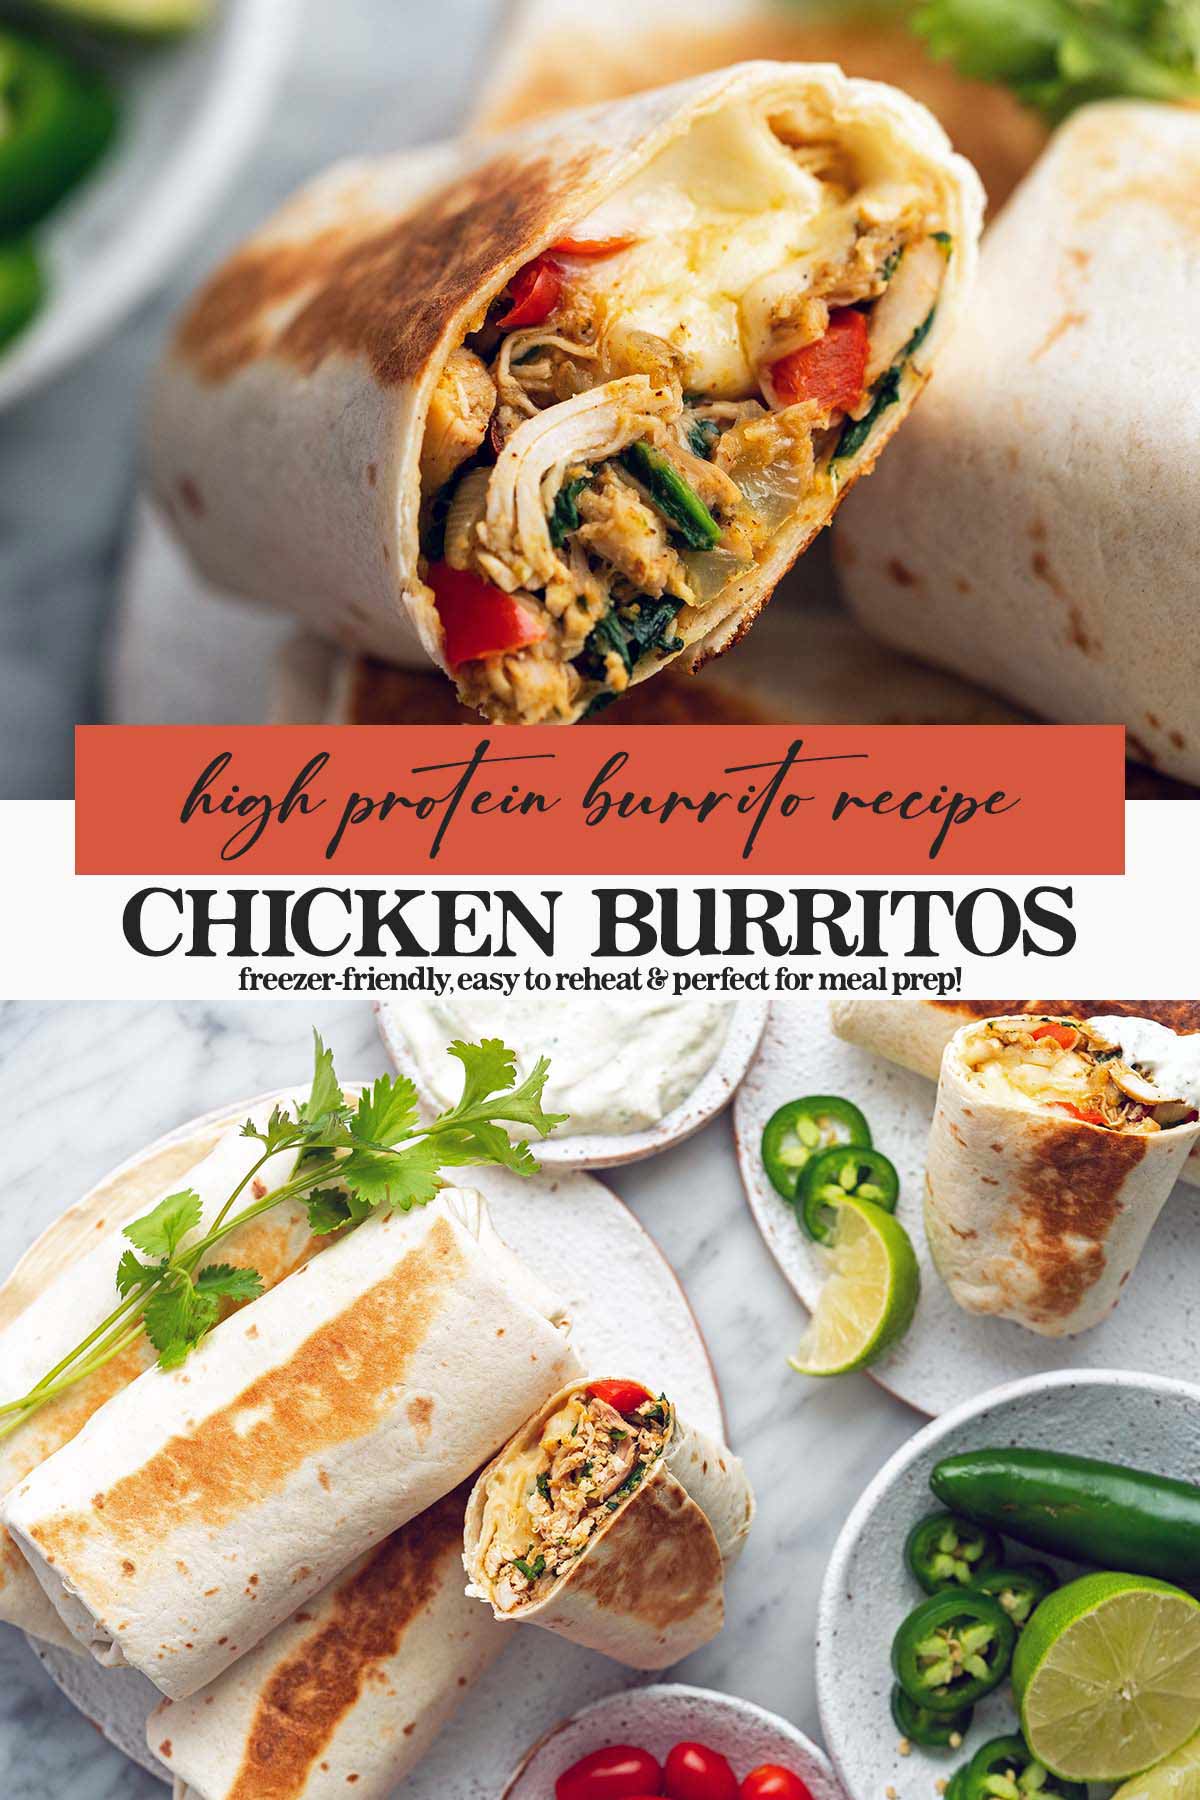
Chicken meal prep burritos are a game-changer for anyone who wants to simplify their weeknight dinners without sacrificing flavor or nutrition. These are packed with 40 grams of protein per serving, and you can reheat them directly from frozen!
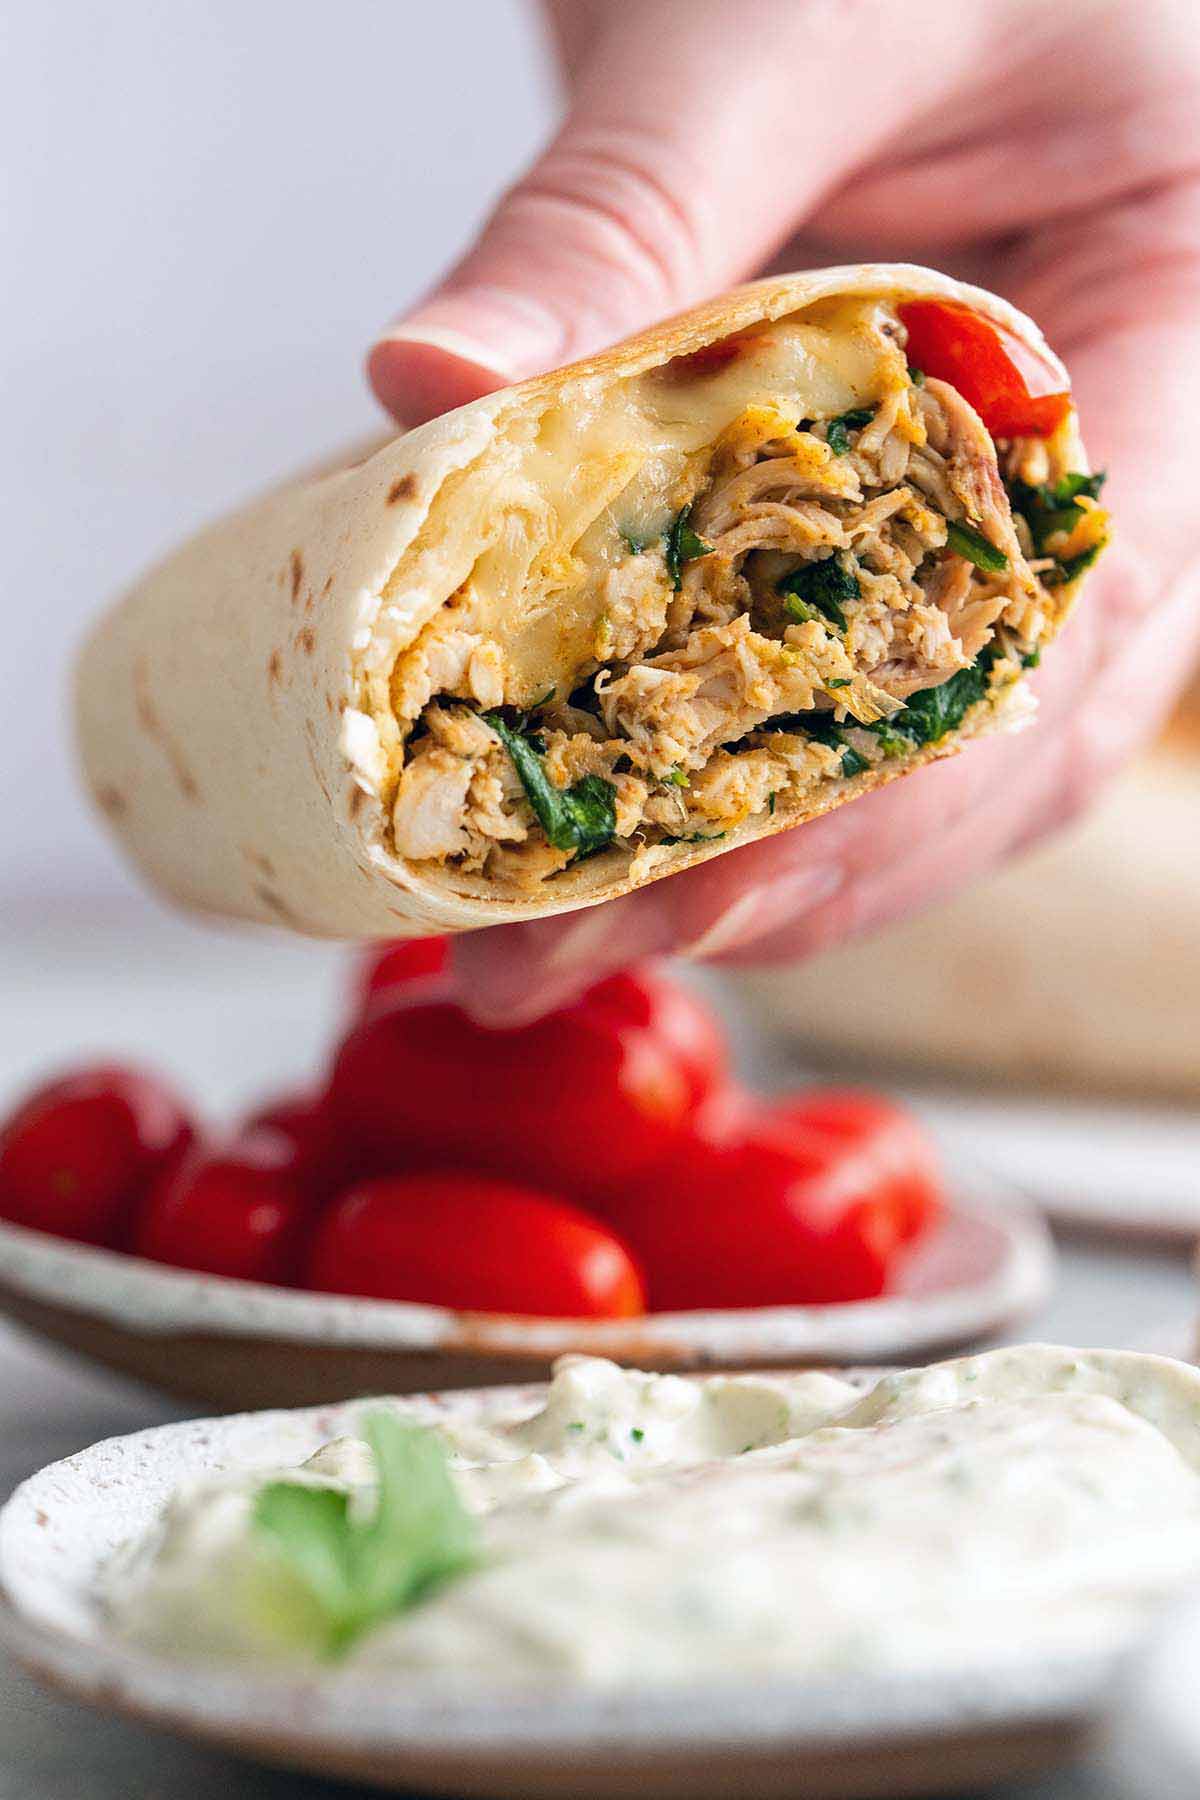
Meal prep doesn’t have to be boring or complicated. These veggie-packed, high-protein chicken burritos make a healthy dinner much more accessible on busy nights. If you have these stashed in your freezer waiting for you, takeout or the drive-thru looks a lot less tempting. With these on hand, you’ll get a nutritious meal and save money! Full of flavor, protein, and healthy ingredients, you can prep these in bulk and store them for quick, delicious meals all week (or month) long.
I’m a condiment girl through and through! When I was coming up with this recipe, I wanted to make the burritos even more flavorful with a dipping sauce. Guacamole, sour cream, fresh salsa, and queso (especially high protein queso made with cottage cheese!) are all great options, but this protein-packed cottage cheese-based crema with fresh cilantro and lime is delicious, fun, and a little bit different. And it whips up in just a couple minutes! If you’re a sauce-lover like me, you’re going to want to make extra because it’s great as a salad dressing or as a dip for raw veggies, pretzels, or crackers.
Why You’ll Want This Easy Burrito Recipe in Your Regular Meal Prep Rotation
- Balanced nutrition – Each burrito is packed with chicken for protein, and a variety of vegetables for vitamins, minerals, and fiber. These will keep you satisfied and energized until your next meal!
- Customizable – You can easily swap ingredients to suit your dietary needs or flavor preferences.
- Great for meal prep – Spend less than an hour and make a batch (or two) of burritos, wrap them individually, and pop them in the freezer so you can take out as many as you need when you need them! It makes dinner on busy weeknights a breeze, and you’re still getting in a well-balanced, nutrient-rich meal. These burritos freeze beautifully, and you can even reheat them from frozen if you forget to thaw them!
Ingredients
Breaking It Down
Ingredients Explained
In this section I explain the ingredients and give substitution ideas where applicable. For the full recipe (including the ingredient amounts), see the recipe card below.
Chicken Burritos Ingredients
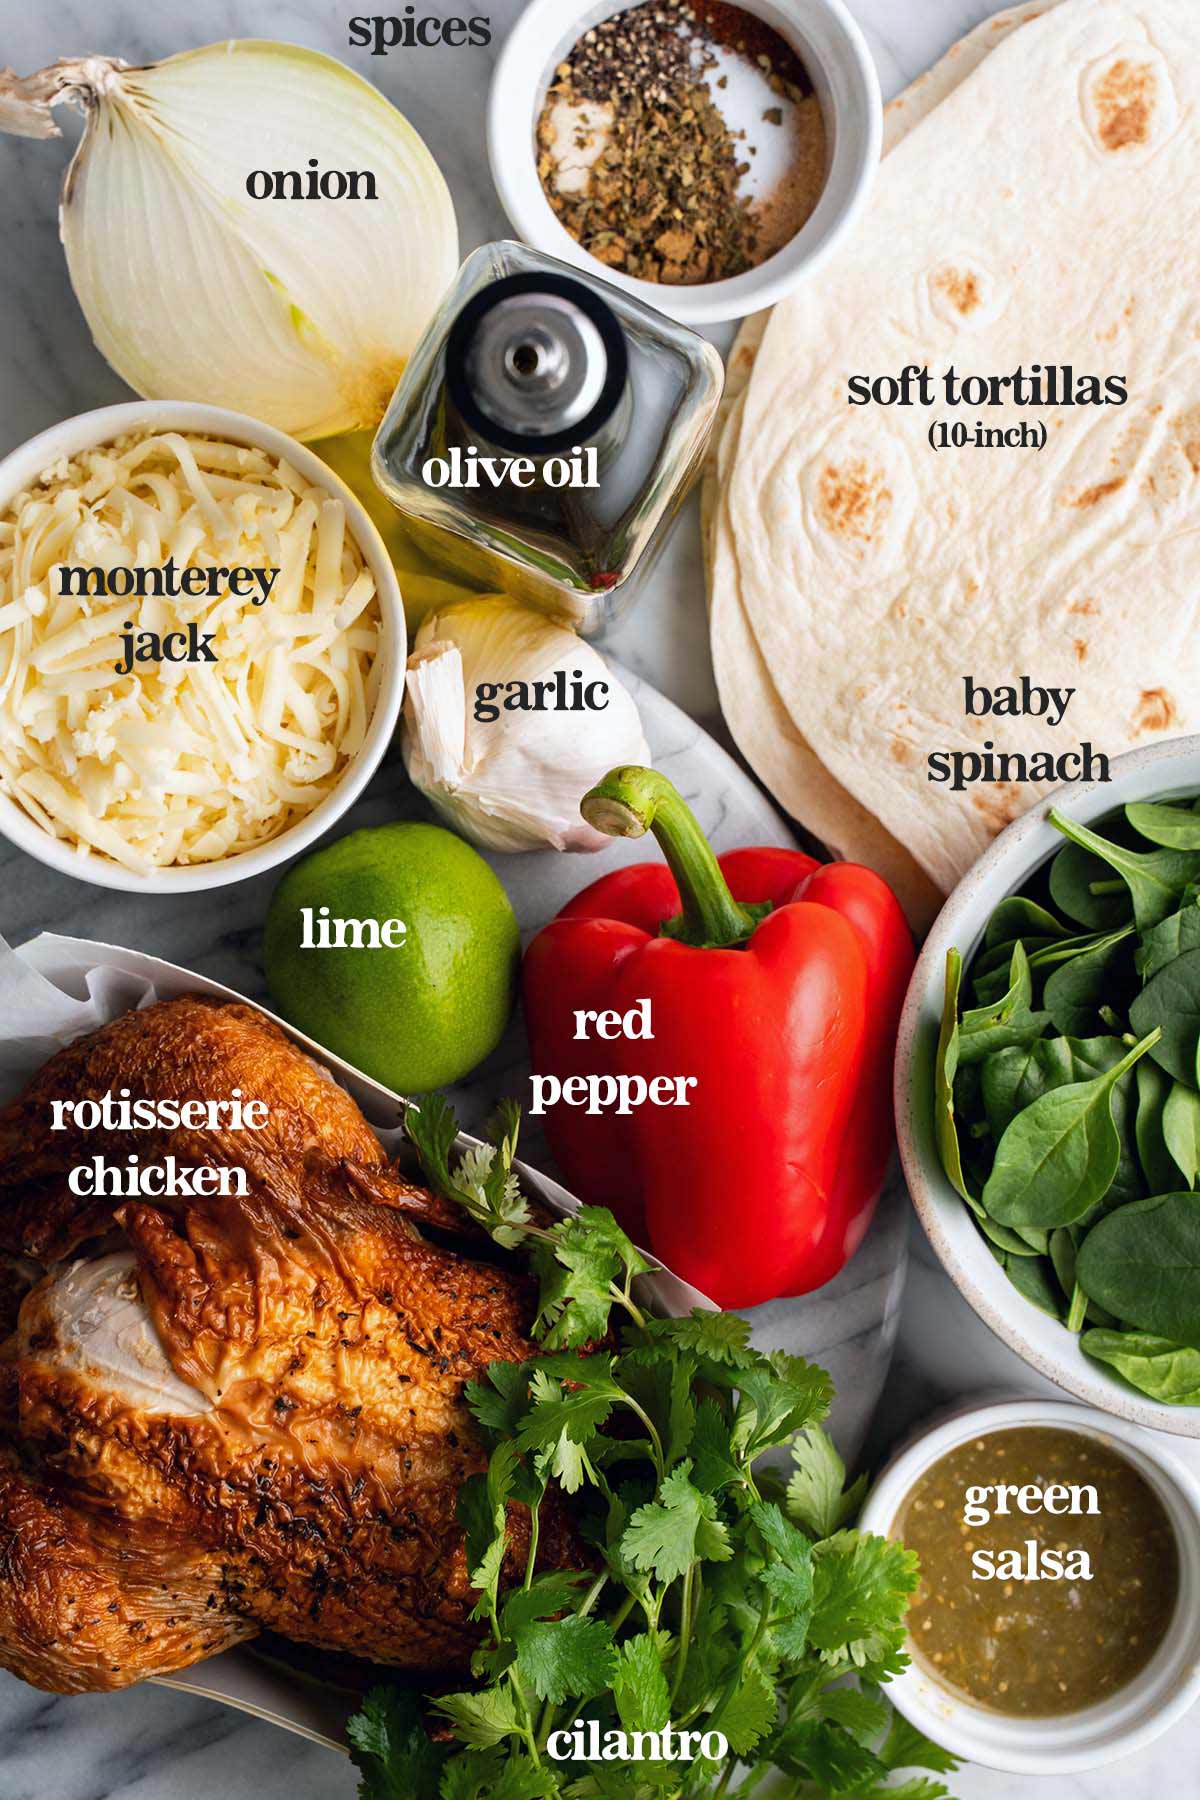
- Extra-virgin olive oil – We cook down the veggies in a little olive oil.
- White onion – Adds savory flavor and aroma.
- Red bell pepper – Use any color of bell pepper you like.
- Garlic – Adds a pungent flavor that mellows as it cooks.
- Baby spinach – To get in some greens! You can swap out the baby spinach for any leafy greens you like. Note that sturdier greens (such as kale) will need to cook a bit longer to wilt.
- Shredded rotisserie chicken – Leftover roast chicken is another great option here. You can also use raw boneless, skinless chicken breasts or thighs; cut them into bite-sized pieces and cook them for 5 minutes before adding the onion and bell pepper to the skillet. Another option is to use canned, drained chicken breast.
- Chili powder, garlic powder, onion powder, cumin, salt, Mexican oregano, and black pepper – If you prefer, you can omit these spices and instead use 3 tablespoons of your favorite taco seasoning.
- Salsa verde – Aka green salsa! You can use any type of salsa you like here.
- Fresh cilantro – Adds bright, fresh herby flavor to this burrito filling.
- Fresh lime zest – Bumps up the lime flavor without adding more acidity.
- Tortillas – Use 10-inch soft flour tortillas.
- Monterey Jack cheese – This is a mild cheese that melts well and is readily available. You can swap it out for Oaxaca cheese, queso asadero, cotija, or queso fresco.
High Protein Cilantro Lime Crema Ingredients

- Cottage cheese – I like to use 4% cottage cheese here for rich flavor and creamy texture, but you can use any kind of cottage cheese you like.
- Sour cream – Adds a touch of tanginess, as well as richness and creamy texture. Greek yogurt also works really well here, and will bump up the protein even more.
- Fresh lime juice – This adds a hint of citrusy tartness to wake up the flavors.
- Garlic – For the most robust flavor, use fresh garlic.
- Garlic powder, onion powder, cumin, salt, and black pepper – I know we’re also using fresh garlic, but dried garlic powder is milder and sweeter, and adds another layer of flavor. The other spices help season the crema and make the flavor pop.
- Fresh lime zest – For intense citrusy flavor without the acidity.
- Fresh cilantro – We use cilantro in both the burrito filling and dipping sauce to tie the flavors together. Even though we’re meal prepping, putting just a little bit of extra effort in can make freezer meals feel special!
Step-by-Step Instructions: How to Make Meal Prep Burritos
Here are step-by-step photos to guide you through the process. For the recipe video, please see the recipe card below.
1: How to Make Chicken and Veggie Filling For Burritos

Add the oil to a large skillet over medium heat. Once hot, add the onion and red bell pepper, and cook until starting to soften, about 5 minutes, stirring occasionally. Add the garlic and spinach and cook until the garlic is fragrant and the spinach is wilted, about 1 minute, stirring frequently. Stir in the chicken and spices and cook 1 minute. Stir in the salsa, cilantro, and lime zest, and remove from the heat.
TIP: If you don’t feel like taking the time to assemble burritos, you can eat the filling as a skillet meal. Top it with cheese if desired, and you’re good to go – or good to freeze! This chicken vegetable burrito filling is delicious paired with rice, roasted potatoes, or on a bed of leafy greens.
2: How to Roll Burritos (And Toast Them!)
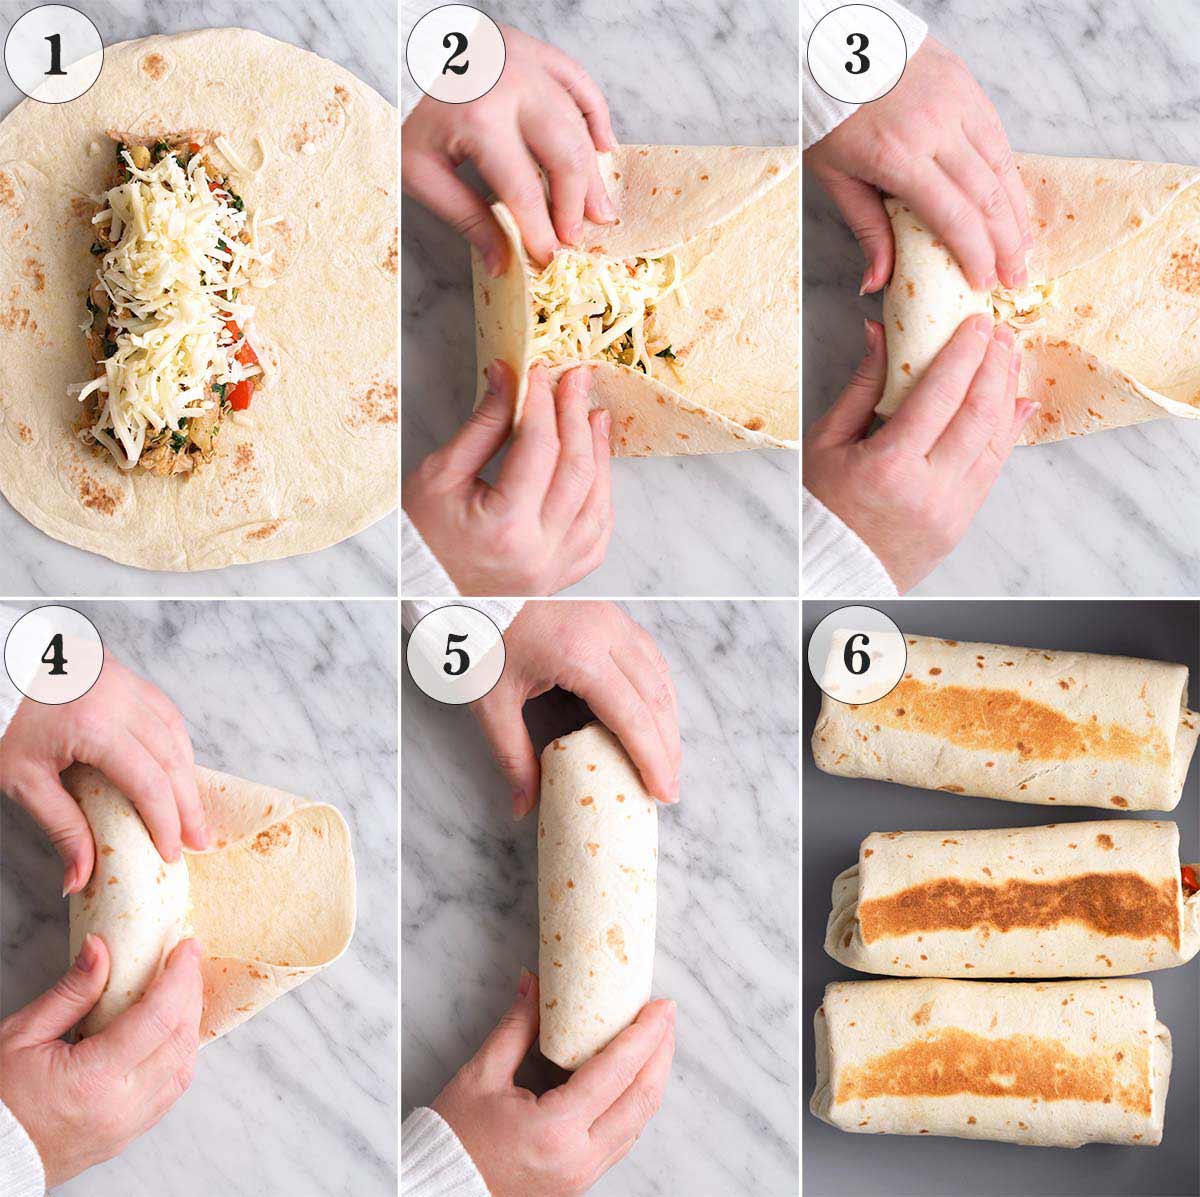
- Lay a flour tortilla out on a flat surface. Place 1/6 of the chicken burrito filling (about 1 cup) across the bottom 1/3 of the tortilla, leaving a little space on all sides so you can fold the tortilla over. Add 1/6 of the shredded cheese on top of the filling.
- Fold both sides of the tortilla over onto itself, then fold the bottom 1/3 up over the filling.
- Continue rolling the tortilla up over the filling.
- As you’re rolling each burrito, after you roll the tortilla over the filling, tuck in the corners of the tortilla, as shown here. This helps roll the burritos as tightly as possible, making sure your filling doesn’t come out.
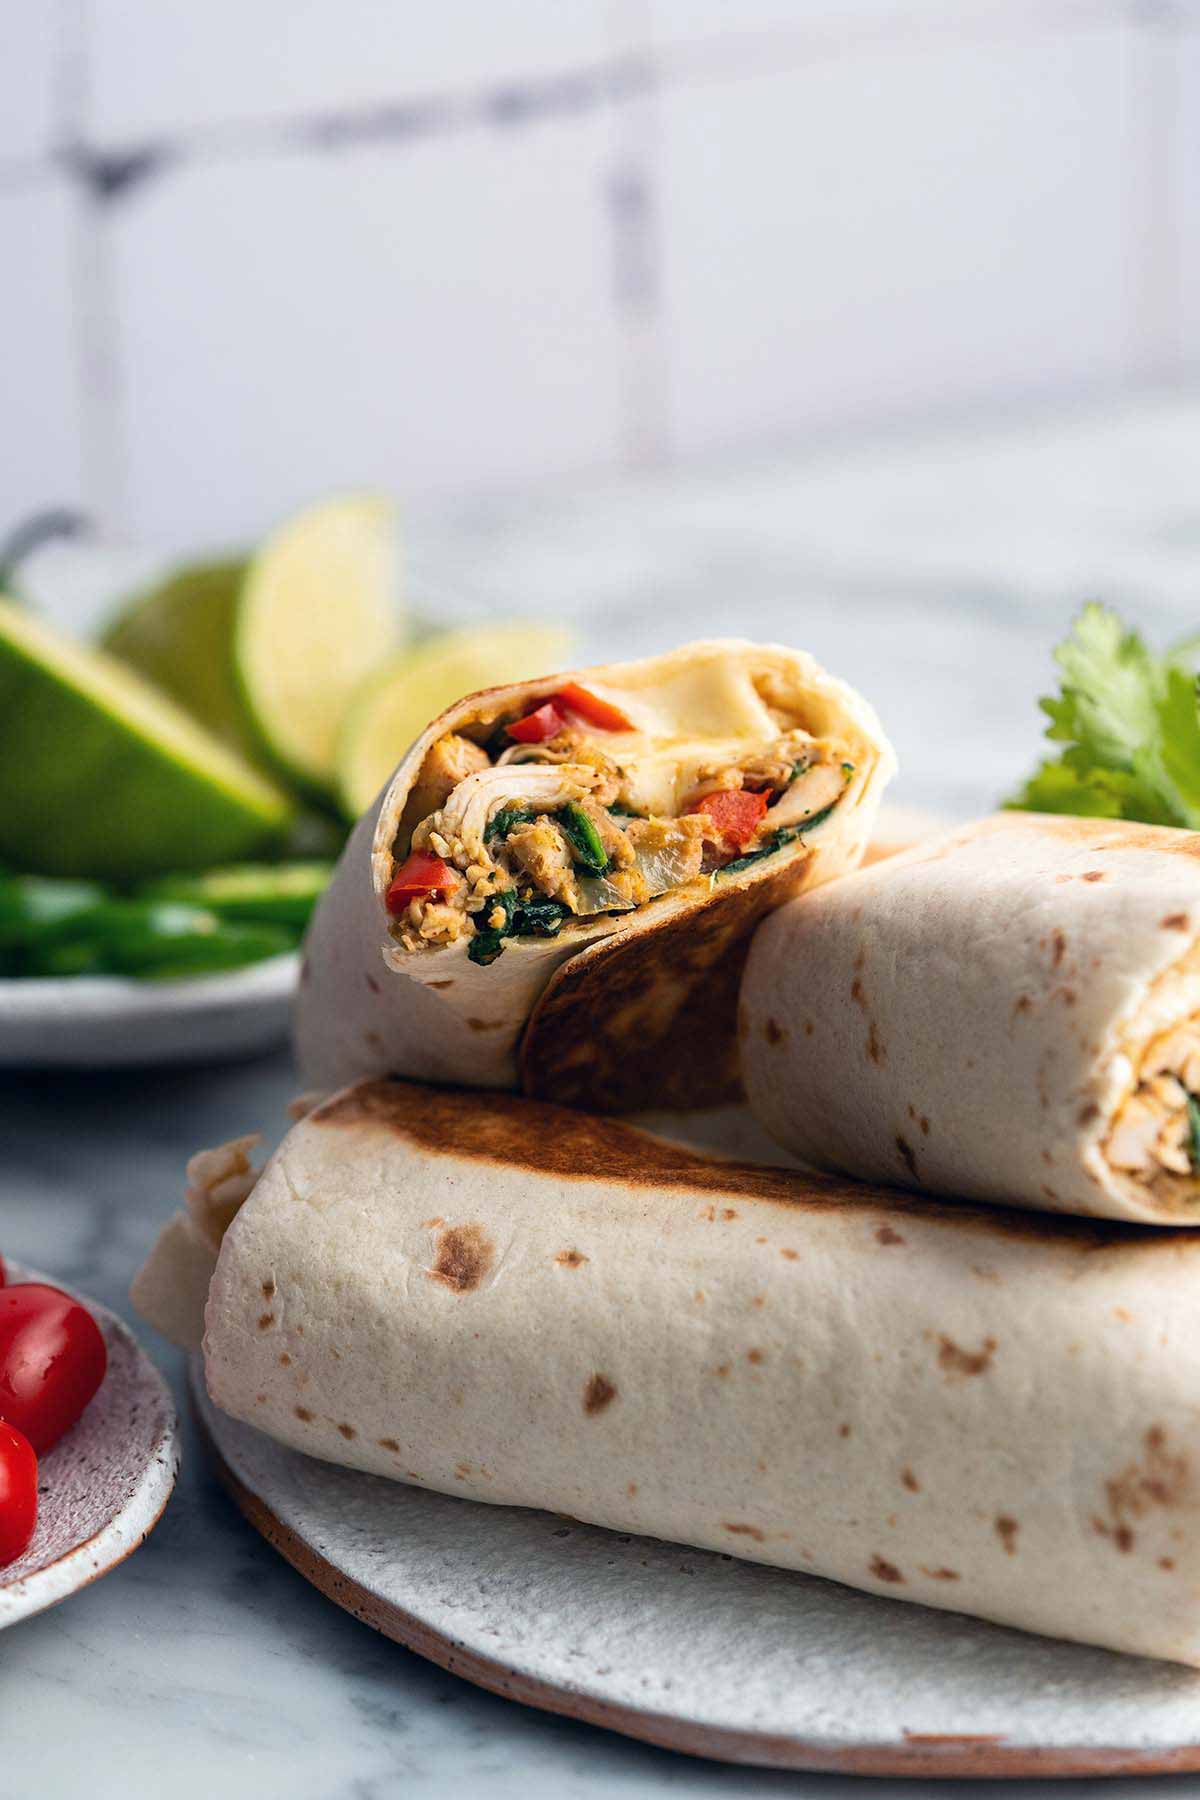
- You’ll end up with a tightly-rolled burrito that’s perfect for a grab-and-go meal! Repeat until all the burritos are rolled.
- To toast the burritos, preheat a large skillet over medium heat. Add the rolled burritos and cook until they’re warm throughout and golden on the outside, about 3 to 5 minutes. (Do this in 2 batches if your skillet isn’t big enough to hold all the burritos at the same time.)
3: How to Make High Protein Cilantro Lime Crema

- Add all ingredients (except the cilantro) to a blender or food processor and process until smooth.
- Add the cilantro and pulse a couple times to combine.

Storage Tips
After cooling to room temperature, wrap the burritos individually in foil and then put them in a large zip-top plastic bag. Portion out the crema into condiment containers. Store the burritos and crema in the fridge for up to 4 days or in the freezer for up to 3 months.
Reheating
If you’re pressed for time, the microwave will work well to reheat burritos in just a couple minutes. However, if you want to re-crisp the outside, there are better reheating methods.
You can reheat them until warm in a skillet on the stovetop over medium to medium-low heat, flipping occasionally. To reheat burritos in the air fryer, preheat it to 350F and heat them wrapped in foil for 8 minutes (flipping once), and then unwrapped for 1 to 2 minutes. In the oven, preheat it to 350F and heat foil-wrapped burritos for 15 minutes (flipping once), and then unwrapped for 2 minutes.
To reheat burritos from frozen, preheat the oven to 350F. Place foil-wrapped burritos in the oven and reheat for 40 to 45 minutes, or until warm throughout.

Pro Tips For Perfect Meal Prep Burritos
- Customize the filling! You aren’t limited to these vegetables, spices, cheese, etc. Use what you like. You can also add refried beans, black beans, prepared rice, or cooked quinoa.
- Keep them crisp. To avoid soggy tortillas, let the cooked ingredients cool before assembling your burritos.
- Don’t be tempted to overfill them. Less is more when it comes to filling burritos. Overstuffed burritos can be difficult to roll and are prone to cracking or falling apart.
Serving Suggestions
With 40 grams of protein, a variety of veggies, and a little under 500 calories per serving, these burritos are a filling grab-and-go meal on their own. But if you want to serve them with side dishes, here are a few delicious options that pair well:
- Leafy green salad
- Pico de Gallo
- Homemade Rice a Roni
- Tortilla chips (pair them with guacamole or cottage cheese queso!)
Frequently Asked Questions
Absolutely! Replace the chicken with roasted vegetables, tofu, or beans for a delicious vegetarian option. Just note that the protein content will change if you swap out the chicken.
To help prevent the tortillas from cracking when you roll the burritos, you can soften the tortillas first. To do so, stack the tortillas layered between damp paper towels, place them on a microwave-safe plate, and microwave them in 20-second intervals until warm. This makes them more pliable and easier to roll.
Yes! Whole wheat, low-carb, or gluten-free tortillas all work well for this recipe. Use whatever fits into your way of eating.
Use a salsa that you enjoy eating! Mild, medium, or spicy, it’s up to your personal preference. I like green salsa here, but red is also delicious.
More Freezer Friendly Meal Prep Recipes
- Cabbage Vegetable Soup with Beef – A modern take on the classic cabbage soup diet recipe!
- Meal Prep Breakfast Sandwiches – With sausage, egg, and cheese, and 45 grams of protein each.
- Homemade Salisbury Steak with Mushroom Gravy – Just like the traditional TV dinners, but made with real food ingredients (and way more delicious!).
Let’s Connect

Did you make this recipe? Please rate it and leave a comment below. You can also tag @anediblemosaic on social media.
To stay up-to-date, follow me on Facebook, Instagram, Pinterest, and Twitter!

Chicken Meal Prep Burritos Recipe
Email This Recipe
Get this recipe link emailed straight to your inbox!
Ingredients
Chicken Burritos:
- 2 tablespoons extra-virgin olive oil
- 1/2 large white onion diced (about 1 1/4 cups)
- 1 red bell pepper chopped (about 1 cup)
- 4 large cloves garlic crushed
- 4 cups baby spinach coarsely chopped
- 4 cups shredded rotisserie chicken see Notes for chicken options
- 1 1/2 teaspoons chili powder see Notes for spice options
- 1 1/2 teaspoons garlic powder
- 1 1/2 teaspoons onion powder
- 1 1/2 teaspoons ground cumin
- 1 teaspoon salt
- 1 teaspoon Mexican oregano
- 1/2 teaspoon black pepper
- 1/2 cup salsa verde green salsa
- 3 tablespoons minced fresh cilantro
- 3/4 teaspoon fresh lime zest
- 6 10-inch soft flour tortillas
- 8 ounces Monterey Jack cheese shredded
High Protein Cilantro Lime Crema:
- 1 1/4 cups 4% cottage cheese
- 1/4 cup full-fat sour cream or Greek yogurt
- 1 tablespoon fresh lime juice
- 1 large clove garlic crushed
- 3/4 teaspoon garlic powder
- 3/4 teaspoon onion powder
- 1/4 teaspoon ground cumin
- 1/4 teaspoon salt
- 1/8 teaspoon black pepper
- 3/4 teaspoon fresh lime zest
- 2 tablespoons minced fresh cilantro
Instructions
For the Chicken Burritos:
- To make the filling, add the oil to a large skillet over medium heat. Once hot, add the onion and red bell pepper, and cook until starting to soften, about 5 minutes, stirring occasionally. Add the garlic and spinach and cook until the garlic is fragrant and the spinach is wilted, about 1 minute, stirring frequently. Stir in the chicken and spices and cook 1 minute. Stir in the salsa, cilantro, and lime zest, and remove from the heat.
- To assemble the burritos, lay a flour tortilla out on a flat surface. Place 1/6 of the chicken burrito filling (about 1 cup) across the bottom 1/3 of the tortilla, leaving a little space on all sides so you can fold the tortilla over. Add 1/6 of the shredded cheese on top of the filling. Fold both sides of the tortilla over onto itself, then fold the bottom 1/3 up over the filling, and roll it up as tightly as possible. (See Notes to soften your tortillas before rolling the burritos.) Repeat until all the burritos are rolled.
- To toast the burritos, preheat a large skillet over medium heat. Add the rolled burritos and cook until they’re warm throughout and golden on the outside, about 3 to 5 minutes. (Do this in 2 batches if your skillet isn’t big enough to hold all the burritos at the same time.)
For the High Protein Cilantro Lime Crema:
- Add all ingredients (except the cilantro) to a blender or food processor and process until smooth. Add the cilantro and pulse a couple times to combine.
To Serve:
- Serve the warm chicken burritos with the cilantro lime crema for dipping.
Video
Notes
- Chicken Options: Leftover roast chicken is another great option here. You can also use raw boneless, skinless chicken breasts or thighs; cut them into bite-sized pieces and cook them for 5 minutes before adding the onion and bell pepper to the skillet. Another option is to use canned, drained chicken breast.
- Spice Options: If you prefer, you can streamline the spices! Omit the chili powder, garlic powder, onion powder, ground cumin, salt, Mexican oregano, and black pepper and instead use 3 tablespoons of your favorite taco seasoning.
- To Soften the Flour Tortillas: To help prevent the tortillas from cracking when you roll the burritos, you can soften the tortillas first. To do so, stack the tortillas layered between damp paper towels, place them on a microwave-safe plate, and microwave them in 20-second intervals until warm.
- Storage: Once they’re cooled to room temperature, wrap the burritos individually in foil and then put them in a large zip-top plastic bag. Portion out the crema into condiment containers. Store the burritos and crema in the fridge for up to 4 days or in the freezer for up to 3 months.
- Reheating: If you’re pressed for time, the microwave will work well to reheat burritos in just a couple minutes. However, if you want to re-crisp the outside, there are better reheating methods.
- You can reheat them until warm in a skillet on the stovetop over medium to medium-low heat, flipping occasionally.
- To reheat burritos in the air fryer, preheat it to 350F and heat them wrapped in foil for 8 minutes (flipping once), and then unwrapped for 1 to 2 minutes.
- To reheat burritos in the oven, preheat it to 350F and heat them wrapped in foil for 15 minutes (flipping once), and then unwrapped for 2 minutes.
- To Reheat From Frozen: Preheat the oven to 350F. Place foil-wrapped burritos in the oven and reheat for 40 to 45 minutes, or until warm throughout.
- Keto Version: Use keto soft tortillas. These Hero tortillas are my absolute favorite. Even though they’re only 8-inch, they’re soft and pliable and still work really well here. Or skip the tortillas and eat the filling and cheese as a skillet meal to keep the carbs down!
Nutrition
Nutritional information is automatically calculated and should be used as an approximate.
Share it with me on Instagram and leave a comment to let me know your thoughts!


I’m the writer, recipe developer, photographer, and food stylist behind this blog. I love finding the human connection through something we all do every day: eat! Food is a common ground that we can all relate to, and our tables tell a story. It’s my goal to inspire you to get in the kitchen, try something new, and find a favorite you didn’t know you had.
Free Bonus