


This post may contain affiliate links, view our disclosure.
With this easy sweetened condensed milk recipe, you’ll learn how to make condensed milk out of pantry staples that’s thick and creamy with a buttery vanilla flavor – in just 5 minutes!
Have you ever wondered how condensed milk is made?
Well friends, it’s usually a process that takes a bit longer than 5 minutes. It starts with whole milk and sugar, and involves boiling it down until the mixture reaches a thick, syrupy consistency. Depending on the size of your batch and your pot, this can take as little as 30 minutes, to as long as 2 hours.
Let’s do it in 5. And how about with no pots and pans to clean?
Why This Will Be Your Go-To Recipe
- It’s made entirely with pantry staples! We use all shelf-stable items here, so if you have a well-stocked pantry you may already have everything on hand to make this.
- As far as quick and easy recipes go, this one gets a gold medal! Just 5 ingredients and 5 minutes is all it takes.
- If you’re trying to stick with your grocery budget, this will help you save money. Yes you’ll need a couple different items to make this, but then you’ll be able to make this recipe several times, saving money in the long run.
- You don’t have to try to remember to keep a can of sweetened condensed milk in your pantry. There have been many times when I’ve seen a recipe that sounded good that called for sweetened condensed milk, but I didn’t have it on hand! (This just isn’t one of those things that I keep in my kitchen unless I need it for a specific recipe.) But now that doesn’t matter because it’s easy to whip up in a matter of minutes with minimal ingredients.
Ingredients
Breaking It Down
Ingredients Explained
In this section I explain the ingredients and give substitution ideas where applicable. For the full recipe (including the ingredient amounts), see the recipe card below.
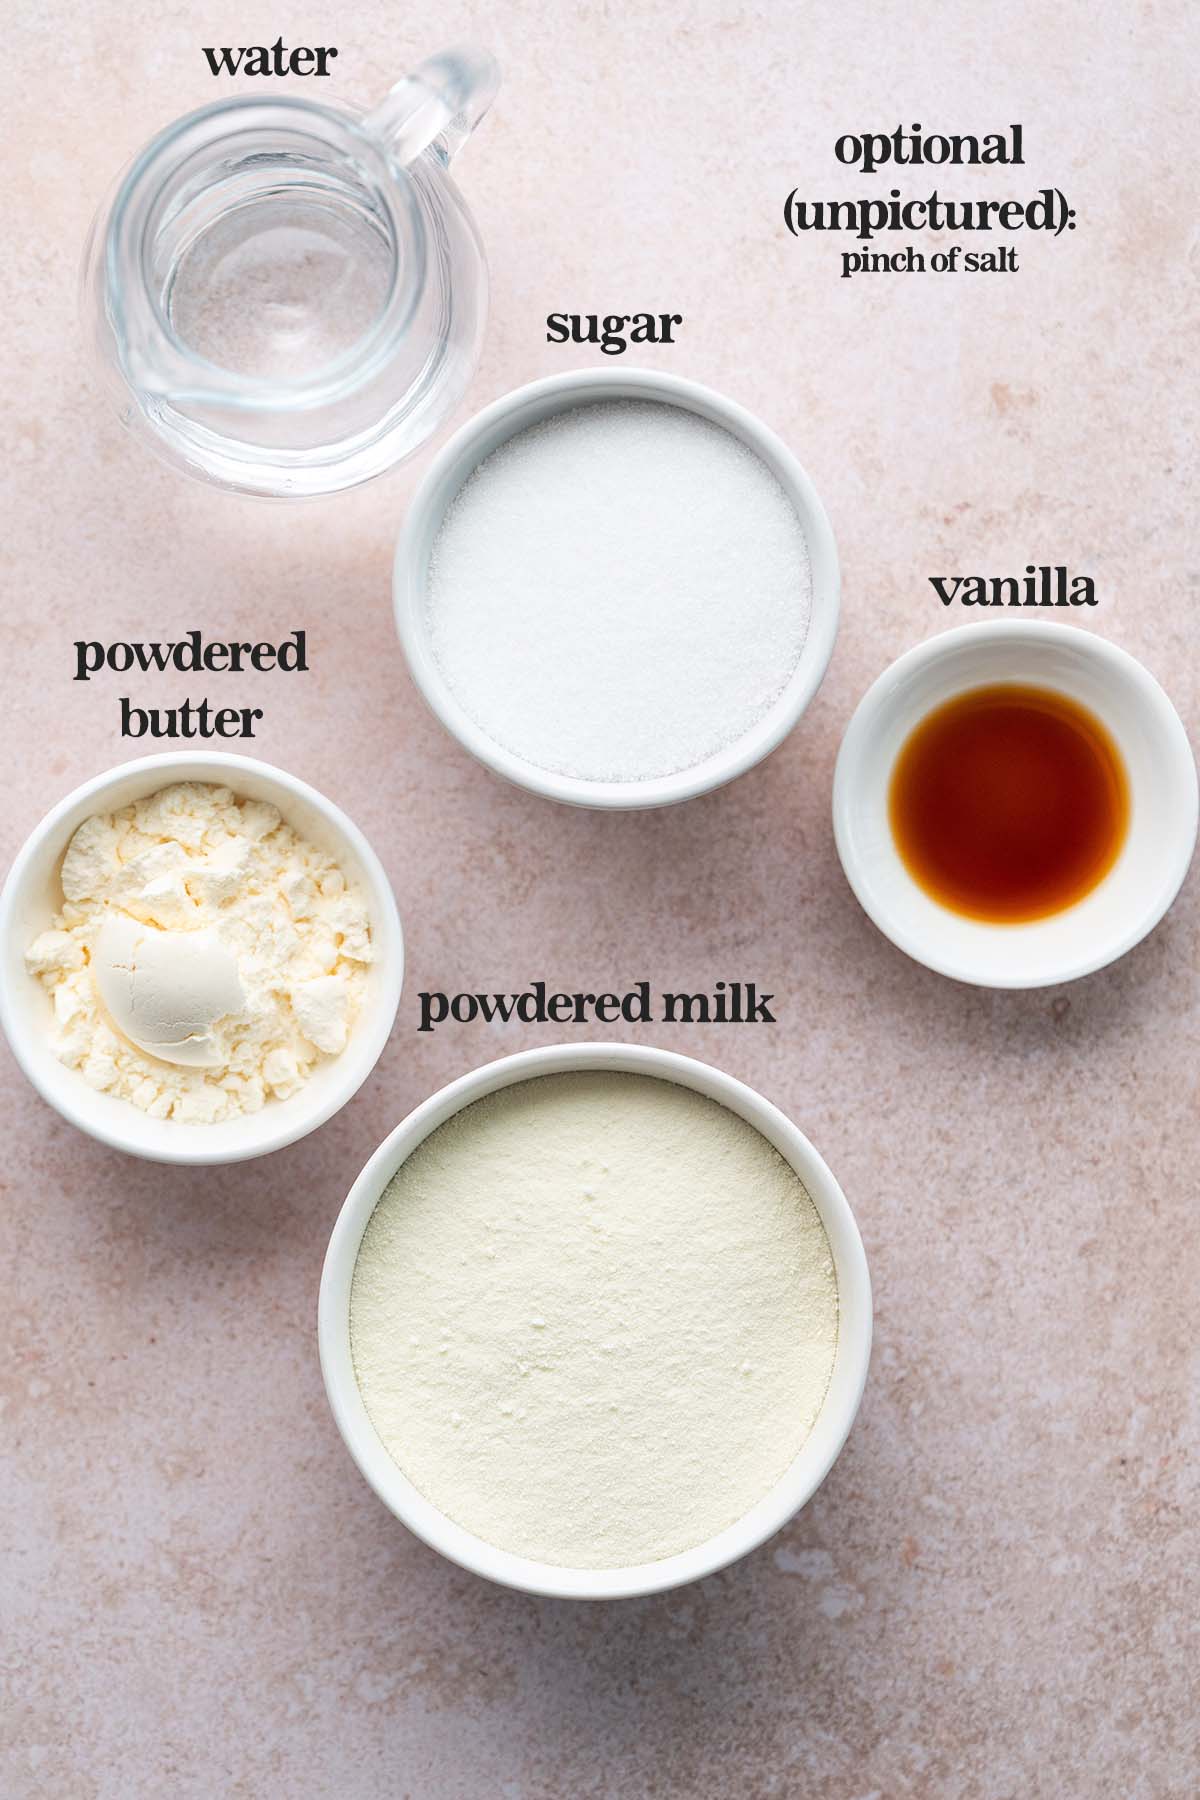
- Sugar – Use regular granulated white sugar here.
- Powdered milk – You’ll also see this referred to as milk powder. In this recipe, we use nonfat powdered milk + powdered butter. However, you can use powdered whole milk instead, and omit the butter powder.
- Powdered butter – If you don’t have this on hand, you can use 4 tablespoons of melted regular butter instead.
- Boiling water – The water temperature really does play an important role in this recipe turning out right. In order for the sugar and milk powder to fully dissolve, the water should be just off the boil.
- Vanilla extract – This is completely optional, but adds a lovely aroma and subtle flavor that really enhances our sweet, buttery condensed milk.
- Salt – This is also optional, but recommended! We only need a little pinch to elevate the flavor of this sweet condiment.
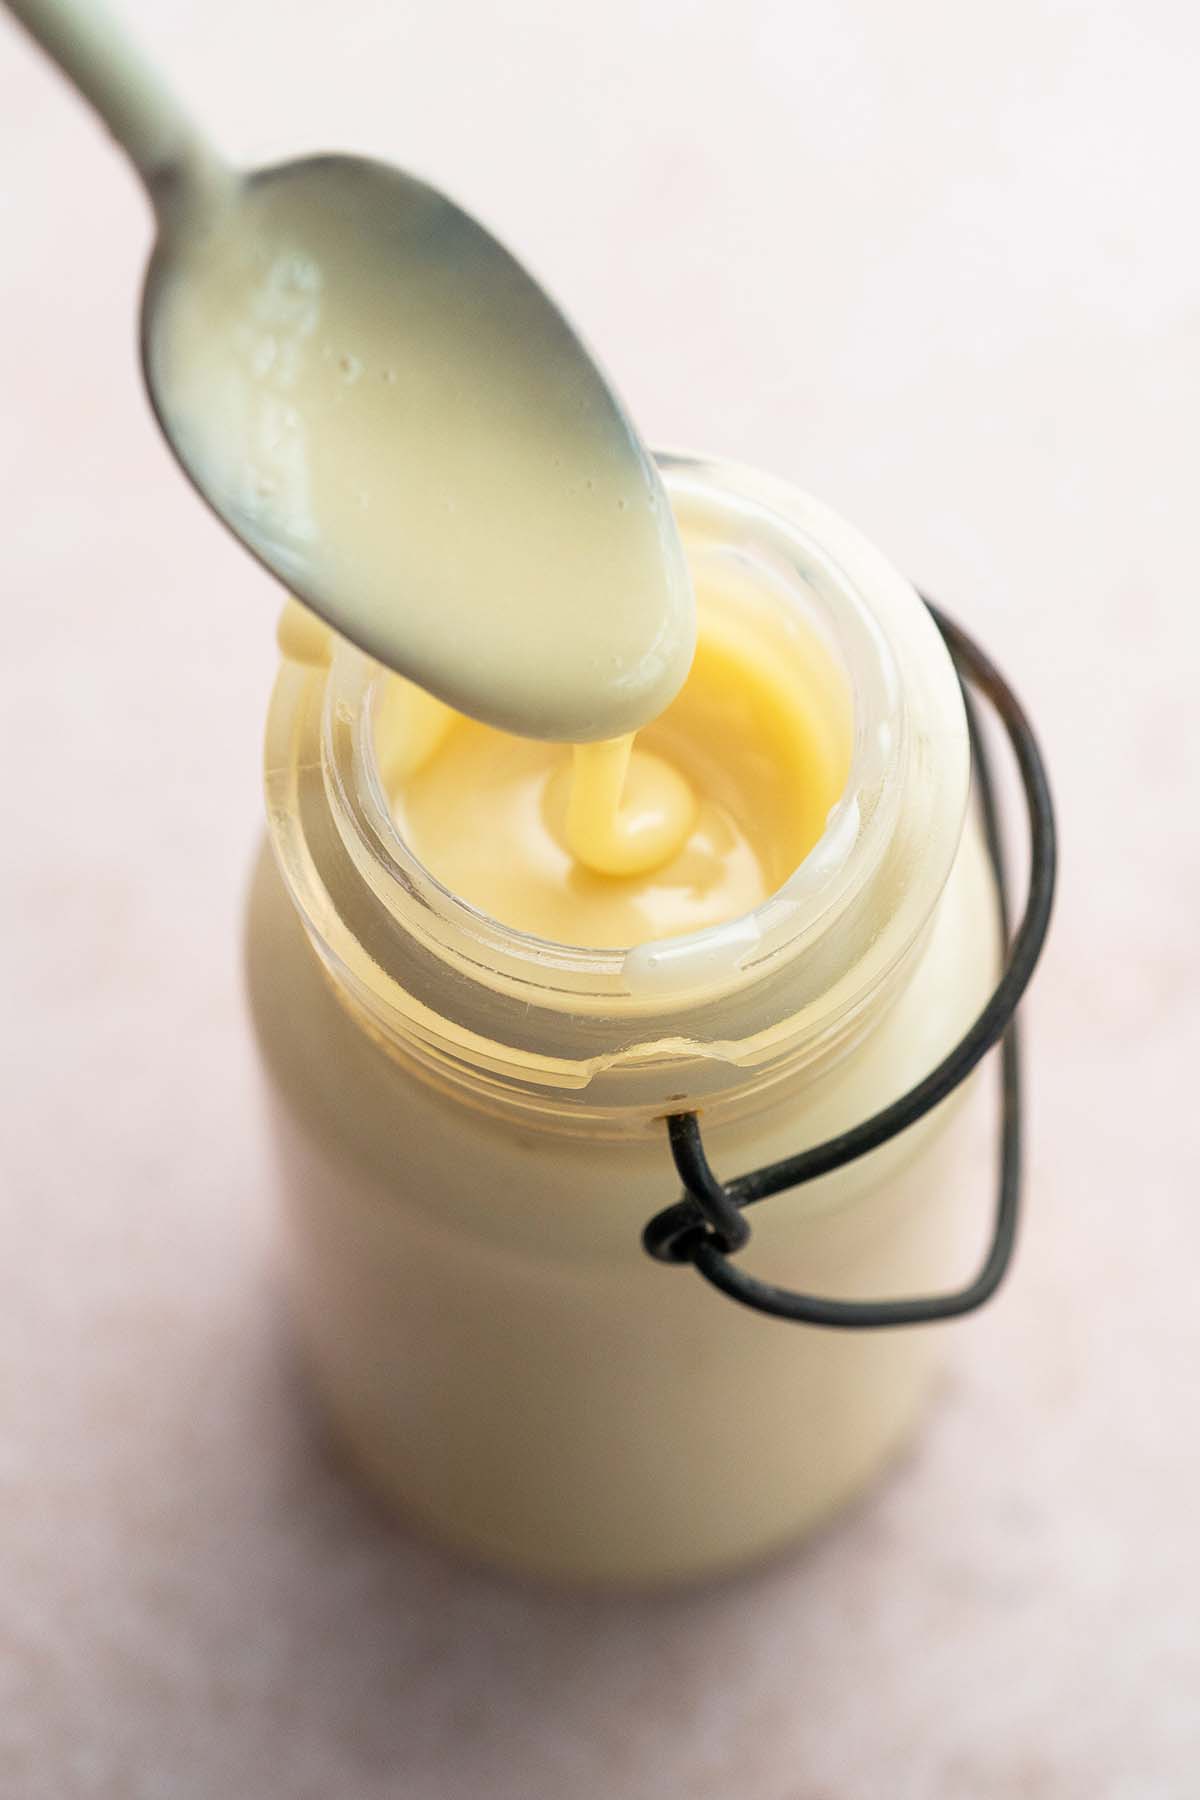
Pro Tip: It Thickens As It Cools!
This sweet sauce will thicken as it cools to room temperature, and even more as it chills in the fridge.
How to Make Sweetened Condensed Milk
- Add all ingredients to a blender.
- Process on high until it’s well-mixed and starts to thicken, about 3 to 4 minutes, stopping to scrape down the sides as necessary. (Don’t go longer than that; it will thicken more as it cools.)
Storage
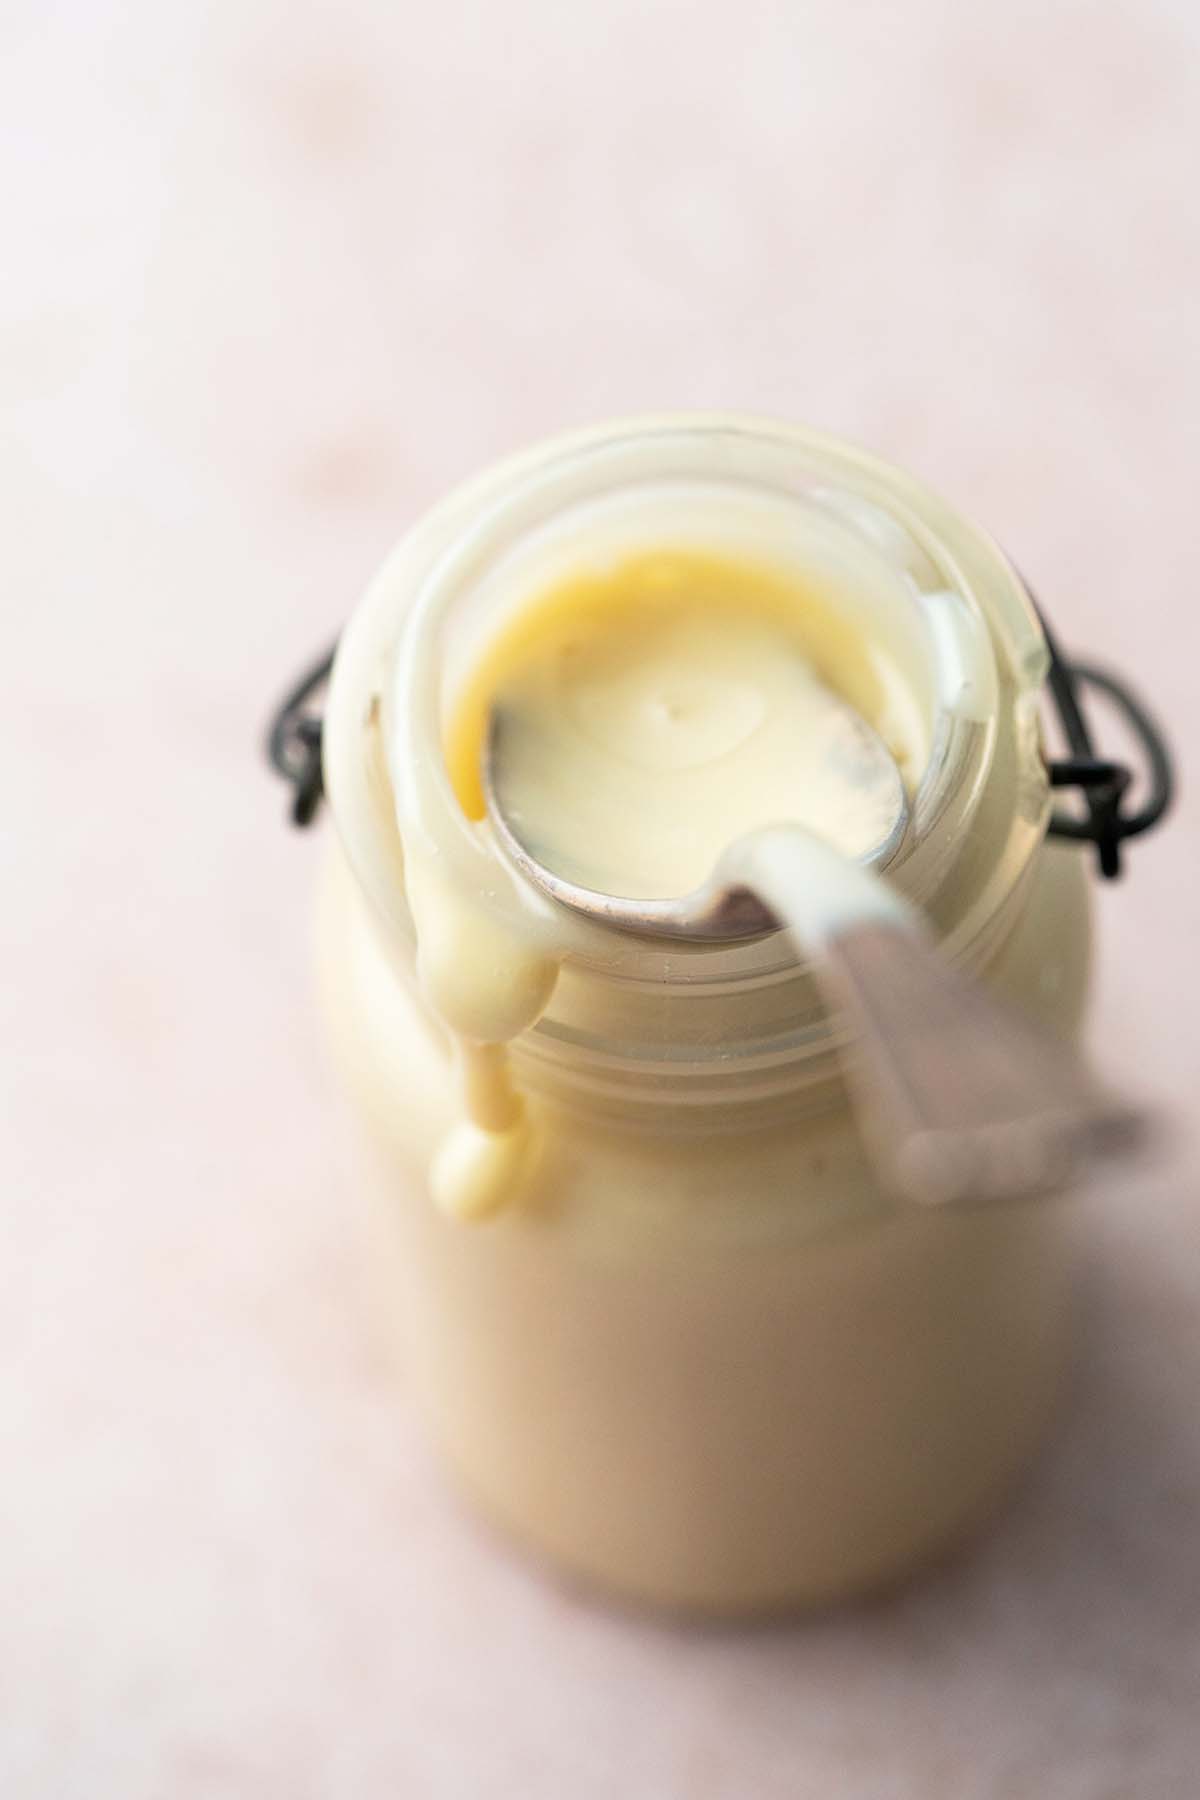
Let the sweetened condensed milk cool to room temperature, then transfer it to a clean glass jar with a lid. Cover it and store refrigerated for up to 1 month.
Recipe Tips
- Don’t be tempted to alter the amounts. When this is done blending it will still be a bit on the thin side; however, it will thicken significantly as it cools.
- You don’t need a high-speed blender to make this! This recipe will work fine in a regular blender, but pay attention. If it feels like your blender is starting to get too hot, turn it off and let the motor rest and cool down for a bit before finishing blending.
- Although you can make this recipe with only shelf-stable pantry items, you can swap out the powdered butter if you don’t have it. Simply use the same amount of regular butter (melted) instead.
- It’s completely optional, but I like to add a pinch of salt. I find that it helps round out the flavor perfectly.
How to Make Sweetened Condensed Milk From Evaporated Milk
Consider this scenario: you’re in the middle of a recipe that calls for a can of condensed milk. You scan your pantry, thinking you have a can tucked in the back somewhere, only to realize that you don’t have it on hand. (Friends, we’ve all been there! Lesson learned. That’s why we read through the whole recipe and check ingredients before starting.)
But don’t run to the grocery store just yet. You might have something on hand that you can use as a condensed milk substitute, even if you don’t have milk powder. Take a peek in your pantry to see if you have evaporated milk!
Time needed: 10 minutes
If you have a can of evaporated milk on hand, it’s quick and easy to turn it into condensed milk.
- Gather Ingredients
You’ll need: 1 (12-ounce) can evaporated milk, 1 1/2 cups granulated white sugar, and optionally, 1 teaspoon vanilla extract.
- Boil
Whisk together the milk and sugar in a medium saucepan over medium heat. Bring to a boil, stirring constantly to dissolve the sugar, and then remove from the heat. Stir in the vanilla.
- Cool
The mixture will thicken as it cools. Let it cool to room temperature, and then use it or store it in a glass jar in the fridge for up to 1 month.

Frequently Asked Questions
No. Both are shelf-stable milk-based products, but condensed milk is very sweet and evaporated milk is unsweetened. Additionally, condensed milk is much thicker than evaporated milk.
Powdered milk on its own isn’t usually a good substitute for condensed milk. For starters, one is a liquid and the other is a dry ingredient. Also, they have different sweetness levels. But all is not lost!
If you have milk powder on hand, you can easily make it into sweetened condensed milk with this 5 minute recipe!
You found it; this recipe is a perfect substitute for a can of condensed milk! I developed this recipe with the same quantity in mind. Whip it up, and use it in any recipe that calls for a 14-ounce can of sweetened condensed milk.
More Sweet Condiment Recipes
- Butterscotch Sauce – An no-fail recipe that you’ll want to put on everything, from ice cream to oatmeal to pancakes!
- Vanilla Mango Preserves – Vanilla and mango are a perfect pairing in this tropical fruit jam.

Let’s Connect

Did you make this recipe? Please rate it and leave a comment below. You can also tag @anediblemosaic on social media.
To stay up-to-date, follow me on Facebook, Instagram, Pinterest, and Twitter!

Easy Sweetened Condensed Milk Recipe
Email This Recipe
Get this recipe link emailed straight to your inbox!
Equipment
Ingredients
- 3/4 cup granulated white sugar
- 1 1/4 cups nonfat powdered milk
- 4 tablespoons butter powder (see Notes)
- 1/2 cup boiling water
- 1 teaspoon pure vanilla extract optional
- 1 pinch salt optional
Instructions
- Add all ingredients to a blender and process on high until it’s well-mixed and starts to thicken, about 3 to 4 minutes, stopping to scrape down the sides as necessary. (Don’t go longer than that; it will thicken more as it cools.)
- Store in a glass jar in the fridge for up to 1 month and use it any way you’d use regular sweetened condensed milk.
Notes
- Recipe Yield and Serving Size: This recipe makes about 1 1/4 cups of sweetened condensed milk, which is 20 (1-tablespoon) servings.
- Blender: You don’t need a high-speed blender to make this! This recipe will work fine in a regular blender, but pay attention. If it feels like your blender is starting to get too hot, turn it off and let the motor rest and cool down for a bit before finishing blending.
- Butter Powder: Although you can make this recipe with only shelf-stable pantry items, you can swap out the powdered butter if you don’t have it. Simply use the same amount of regular butter (melted) instead.
- Salt: It’s completely optional, but I like to add a pinch of salt. I find that it helps round out the flavor perfectly.
- This Thickens as it Cools: Don’t be tempted to alter the amounts. When this is done blending it will still be a bit on the thin side; however, it will thicken significantly as it cools.
Nutrition
Nutritional information is automatically calculated and should be used as an approximate.
Share it with me on Instagram and leave a comment to let me know your thoughts!


I’m the writer, recipe developer, photographer, and food stylist behind this blog. I love finding the human connection through something we all do every day: eat! Food is a common ground that we can all relate to, and our tables tell a story. It’s my goal to inspire you to get in the kitchen, try something new, and find a favorite you didn’t know you had.
Free Bonus


Faith, thank you! I’m very grateful for this recipe!