


This post may contain affiliate links, view our disclosure.
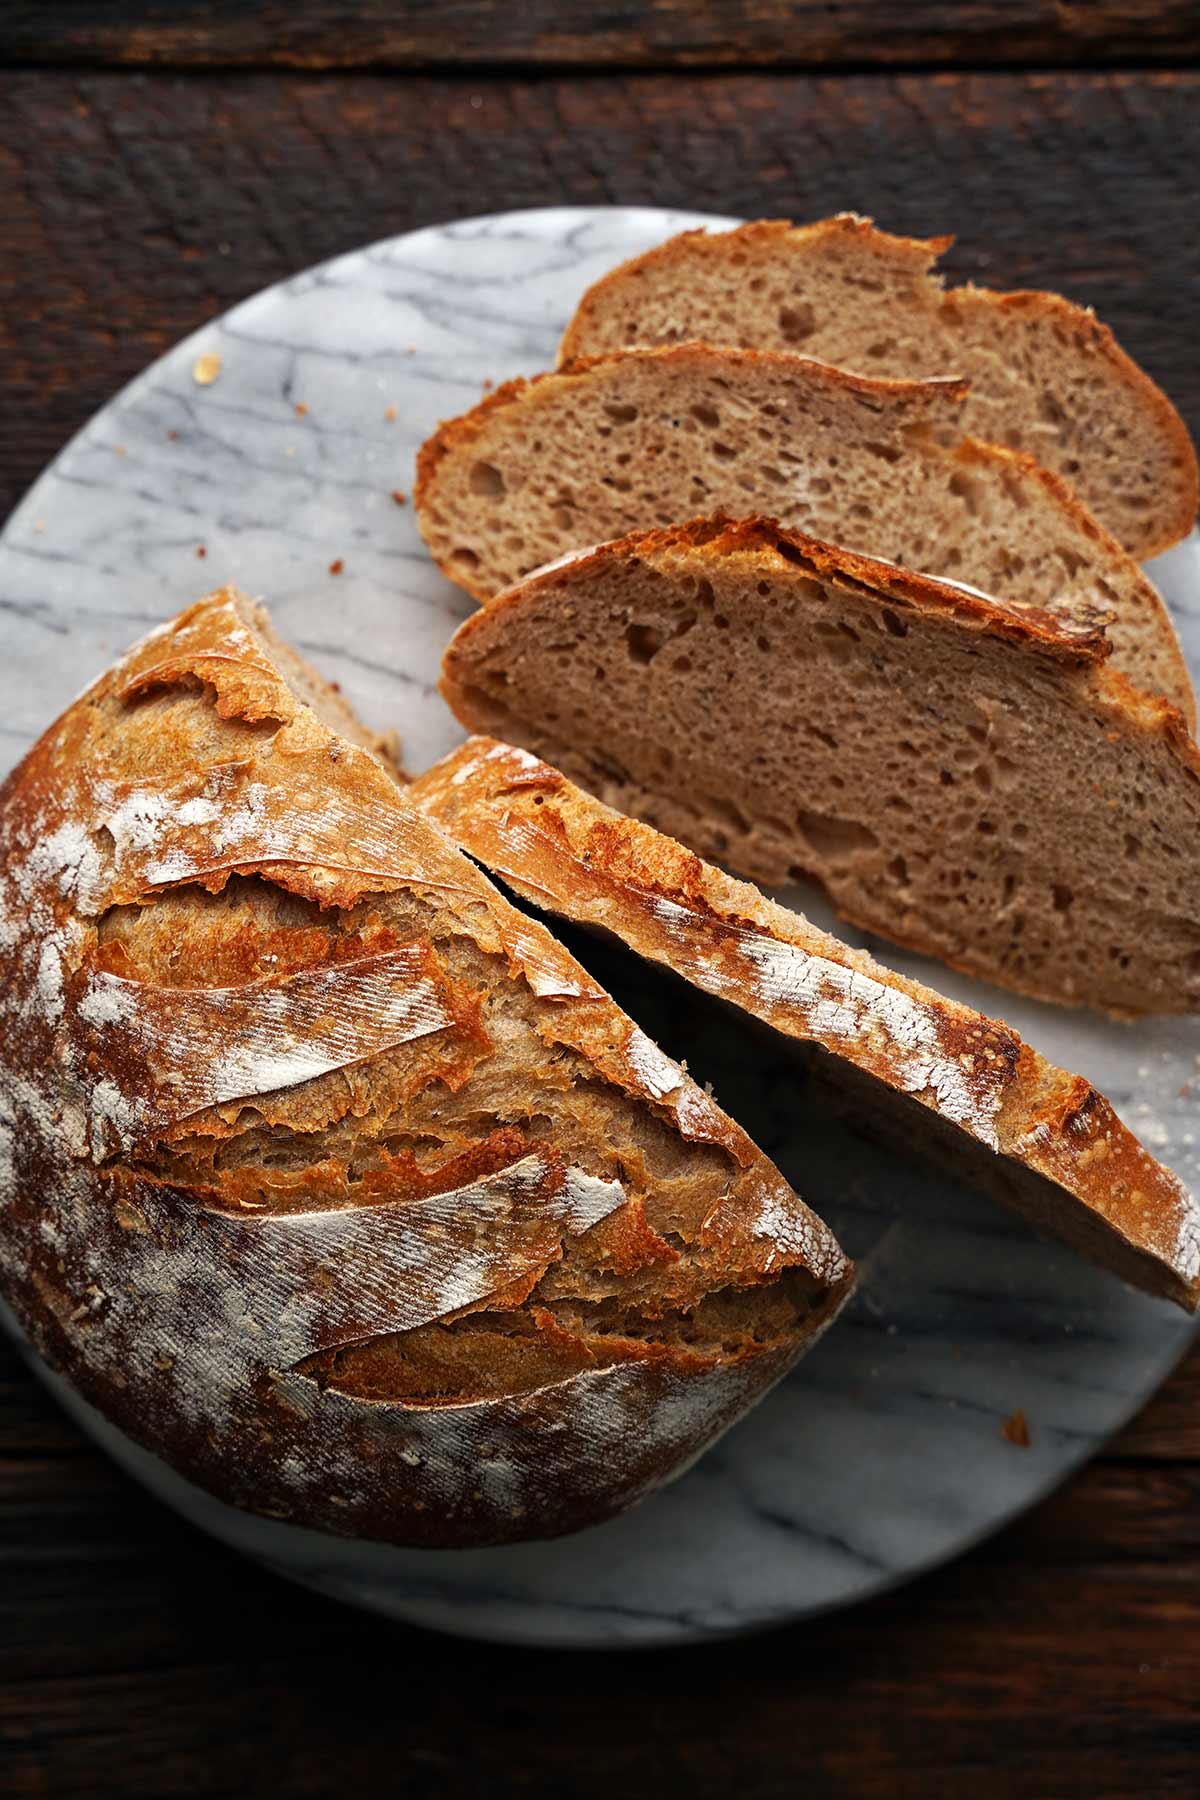
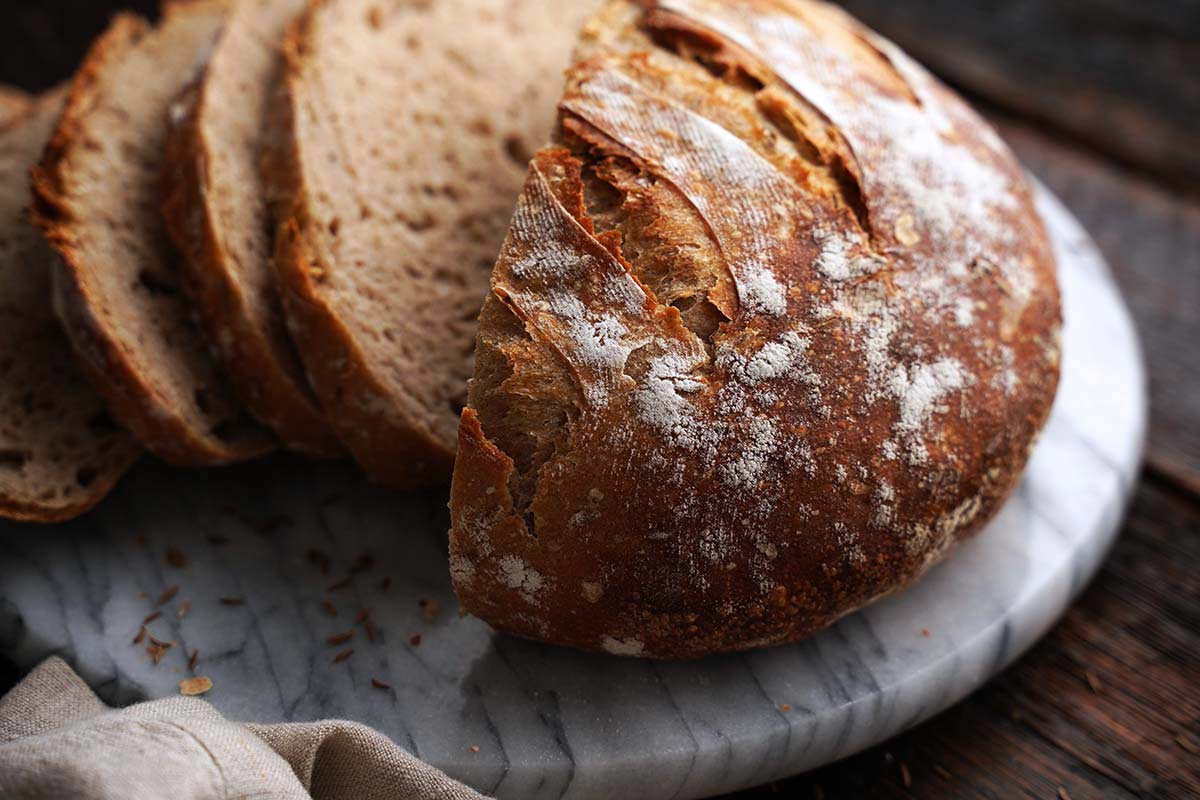
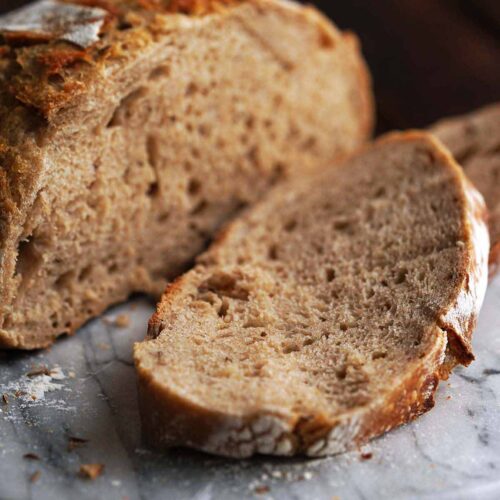
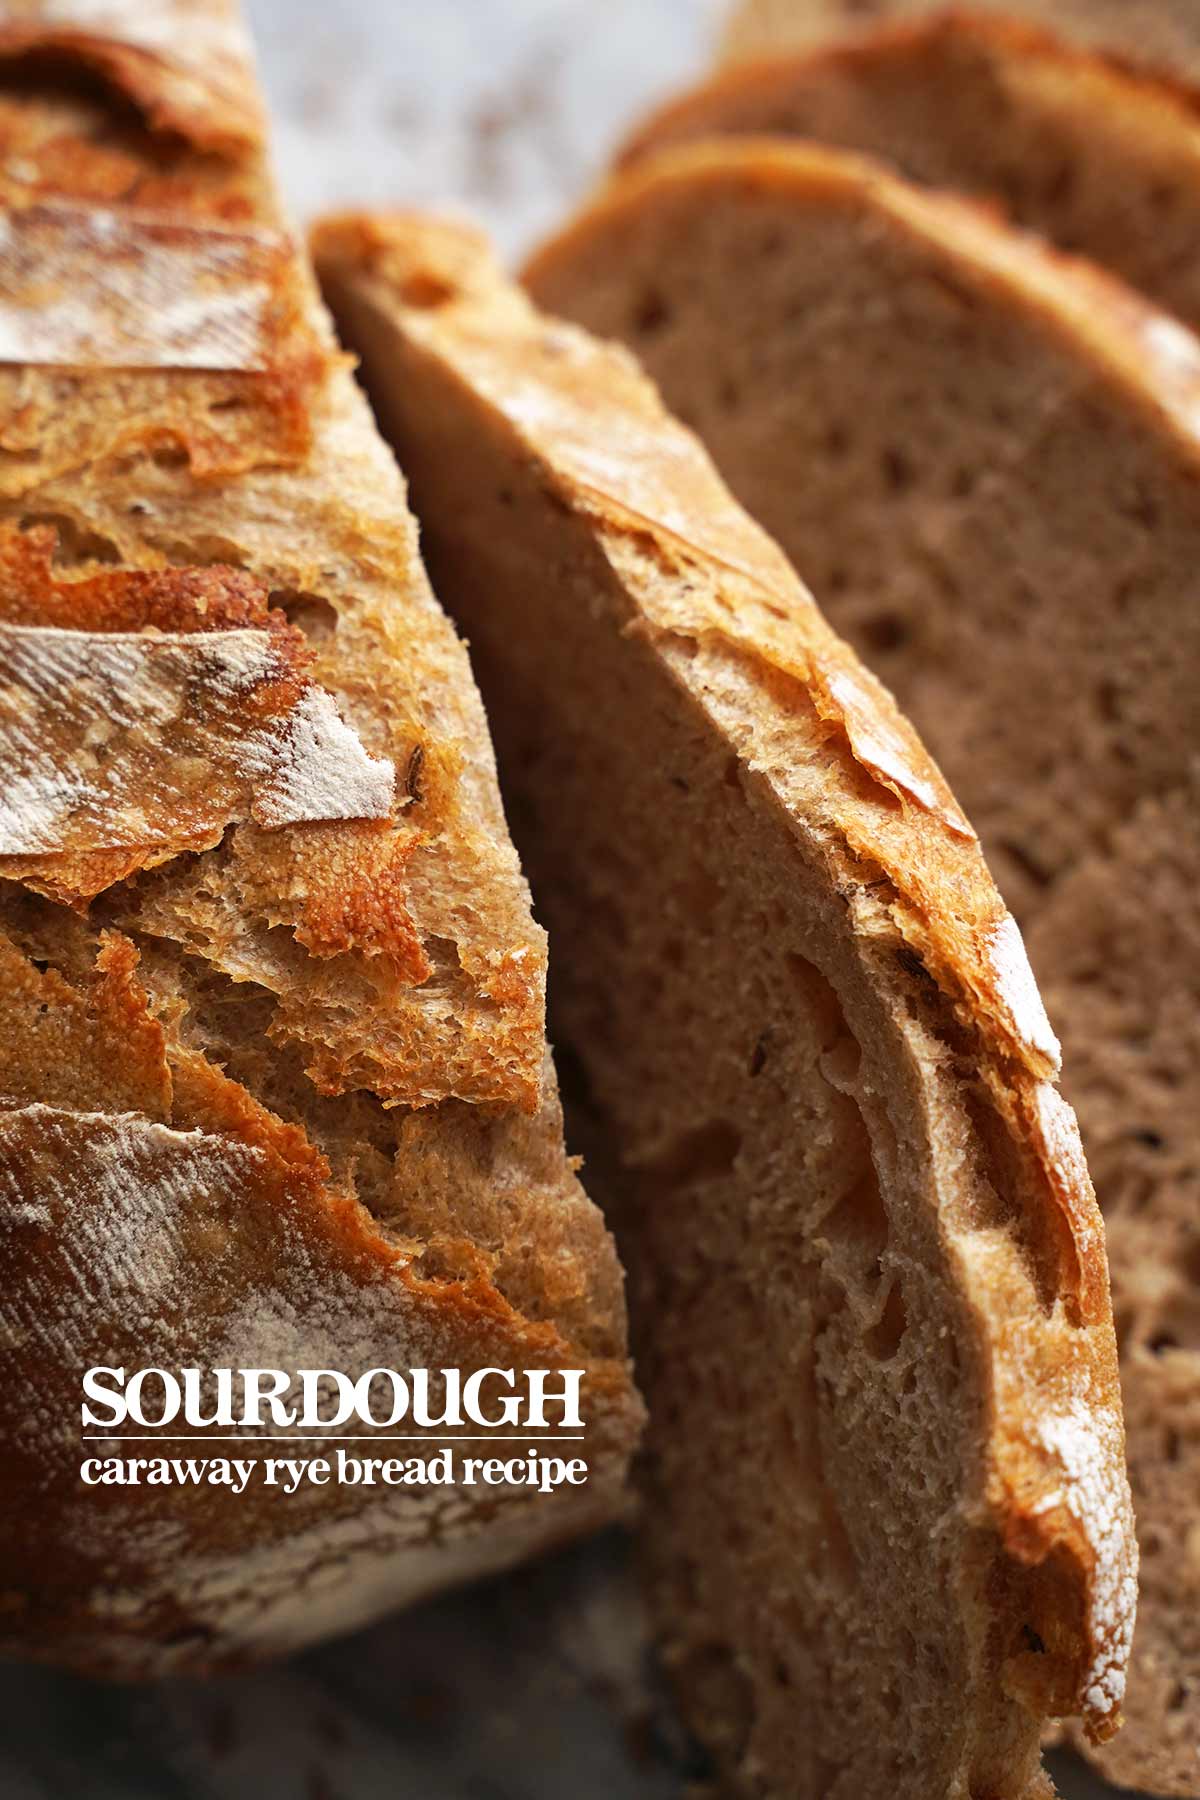
With a combination of wheat and rye flours, this sourdough caraway rye bread recipe is fluffy and chewy inside and crispy and golden outside. It’s a lovely soft light rye loaf, perfect for slicing and making into sandwiches!

Since the time I made my sourdough starter in summer 2024, perfecting rye bread has been a goal of mine. You know the kind of light rye bread I’m taking about: soft and chewy crumb with a crisp, golden crust studded with caraway seeds like what you’d get at a Jewish deli in New York City. When my starter was ready for baking, I baked three loaves: a regular sourdough loaf, sourdough honey oat bread, and sourdough seeded rye. That first rye loaf I baked was far from perfect, but it was my favorite out of the three.
Since then I’ve tweaked and tested this recipe using different wheat:rye flour ratios and hydration levels, and after much trial and error, I have it where I want it. This loaf is light, fluffy, and chewy on the inside and crisp outside. Perfect on its own or with a smear of salted butter. Of course you can make killer Reuben sandwiches with it, but my favorite use for it is a simple maple-glazed turkey and Swiss cheese sandwich with mayo with a side of dill pickles.
(Side Note: If you’re interested in reading more about my sourdough journey, take a peek at my About page on my sourdough blog, Sourdough Diaries. Over there I also give a ton of information on sourdough baking for beginners! Additionally, I talk about sourdough equipment (what’s necessary vs. what’s useful but you can do without), and answer a ton of sourdough starter frequently asked questions.)

Baker’s Percentages For This Recipe
Let’s start with the question that’s probably in your head: what in the world is a baker’s percentage? Also sometimes called “baker’s math”, this is a method of standardization that expresses all ingredients as a percentage of the total weight of flour to help with consistency. You may have heard of the term “high hydration dough” or “low hydration dough”. Both of these terms come into play once the baker’s percentages for a particular recipe are calculated.
To calculate baker’s percentages, it’s important to know that we work in weight (typically grams), not volume. To start, add the total weight in grams of all types of flour in the recipe. (We are essentially setting up a ratio with the total weight of flour equal to 100%.) Then to calculate the percentage for each of the other ingredient, divide that ingredient’s weight in grams by the flour’s weight in grams and multiply that number by 100.
Let’s simplify with an example. To calculate the baker’s percentages for this recipe:
- Find the total combined weight of flours. Here we use 350 grams bread flour and 150 grams rye flour, so the total weight is 500 grams.
- Sourdough starter percentage. 125 grams sourdough starter divided by 500 grams flour equals 0.25, which we multiply by 100 to get the percentage, which equals 25%. To write it more succinctly, (125/500)X100 = 25%.
- Water percentage (aka hydration). (380 grams water/500 grams flour)X100 = 76%
- Salt percentage. (12 grams salt/500 grams water)X100 = 2.4%
What is High Hydration Sourdough?
In general:
- 60-70% hydration doughs are considered low hydration.
- 70-75% hydration doughs are moderate hydration.
- 76% and greater hydration doughs are high hydration.
High hydration sourdough bread is typically characterized by an open, airy crumb and a thin, crispy crust.
However, hydration levels aren’t set in stone, mainly due to the variation in how different types of flour absorb liquid. For example, the rye flour in this recipe is “thirstier” than the wheat flour, so we need to use more water to account for that. On paper, it’s a 76% hydration dough, but it doesn’t necessarily behave like a high hydration dough. It’s a lot less sticky than a 76% hydration dough that’s made with only wheat flour. I like to think of this as the point where the art (and finesse) of sourdough meets the science of baking.
Can I Make Sourdough Rye Bread with 100 Percent Rye Flour?
Yes! However, you’ll need a different recipe than this one. Bread made with 100 percent rye flour tends to be denser and moister (in a sticky, gummy way) due to rye’s low gluten content relative to wheat’s gluten content. I developed this recipe using a combination of 350 grams of bread flour and 150 grams of rye flour to get the fluffy, chewy-inside, crispy-outside texture of deli style caraway seed light rye bread.
Ingredients
Breaking It Down
Ingredients Explained
In this section I explain the ingredients and give substitution ideas where applicable. For the full recipe (including the ingredient amounts), see the recipe card below.
Ingredients To Feed Your Starter
- 100% hydration ripe sourdough starter – “Ripe” in the context of a sourdough starter means that it’s ready to bake with; it should consistently double in size within 4 to 12 hours after feeding at room temperature. Note that if you’re just making your starter, it can take 7 to 10 days (or longer) for it to ripen to the point of being ready to bake with.
- Unbleached all-purpose flour – Organic if possible.
- Non-chlorinated water – I use room temperature bottled water.
Ingredients For The Dough
- 100% hydration fed, bubbly sourdough starter – Feed your starter and give it time to peak before making the dough.
- Non-chlorinated water – I use room temperature bottled water.
- Fine sea salt – My go-to is Redmond Real Salt.
- Unbleached bread flour – Organic if possible.
- Medium rye flour – Organic if possible.
- Caraway seeds – You can omit the caraway seeds if you don’t want a seeded rye.
Do I Need to Autolyse Sourdough?
No, neither autolyse (when you mix flour and water, let it rest, and then mix in starter and salt) nor fermentolyse (when you mix flour, water, and starter, let it rest, and then mix in salt) are absolutely necessary. These techniques are methods used to “jump start” fermentation and improve gluten development. Follow the instructions for the specific recipe you’re using (note that here we do not autolyse or fermentolyse).

Step-by-Step Instructions
For step-by-step photos of the process as well as a video showing how to make sourdough bread, please check out my sourdough sandwich bread recipe on Sourdough Diaries.
Step 1: Feed Your Starter (4 to 12 hours wait time)
Feed your starter so that it’s at peak when you’re planning to make the dough. Around 4 to 12 hours before you want to make the dough is the general timeframe, but you know how long it takes your starter to reach peak after a feeding, so go with that.
Step 2: Make the Dough (30 minutes wait time)
Add the active starter, water, and salt to a large container (TIP: use a glass or clear container so you can see through the sides and bottom), and whisk to combine. Add the bread flour and rye flour, and stir to form a shaggy dough (don’t knead it). Cover the container and let it sit at room temperature for 30 minutes.
Step 3: Stretch and Folds (90 minutes wait time)
Wet your hands and perform your first set of stretch and folds. To do so, grab a piece of dough, gently stretch it up, fold it over, and then rotate the bowl 1/4 turn. Repeat this process 3 more times until you come to the point where you started. Cover the bowl and let the dough rest at room temperature for 30 minutes. Sprinkle the caraway seeds on top so they get incorporated into the dough during your next set of stretch and folds.
After 30 minutes, repeat the stretch and fold process. Cover the bowl and let the dough rest at room temperature for another 30 minutes. Repeat this process 2 more times, for a total of 4 sets of stretch and folds spaced 30 minutes apart.
Step 4: Bulk Fermentation (6 to 12 hours wait time)
Let the dough rest (covered) until bulk fermentation is over, about 6 to 12 hours at room temperature. Bulk fermentation is over when the dough looks puffed. (TIP: It doesn’t have to be fully doubled in size; it may be 75%. The top of the dough should be slightly domed and bubbly, and the bottom should look spongy.)
Step 5: Shape
Line a large bowl with a clean cotton tea towel, and sprinkle an even layer of flour across the towel.
Lightly spritz your countertop with a little non-chlorinated water and wet your hands (I prefer to roll out my dough with water instead of flour). Scrape your dough out onto the dampened countertop and roughly shape it into a rectangle about 13 to 14 inches long by 8 to 9 inches wide (it doesn’t have to be perfect and you aren’t rolling it out here). Gently press the dough with your fingertips to get rid of excess gas bubbles. Fold your dough in thirds like a letter, then starting with one end, roll up the dough into a log. To create surface tension, gently pull the dough towards you across the countertop a few times.
Place the dough (seam side up) into the prepared towel-lined bowl. Cover the bowl with plastic wrap.
Step 6: Proof (1 to 4 hours at room temperature or 12 to 24 hours in the fridge wait time)
Let the dough rest until it’s properly proofed, about 12 to 24 hours in the fridge or 1 to 4 hours at room temperature. (TIP: You’ll know it’s properly proofed when it looks puffed (it’ll be roughly doubled in size), and jiggles when you gently shake the bowl. Also, the poke test is helpful as a guideline; lightly flour your finger and the dough’s surface, and gently press your finger into the dough. If it springs back slowly (instead of springing back quickly or not at all), it’s ready to bake.)
Step 7: Preheat, Score, and Bake (1 hour wait time)
An hour before you want to bake, put a 5 to 6-quart Dutch oven with the lid on (or whatever vessel you use for baking sourdough) into the oven. Preheat the oven to 450F; once your oven reaches temperature, set a timer for 1 hour.
After preheating the oven for 1 hour, take your dough out of the fridge, invert it onto a parchment paper-lined plate, and score the top. Use the parchment paper to carefully lift the dough up and place it into the Dutch oven (with the parchment still underneath it). Put the lid on.
Bake for 35 minutes, then remove the lid and bake until done, about 15 to 25 minutes more. (TIP: The bread is done when it’s golden outside, sounds hollow when tapped on the bottom, and reaches an internal temperature of 205-210F.)
Step 8: Cool and Slice (about 6 hours wait time)
Transfer the bread to a wire rack and cool completely before slicing, at least 6 hours, but overnight is better.

Storage, Freezing, and Reheating Tips
- Storage: Once it’s cool, store this bread in a bread bag or wrapped in a kitchen towel for up to 3 days at room temperature, or in a zip-top plastic bag for up to 1 week in the fridge.
- Freezing: To freeze sourdough slices, let the loaf fully cool and then slice it. Arrange the slices in an even layer on a parchment paper-lined baking tray and freeze until solid. After that, pop the frozen slices into a freezer-safe bag for up to 3 months.
- Reheating: After freezing, for the best flavor and texture, I recommend toasting the slices right before eating. You can reheat frozen sliced sourdough bread in a 425F oven for about 10 to 15 minutes (no need to thaw it first!), flipping each slice once halfway through.
My Best Tips For Success With This Sourdough Rye Bread Recipe (Please Read Before Starting, I Want To Help You Succeed)
- You don’t have to use organic, but unbleached flours are important. This is because residual chemicals left from the bleaching process can harm wild yeast and the beneficial bacteria that’s necessary for sourdough fermentation.
- Along those lines, it’s also important to use non-chlorinated water. In my area, the water is frequently heavily treated with chlorine, so I use bottled water with great results.
- When I say room temperature, I mean somewhere in the range of 68F to 77F. I live in Florida and and keep the air conditioning at my house set to 74F the entire year (except January and February when the heat is on and the thermostat is set to 68F). If your kitchen is colder, you will likely have to increase fermentation times.
- Use the time ranges given as guidelines, not hard-and-fast rules. Even a difference as small as one degree in your kitchen’s ambient temperature can affect the rate of fermentation. A much more reliable method than time is to go by how the dough looks.

Frequently Asked Questions
No. Pumpernickel is a specific type of rye bread hailing from the Westphalia region of Germany. It’s denser in texture and darker in color, traditionally made with whole rye berries and baked for hours.
Yes, for this recipe we need to perform stretch and folds for gluten development. In some rye bread recipes (especially those using 100 percent rye flour), stretching and folding to develop gluten may not be necessary. However, in this New York deli style light rye bread, we use a combination of bread flour and rye flour and stretch and folds help us get the perfect chewy, fluffy crumb.
I use my regular 100% hydration sourdough starter (fed with unbleached all-purpose wheat flour) to make rye sourdough bread. It works beautifully! However, if you have a regular sourdough starter on hand, you can give it rye flour feedings for a few days before baking with it.
You don’t need to use rye starter to make a loaf of rye sourdough, but you can if you want! It will definitely intensify the rye flavor. To make rye levain as an offshoot of your regular starter, put some of your sourdough starter in a separate jar and feed it with rye flour for a few days.
More Sourdough Recipes to Try
- Sourdough Ciabatta Bread Rolls
- Pierogi Dough (Starter or Discard)
- Sourdough Detroit Style Pizza
- Sourdough Pasta (Starter or Discard)
Let’s Connect

Did you make this recipe? Please rate it and leave a comment below. You can also tag @anediblemosaic on social media.
To stay up-to-date, follow me on Facebook, Instagram, Pinterest, and Twitter!
Caraway Seed Sourdough Rye Bread Recipe
Email This Recipe
Get this recipe link emailed straight to your inbox!
Ingredients
To Feed Your Starter:
- 60 grams 100% hydration ripe sourdough starter
- 60 grams unbleached all-purpose flour
- 60 grams non-chlorinated water
Dough:
- 125 grams 100% hydration sourdough starter fed and bubbly (at room temperature)
- 380 grams non-chlorinated water I use bottled water (at room temperature)
- 12 grams fine sea salt
- 350 grams unbleached bread flour organic if possible
- 150 grams medium rye flour organic if possible
- 2 teaspoons caraway seeds
Instructions
Feed Your Starter (4 to 12 hours wait time)
- Feed your starter so that it’s at peak when you’re planning to make the dough. Around 4 to 12 hours before you want to make the dough is the general timeframe, but you know how long it takes your starter to reach peak after a feeding, so go with that.
Make the Dough (30 minutes wait time)
- Add the active starter, water, and salt to a large container (TIP: use a glass or clear container so you can see through the sides and bottom), and whisk to combine. Add the bread flour and rye flour, and stir to form a shaggy dough (don’t knead it).Cover the container and let it sit at room temperature for 30 minutes.
Stretch and Folds (90 minutes wait time)
- Wet your hands and perform your first set of stretch and folds. To do so, grab a piece of dough, gently stretch it up, fold it over, and then rotate the bowl 1/4 turn. Repeat this process 3 more times until you come to the point where you started. Cover the bowl and let the dough rest at room temperature for 30 minutes. Sprinkle the caraway seeds on top so they get incorporated into the dough during your next set of stretch and folds.After 30 minutes, repeat the stretch and fold process. Cover the bowl and let the dough rest at room temperature for another 30 minutes. Repeat this process 2 more times, for a total of 4 sets of stretch and folds spaced 30 minutes apart.
Bulk Fermentation (6 to 12 hours wait time)
- Let the dough rest (covered) until bulk fermentation is over, about 6 to 12 hours at room temperature. Bulk fermentation is over when the dough looks puffed. (TIP: It doesn’t have to be fully doubled in size; it may be 75%. The top of the dough should be slightly domed and bubbly, and the bottom should look spongy.)
Shape
- Line a large bowl with a clean cotton tea towel, and sprinkle an even layer of flour across the towel.Lightly spritz your countertop with a little non-chlorinated water and wet your hands (I prefer to roll out my dough with water instead of flour). Scrape your dough out onto the dampened countertop and roughly shape it into a rectangle about 13 to 14 inches long by 8 to 9 inches wide (it doesn’t have to be perfect and you aren’t rolling it out here). Gently press the dough with your fingertips to get rid of excess gas bubbles. Fold your dough in thirds like a letter, then starting with one end, roll up the dough into a log. To create surface tension, gently pull the dough towards you across the countertop a few times.Place the dough (seam side up) into the prepared towel-lined bowl. Cover the bowl with plastic wrap.
Proof (1 to 4 hours at room temperature or 12 to 24 hours in the fridge wait time)
- Let the dough rest until it’s properly proofed, about 12 to 24 hours in the fridge or 1 to 4 hours at room temperature. (TIP: You’ll know it’s properly proofed when it looks puffed (it’ll be roughly doubled in size), and jiggles when you gently shake the bowl. Also, the poke test is helpful as a guideline; lightly flour your finger and the dough’s surface, and gently press your finger into the dough. If it springs back slowly (instead of springing back quickly or not at all), it’s ready to bake.)
Preheat, Score, and Bake (1 hour wait time)
- An hour before you want to bake, put a 5 to 6-quart Dutch oven with the lid on (or whatever vessel you use for baking sourdough) into the oven. Preheat the oven to 450F; once your oven reaches temperature, set a timer for 1 hour.After preheating the oven for 1 hour, take your dough out of the fridge, invert it onto a parchment paper-lined plate, and score the top. Use the parchment paper to carefully lift the dough up and place it into the Dutch oven (with the parchment still underneath it). Put the lid on.Bake for 35 minutes, then remove the lid and bake until done, about 15 to 25 minutes more. (TIP: The bread is done when it’s golden outside, sounds hollow when tapped on the bottom, and reaches an internal temperature of 205-210F.)
Cool and Slice (about 6 hours wait time)
- Transfer the bread to a wire rack and cool completely before slicing, at least 6 hours, but overnight is better.
Notes
- Recipe Yield: This recipe makes 1 loaf of bread, or about 16 servings. The nutritional information was calculated based on it yielding 16 servings.
- Storage: Once it’s cool, store this bread at room temperature in a bread bag or wrapped in a kitchen towel for up to 3 days.
- Freezing: To freeze sourdough slices, let the loaf fully cool and then slice it. Arrange the slices in an even layer on a parchment paper-lined baking tray and freeze until solid. After that, pop the frozen slices into a freezer-safe bag for up to 3 months.
- Reheating: After freezing, for the best flavor and texture, I recommend toasting the slices right before eating. You can reheat frozen sliced sourdough bread in a 425F oven for about 10 to 15 minutes (no need to thaw it first!), flipping each slice once halfway through.
Nutrition
Nutritional information is automatically calculated and should be used as an approximate.
Share it with me on Instagram and leave a comment to let me know your thoughts!


I’m the writer, recipe developer, photographer, and food stylist behind this blog. I love finding the human connection through something we all do every day: eat! Food is a common ground that we can all relate to, and our tables tell a story. It’s my goal to inspire you to get in the kitchen, try something new, and find a favorite you didn’t know you had.
Free Bonus


Did you mean to say (Seam side down) or seam side up
Where you speak about shaping?
Bill, Thank you, you’re absolutely right, I meant to say seam side up! I fixed it in the recipe and post above.