


This post may contain affiliate links, view our disclosure.
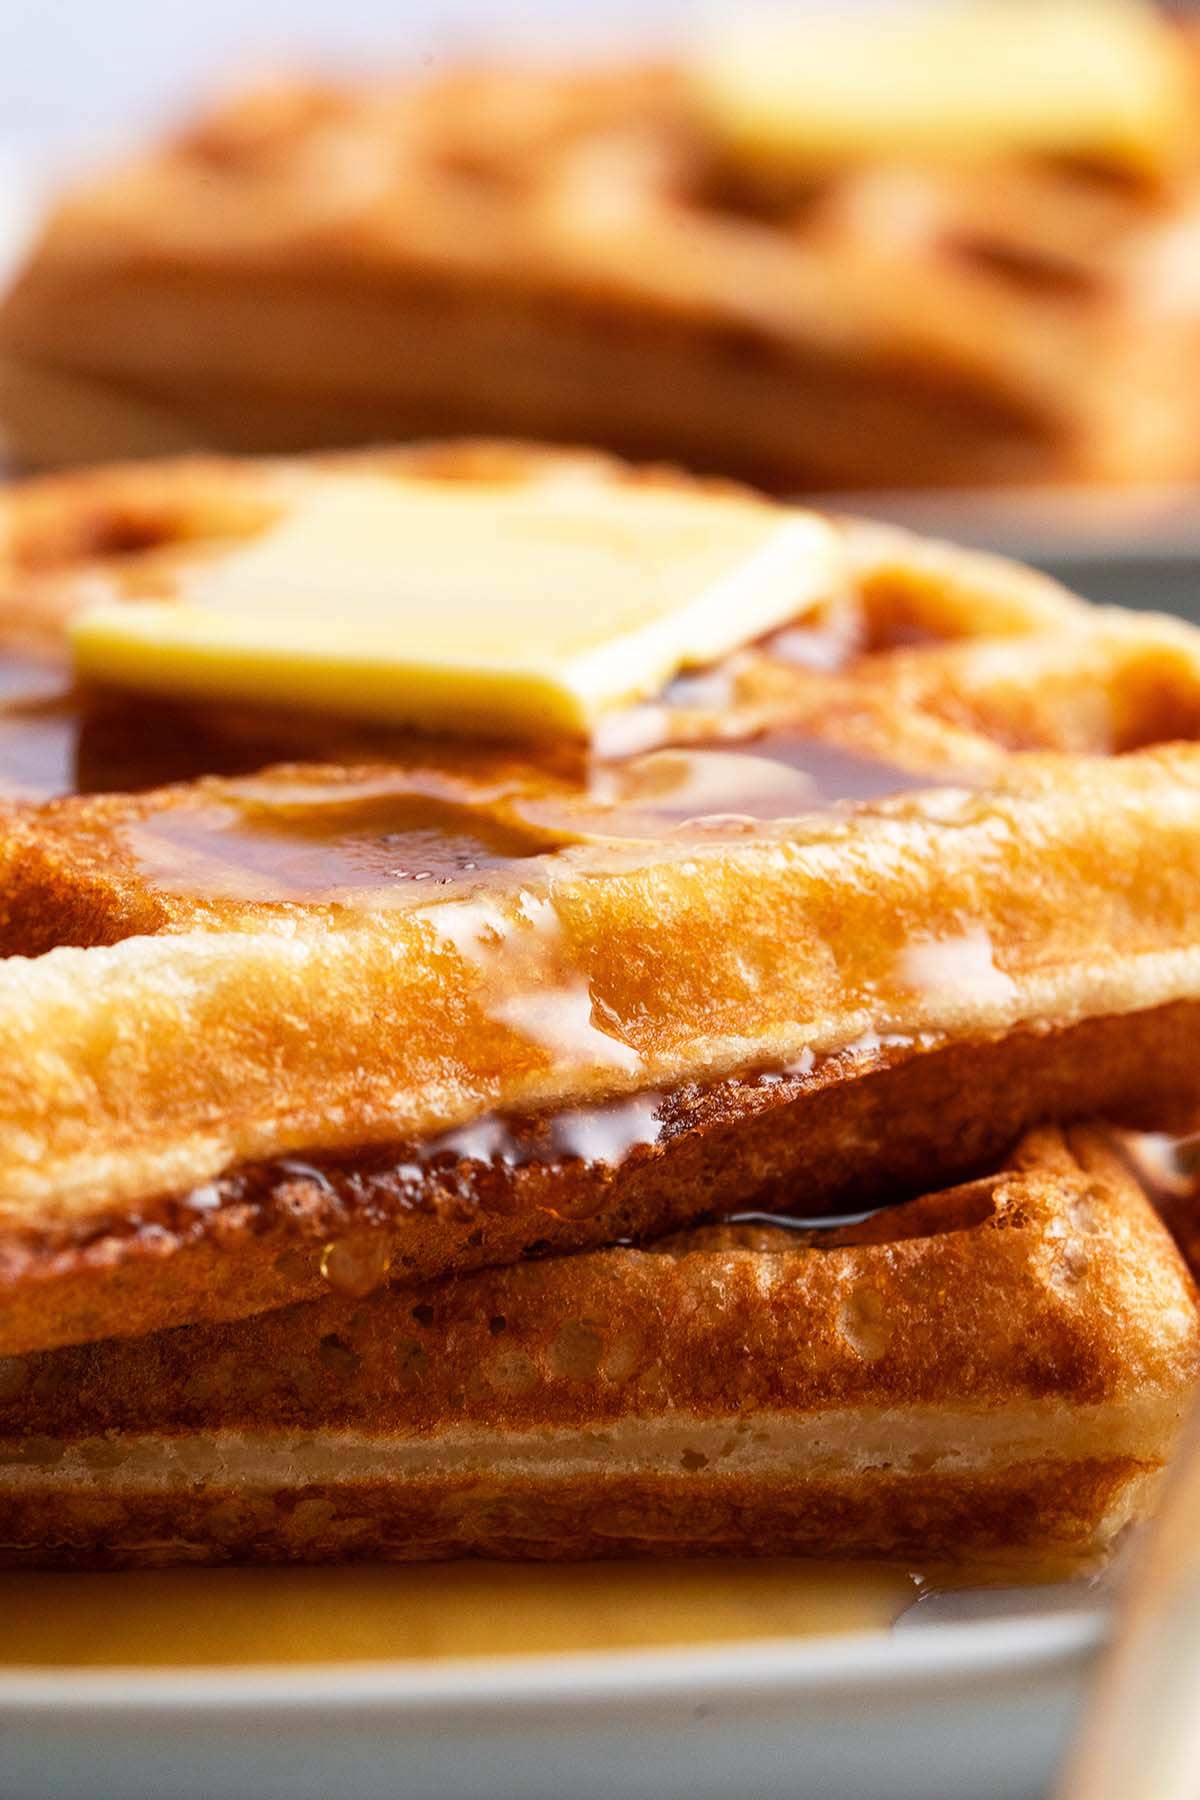
With no wait time required, this easy one bowl recipe for sourdough discard waffles is deliciously crispy outside, and light, fluffy, and chewy inside. These waffles are great for a special occasion brunch (everything from Mother’s Day to Christmas!), or weekday breakfast.
Are you a pancake or waffle person? Of course you can like both, but if you could only pick one for the rest of your life, which would it be? For me, it’s waffles all the way!
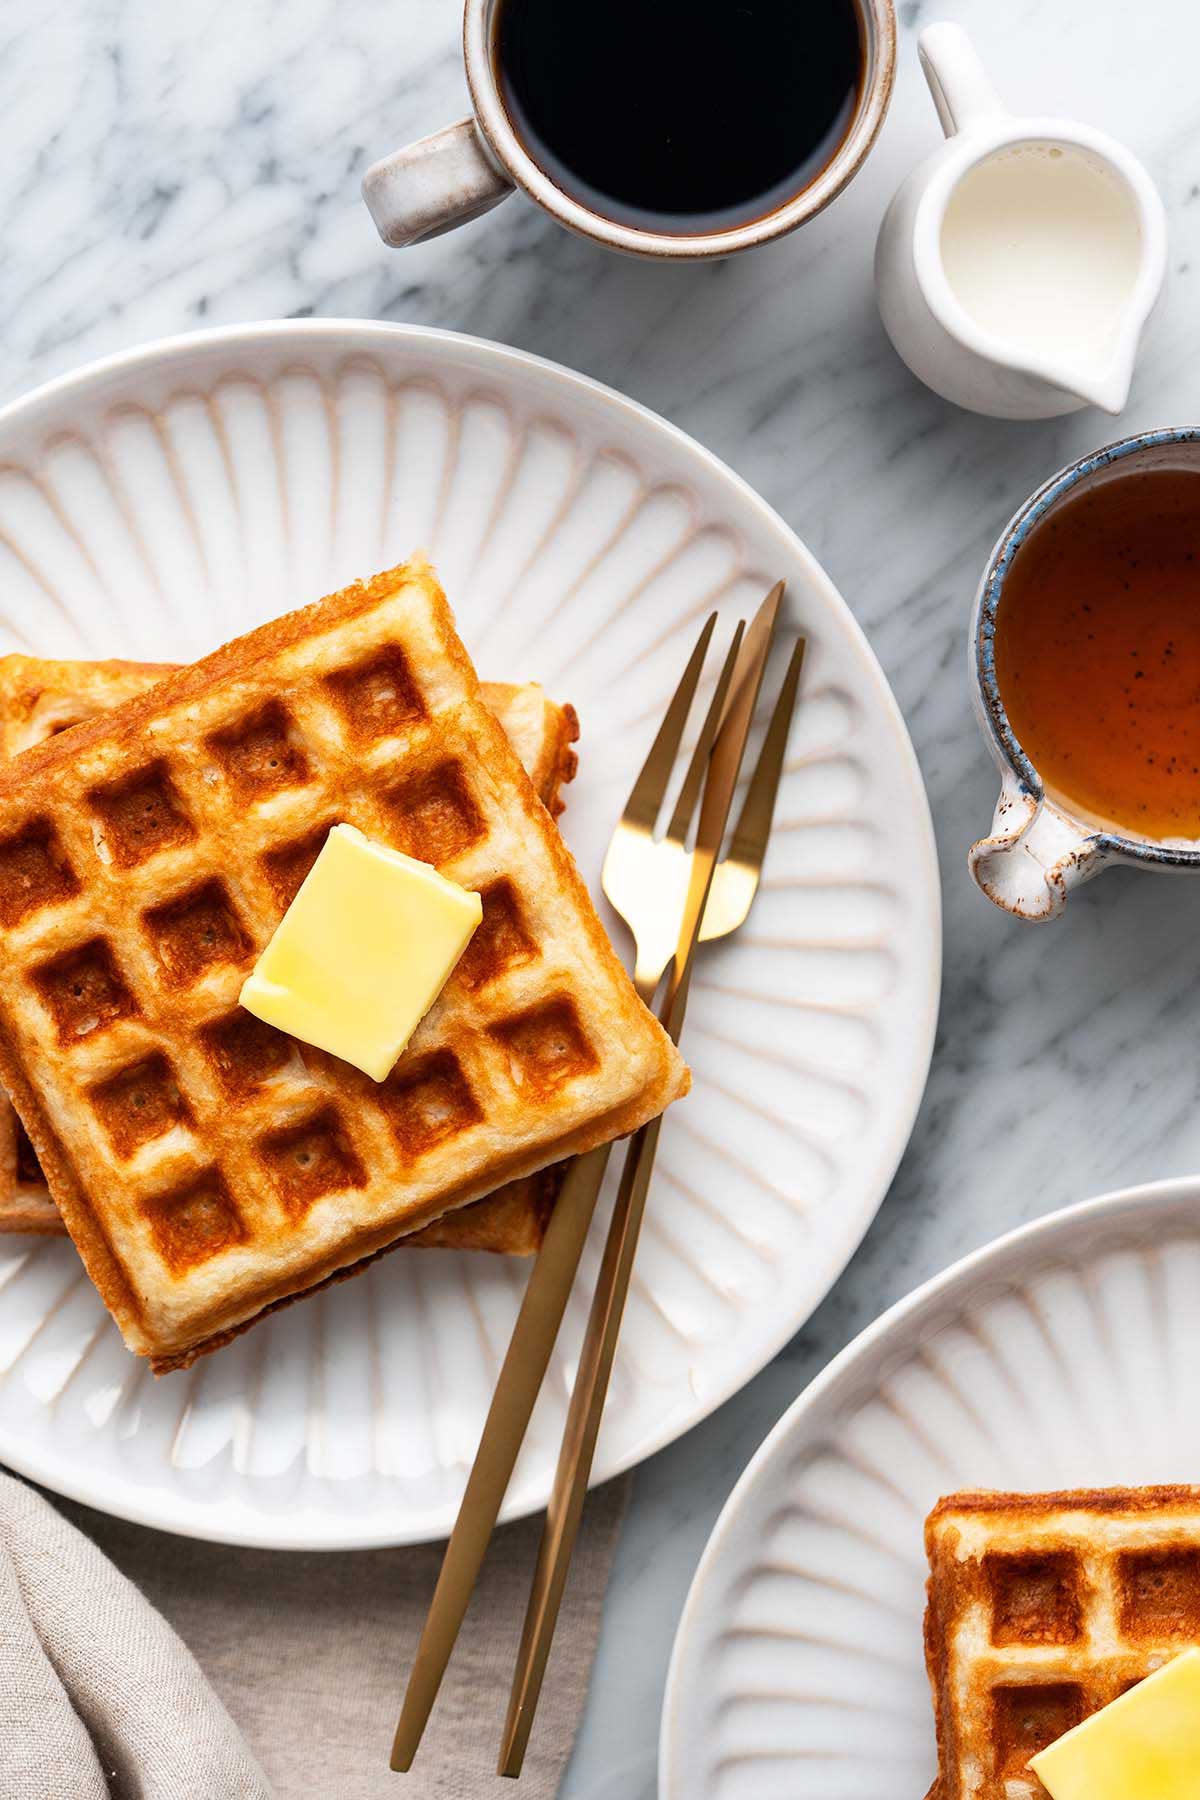
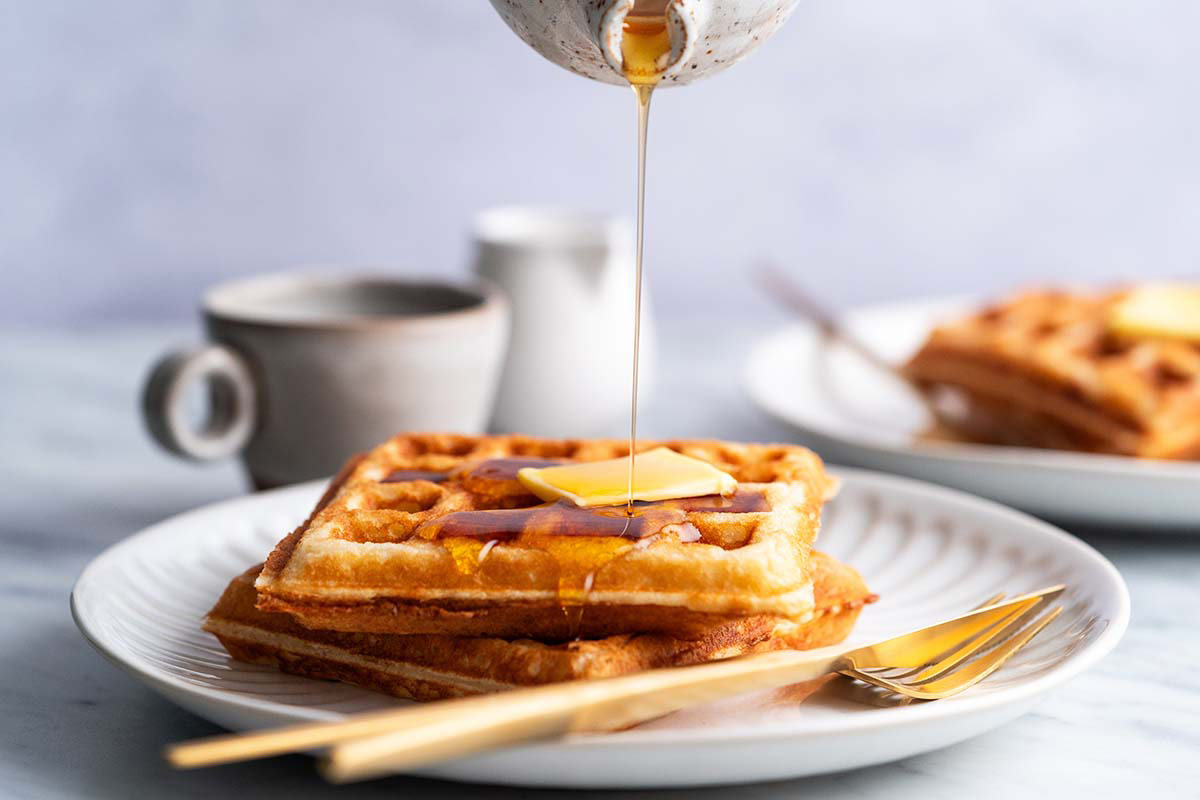
Their crispy exterior is unparalleled when you compare waffles to similar breakfast items, such as pancakes. And their fluffy interior provides a great textural contrast. Not to mention their ingenious grid pattern that not only maximizes surface area crispness, but also conveniently holds whatever syrupy toppings your heart desires. Perfection.
Also, you can go sweet or savory with your mix-ins and toppings. Serve these with fried chicken and maple syrup for a classic Southern dish. Make a waffle sandwich with fried egg and bacon. Or turn waffles into a decadent dessert with a scoop of your favorite ice cream (and maybe a drizzle of 10-minute butterscotch sauce).
Add sourdough discard into the mix and – were it possible – this blissful breakfast becomes even better! Sourdough adds a tanginess to balance the sweet richness. And it helps make waffles breadier and chewier inside and crispier outside. I’m telling you, if you keep sourdough starter on hand, this will be your new favorite waffle recipe.

Ingredients
Breaking It Down
Ingredients Explained
In this section I explain the ingredients and give substitution ideas where applicable. For the full recipe (including the ingredient amounts), see the recipe card below.
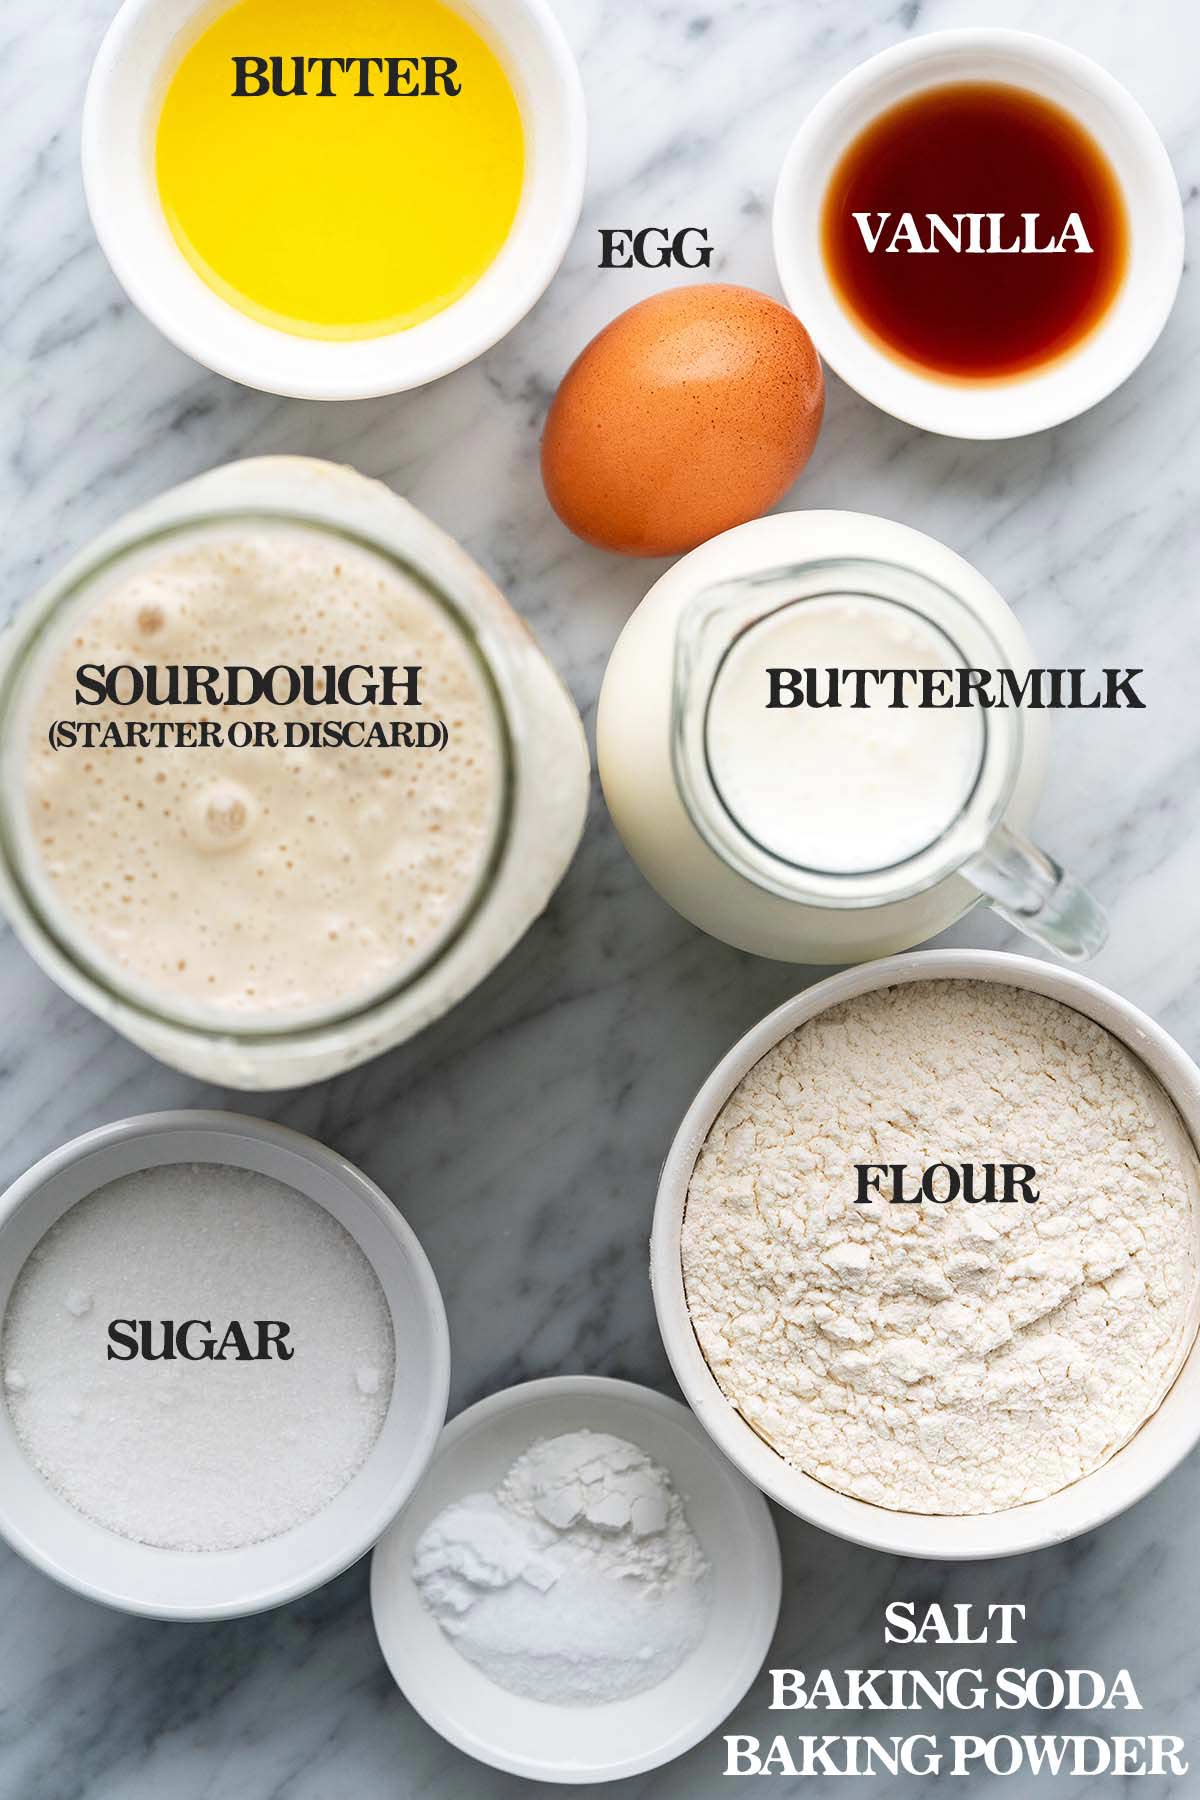
- Buttermilk – Use full-fat buttermilk (instead of reduced-fat) for the richest flavor.
- Sourdough discard – Or fed, active sourdough starter.
- Unsalted butter – For richness. Make sure your butter is melted and cooled slightly.
- Egg – Acts as a binder and helps create lift for the perfect waffle texture.
- Granulated white sugar – For sweetness and to help the waffles crisp on the outside.
- Pure vanilla extract – Adds flavor and aroma.
- Flour – Use regular all-purpose flour or your favorite gluten free flour blend here.
- Baking powder and baking soda – The leavening agents in these waffles. They help create the fluffy texture.
- Salt – To season our waffles so they aren’t bland.
- Clarified butter – Or coconut oil; we use this to grease the waffle iron.
Instructions
Step 1: Make the Waffle Batter

- Whisk together the buttermilk, sourdough discard, melted butter, egg, sugar, and vanilla in a large bowl.
- Add the flour, baking powder, baking soda, and salt, and whisk to combine
- Be careful not to over-mix, a few lumps are fine. (PRO TIP: If you have the time, cover the bowl with plastic wrap and let it sit at room temperature for 30 minutes. Otherwise, you can skip this step and cook the batter immediately.)
Step 2: Cook the Waffles
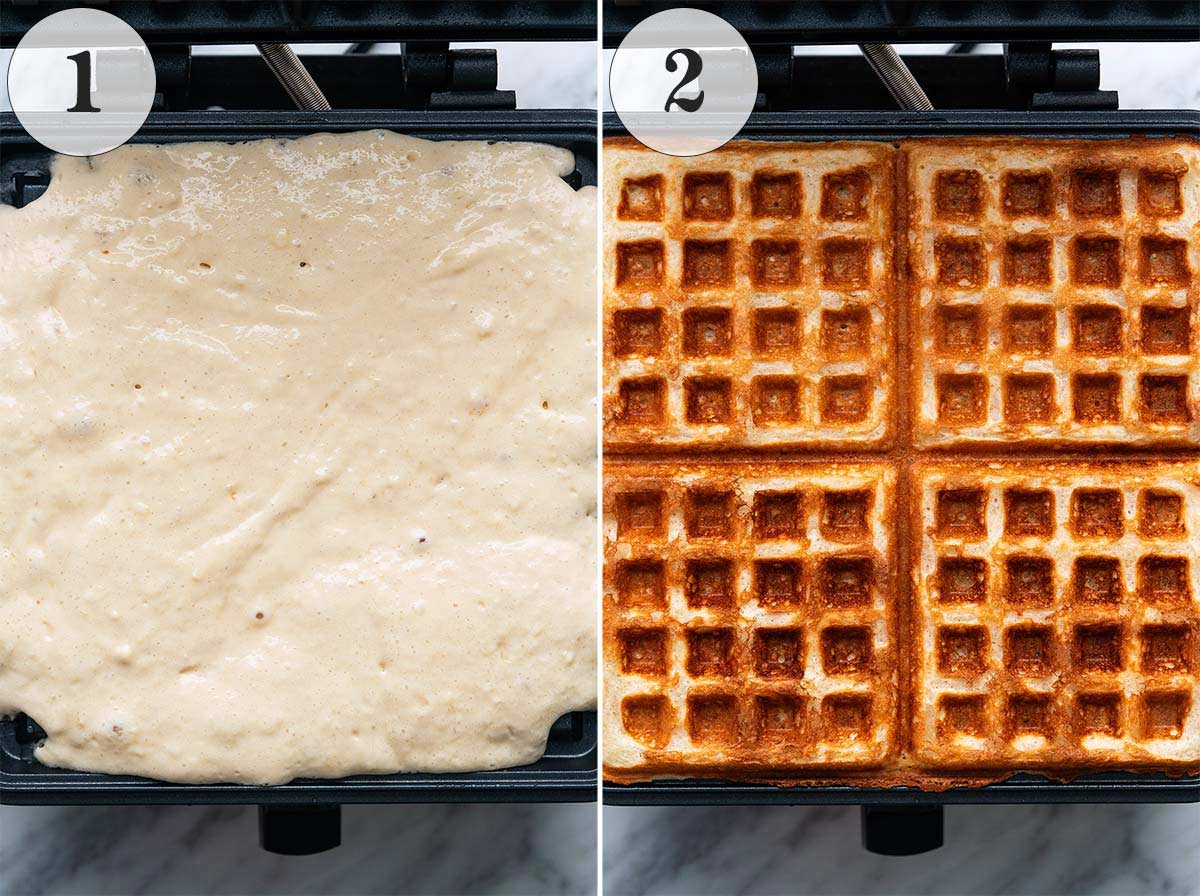
- Preheat the waffle iron. Brush the inside with clarified butter or coconut oil. Add the waffle batter.
- Cook until crispy, repeating until all the batter is cooked. Serve with any toppings you like and enjoy!
Recipe Variations
- Make sourdough discard pancakes! You can use this same batter to make pancakes instead of waffles if you prefer.
- Mix-ins. Add whatever your favorite waffle mix-ins are. Blueberries, chocolate chips, shredded coconut, nuts, etc. The sky is the limit!
- Go savory. Reduce the sugar to 1 tablespoon (I still add a little sugar here to balance the sourdough’s tanginess) and omit the vanilla. Add fresh or dried herbs, savory spices, shredded cheese, etc. One of my favorite savory waffle combinations is to add 1 finely chopped jalapeño pepper, 1/2 teaspoon garlic powder, 1/4 teaspoon black pepper, and 1 cup shredded sharp cheddar.
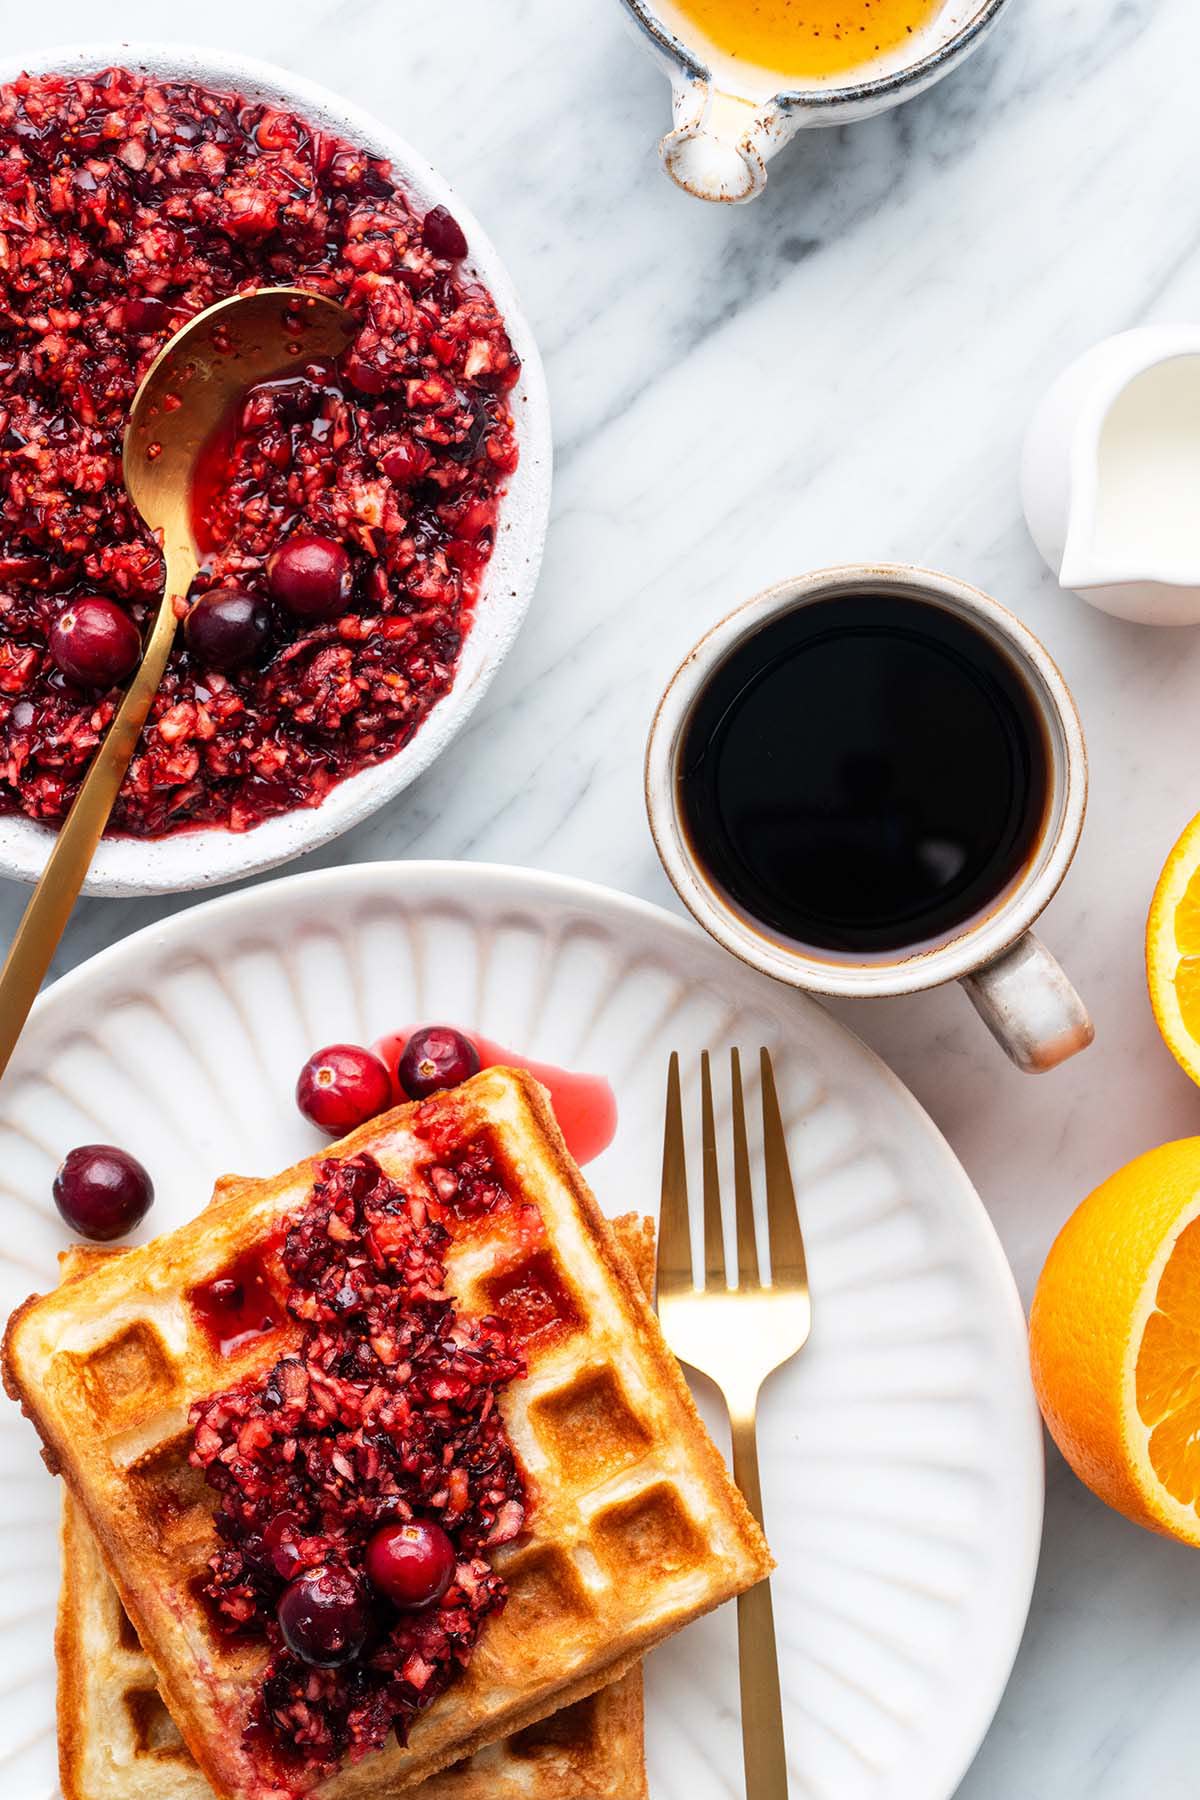
Fun & Unique Waffle Topping Ideas
Just like with pancakes or crepes, you’re only limited by your imagination when it comes to ways you can top your waffles! Of course there are the basic standbys like hocolate chips, chopped nuts, shredded coconut, sliced banana, blueberries, etc. But I’m going to share a few fun themed topping ideas if you want to make these waffles for a special occasion breakfast or brunch.
- Cookie lover’s birthday breakfast or dessert – Crumbled chocolate chip cookie, a scoop of vanilla bean ice cream, rainbow sprinkles, and a maraschino cherry.
- Thanksgiving – Apple cider caramel sauce or 10-minute butterscotch sauce, a dollop of whipped cream, and chopped pecans or walnuts.
- Christmas – Spiced cranberry sauce, cranberry orange relish, or mincemeat.
- Nutella – A drizzle of slightly warmed Nutella, crumbled Nutella brownie, a scoop of ice cream, and chopped toasted hazelnuts.
Storage and Reheating Tips
Cool to room temperature and then store in an airtight container in the fridge for up to 5 days. To store longer, cool to room temperature, wrap each waffle individually (or flash freeze them), and then pop them into a freezer-safe bag and freeze for up to 3 months.
You can reheat waffles from frozen (no need to thaw them first!) in a regular toaster, toaster oven, or regular oven:
- Regular toaster – Reheating waffles in a regular toaster is easy and convenient, and a good method to get them crispy again. Make sure the setting isn’t set too high so they don’t burn before they’re warm all the way through.
- Toaster oven – Set your toaster oven to 350F. If your waffles are frozen, reheat them for 8 to 12 minutes, and if they’re thawed, reheat them for about 5 minutes. If you like, you can flip them over so they heat more evenly.
- Regular oven – If you’re reheating a lot of waffles at once, the regular oven is the best choice. Arrange the waffles in a single layer on a baking tray, cover with foil, and reheat for 10 to 15 minutes, depending on whether they’re thawed or frozen. If you want them even crispier, remove the foil for the last couple minutes of reheating.
Tips For the Best Sourdough Discard Waffles
- If you have the time, let the batter sit for 30 minutes before cooking the waffles. This helps fully hydrate the flour and allows the gluten to relax. (You’ll notice the batter will thicken a bit after sitting for 30 minutes; this is perfectly normal and what we want to happen.) This 30 minute rest helps yield the perfect waffles: light and fluffy inside and crispy outside.
- You can make the batter up to 12 hours ahead of time. This makes it a great option for brunch or a holiday breakfast. To do so, the night before, mix up your batter with everything except the baking powder and baking soda, cover the bowl with plastic wrap, and refrigerate for up to 12 hours. Half an hour before you want to cook the waffles, let the batter sit and room temperature. After that, stir in the baking powder and baking soda, and cook the waffles as normal.
- These waffles freeze and reheat beautifully. If you have a lot of sourdough discard on hand, make a double batch of these waffles because it’s a great way to make meal prep breakfasts for busy mornings!
Frequently Asked Questions
In this recipe, we use regular all-purpose flour and it yields great texture. Alternatively, you can use bread flour for even chewier texture if you prefer.
Sourdough (discard or starter) in waffles adds a tangy component to balance out the sweetness. Also, I find sourdough waffles crispier on the outside and chewier inside, especially if you’re reheating them.
Nope. The only fermentation time required for these waffles is the time it took to make your sourdough discard. However, if you can whip up the batter and then let it rest for 30 minutes before cooking the waffles, you’ll be rewarded with waffle perfection.
More Sourdough Discard Breakfast Recipes to Try
Let’s Connect

Did you make this recipe? Please rate it and leave a comment below. You can also tag @anediblemosaic on social media.
To stay up-to-date, follow me on Facebook, Instagram, Pinterest, and Twitter!

Sourdough Discard Waffles Recipe
Email This Recipe
Get this recipe link emailed straight to your inbox!
Equipment
Ingredients
- 1 cup full-fat buttermilk
- 1 cup sourdough discard or fed, active sourdough starter
- 1/4 cup unsalted butter melted and cooled slightly
- 1 large egg
- 6 tablespoons granulated white sugar
- 1 tablespoon pure vanilla extract
- 1 cup all-purpose flour
- 1 teaspoon baking powder
- 3/4 teaspoon baking soda
- 3/4 teaspoon salt
- Clarified butter or coconut oil (for the waffle iron)
Instructions
- Make the batter. Whisk together the buttermilk, sourdough discard, melted butter, egg, sugar, and vanilla in a large bowl. Add the flour, baking powder, baking soda, and salt, and whisk to combine (be careful not to over-mix).
- Let it sit (optional). If you have the time, cover the bowl with plastic wrap and let it sit at room temperature for 30 minutes. Otherwise, skip this step and cook the batter immediately. (See Notes.)
- Cook. Preheat the waffle iron. Brush the inside with clarified butter or coconut oil. Add the waffle batter and cook until crispy, repeating until all the batter is cooked.
- Enjoy. Serve with any toppings you like.
Notes
- Optional 30 Minute Rest Time: If you have the time, let the batter sit for 30 minutes before cooking the waffles. This helps fully hydrate the flour and allows the gluten to relax. (You’ll notice the batter will thicken a bit after sitting for 30 minutes; this is perfectly normal and what we want to happen.) This 30 minute rest helps yield the perfect waffles: light and fluffy inside and crispy outside, but your waffles will still be great if you skip this step!
- Recipe Yield and Serving Size: This recipe makes about 1 liter of batter. My waffle maker makes 4-inch square waffles, and I get 10 to 12 waffles out of this recipe, which is 5 to 6 servings. Each serving is 2 waffles.
- Cooking Time: Follow the manufacturer’s guidelines for your waffle maker. In general, I’ve noticed that sourdough discard waffles are better (chewy inside and crispy outside) when I cook them just slightly longer than I’d cook other waffles.
- Make Ahead: You can make the batter up to 12 hours ahead of time. This makes it a great option for brunch or a holiday breakfast. To do so, the night before, mix up your batter with everything except the baking powder and baking soda, cover the bowl with plastic wrap, and refrigerate for up to 12 hours. Half an hour before you want to cook the waffles, let the batter sit and room temperature. After that, stir in the baking powder and baking soda, and cook the waffles as normal.
- Storage: Cool to room temperature and then store in an airtight container in the fridge for up to 5 days. To store longer, cool to room temperature, wrap each waffle individually (or flash freeze them), and then pop them into a freezer-safe bag and freeze for up to 3 months.
- Reheating: You can reheat waffles from frozen (no need to thaw them first!) in a regular toaster, toaster oven, or regular oven:
- Regular toaster – Reheating waffles in a regular toaster is easy and convenient, and a good method to get them crispy again. Make sure the setting isn’t set too high so they don’t burn before they’re warm all the way through.
- Toaster oven – Set your toaster oven to 350F. If your waffles are frozen, reheat them for 8 to 12 minutes, and if they’re thawed, reheat them for about 5 minutes. If you like, you can flip them over so they heat more evenly.
- Regular oven – If you’re reheating a lot of waffles at once, the regular oven is the best choice. Arrange the waffles in a single layer on a baking tray, cover with foil, and reheat for 10 to 15 minutes, depending on whether they’re thawed or frozen. If you want them even crispier, remove the foil for the last couple minutes of reheating.
Nutrition
Nutritional information is automatically calculated and should be used as an approximate.
Share it with me on Instagram and leave a comment to let me know your thoughts!


I’m the writer, recipe developer, photographer, and food stylist behind this blog. I love finding the human connection through something we all do every day: eat! Food is a common ground that we can all relate to, and our tables tell a story. It’s my goal to inspire you to get in the kitchen, try something new, and find a favorite you didn’t know you had.
Free Bonus


I made these waffles twice. The first time I used the weight measures given in the recipe and the waffles were nice and light, but not crispy. The weights provided by online conversions vary, so aren’t accurate. The batter was a bit too thin. The second time I made the waffles I adjusted the buttermilk and discard measures, added cornstarch for crispness, and the waffles were excellent and definitely some of the best waffles I’ve made.
Molly, I’m so happy you’re enjoying this recipe, thank you very much for letting me know! Yes, it looks like the automatic conversion for 1 cup of buttermilk (240g) is about 15g (around 1 tablespoon) higher than the average weight (around 225g). One question out of curiosity – did you let the batter rest for 30 minutes before making the waffles?
The first time I made the waffles I let the batter rest in the fridge for about 10 hours. The second time the batter was in the fridge for about 6 hours. The problem the first time was that the batter was too thin. I’ve been making waffles for over 50 years. I knew the consistency was off, but I like to test a recipe as written the first time I make it. I prefer to use metric measures but have learned over the years that the results can vary if a recipe wasn’t tested using the metric measures noted in the recipe.
Molly, Ahhh that makes sense! Thanks for letting me know. With an extremely long fermentation time in a recipe that doesn’t call for it, your batter (dough, etc.) can thin out significantly (think about how thin discard gets as it sits in the fridge over time). Like I mention in the recipe, I find that a 30 minute rest at room temperature works well here.
Were the metric measures calculated using an online conversion source?
Molly, Yes! Is there a particular ingredient you’re wondering about? If so, I’m happy to take a look. (And I know sourdough starter or discard can have quite a big difference in weight depending on factors like when it was fed last, if it’s stored at room temperature or chilled, whether or not it’s been stirred down, etc.)
These waffles were delightful! I made them the night before, simply adding the leavening components the next morning. They were perfect – crispy on the outside, soft and chewy on the inside. My kiddos loved them with a few chocolate chips. Definitely will make again!