

This post may contain affiliate links, view our disclosure.
If you follow me on Instagram, you might already know that yesterday I made natural food coloring.
This is because I recently got the idea in my head that I absolutely had to make blue frosting.
I’ll tell you all about why I needed it soon, but for now, here is a big hint…

That is supposed to be a pirate flag atop that cupcake…but more on that in a later post! (The very light pastel blue in some of the frosting in the cupcake above is from using natural red cabbage purple and teal dyes; the deeper purple color in some of the frosting is from using natural blueberry dye.)
I didn’t want to go the normal route and grab a bottle of food coloring. Every beautiful shade of the rainbow is available in nature, and I thought why not utilize it? How hard could it be to make a natural dye?
I did a little research online and I came across an article for Homemade Natural Blue Food Coloring on Whole New Mom. Not only is she an amazing lady, but her food coloring looked pretty wonderful and I thought, What the heck?! I’ll give it a whirl. (Total Home Alone 2 reference for anyone who’s seen the movie.)
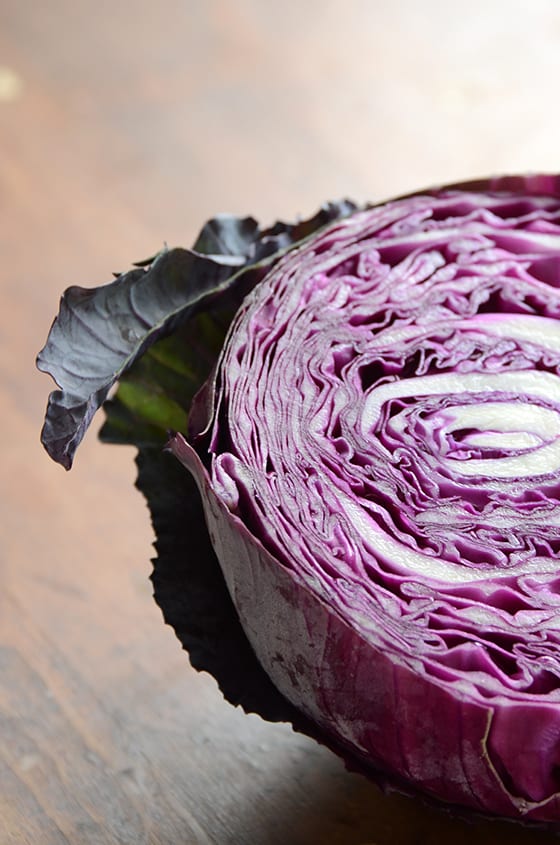
So I started out with probably the prettiest red cabbage I’ve ever seen…
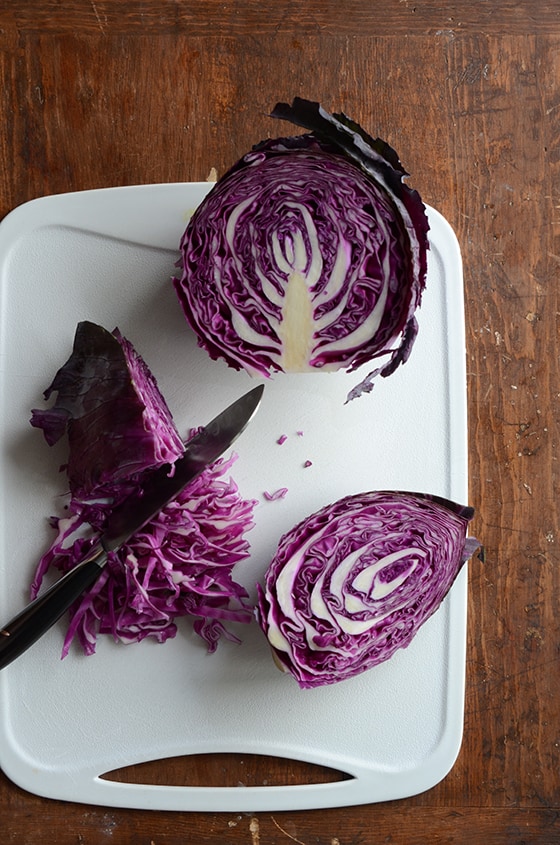
Gave it a quick chop…
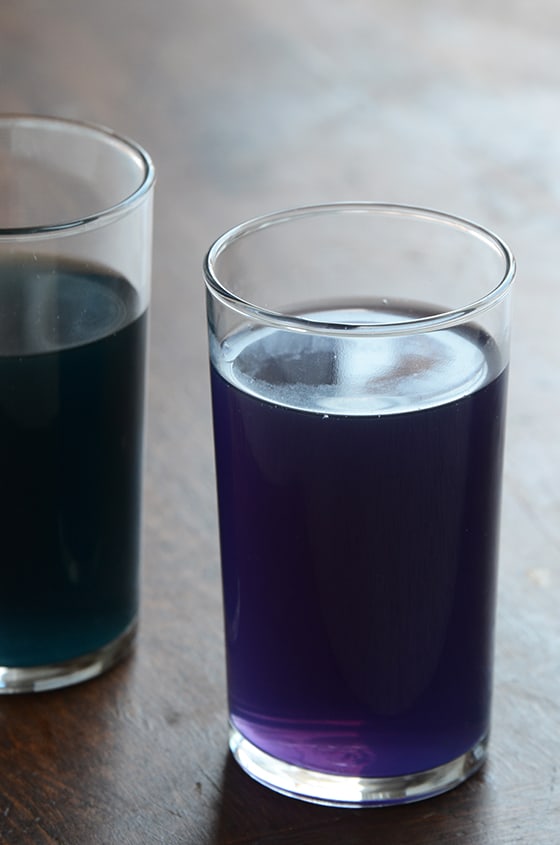
And then after a brief stint in some boiling water, I ended up with a pretty shade of purple. And after adding a bit of baking soda to some of it, I had a lovely teal. (The alkaline property of baking soda causes this to happen.)
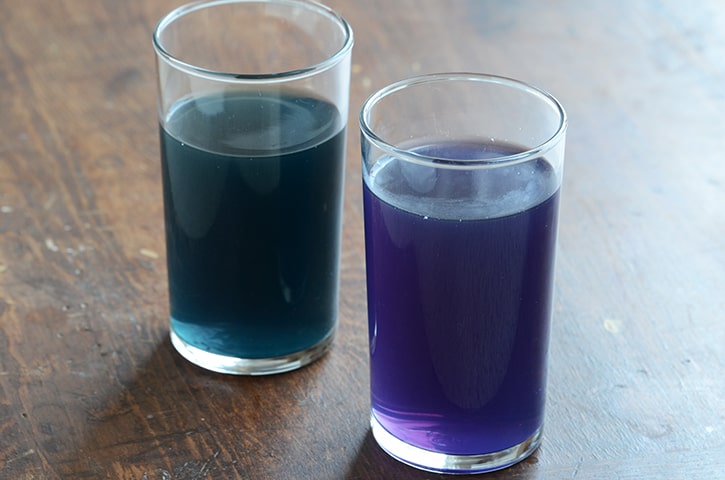
Red Cabbage Method: Natural purple coloring (on right) and teal coloring (on left) above. Note that although the colorings look very deep-colored, they show up as pastel colors when used to dye things.
Out of curiosity I mixed some distilled white vinegar into the teal…and ended up with fuchsia! Even though I wouldn’t use this to dye foods I want to eat (like frosting) because of the flavor of vinegar, I think it would be great for dying Easter eggs and such.
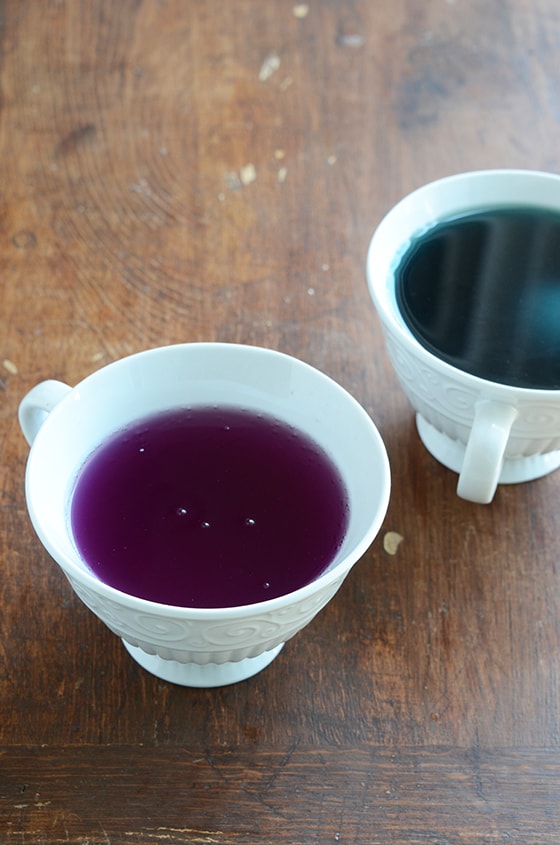
Here’s the fuchia above (with the teal in the background). There is a hard-boiled egg in the teal – it came out a lovely soft pastel shade of green!
I was super excited to try these natural dyes in frosting, so I whipped up a basic batch of frosting with equal parts vegetable shortening (not butter because I didn’t want the yellow from the butter to come through in the final color), powdered sugar, and just a touch of clear extract. Then I mixed in between 3 to 4 tablespoons of my natural dye (about half purple and half teal)…and ended up with a super light pastel bluish purple that almost had a light grey hue.
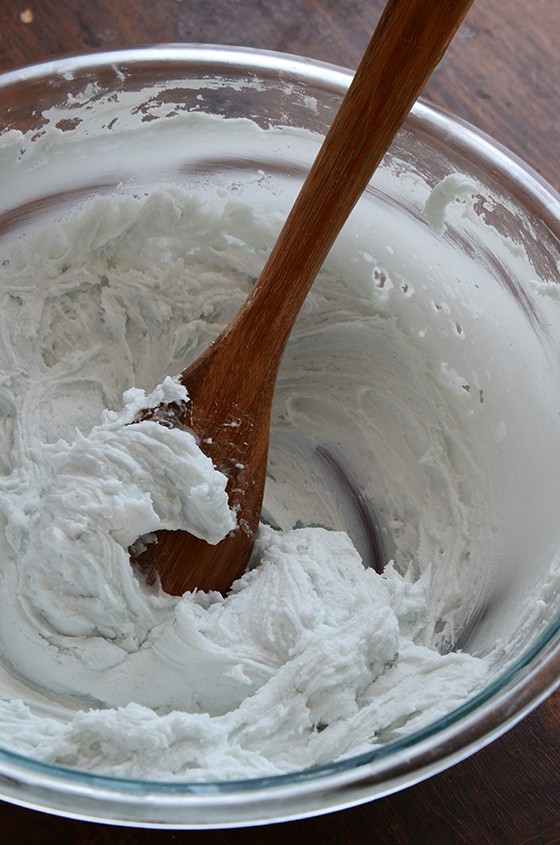
Pure white frosting with about 3 to 4 tablespoons of natural purple and teal dyes (from the red cabbage method) added…that is not enough color for me! (The cupcake photo above shows its color a little better.)
I was disappointed that the natural red cabbage dyes weren’t great for the use I had intended for them (coloring frosting), but I soon thought of a way to remedy that…blueberries! (And I know the red cabbage dyes do have other uses – see my Notes section below.) So I soldiered on and boiled down some blueberries with some water until the liquid was very concentrated and then strained out the blueberries. Here’s what I got…
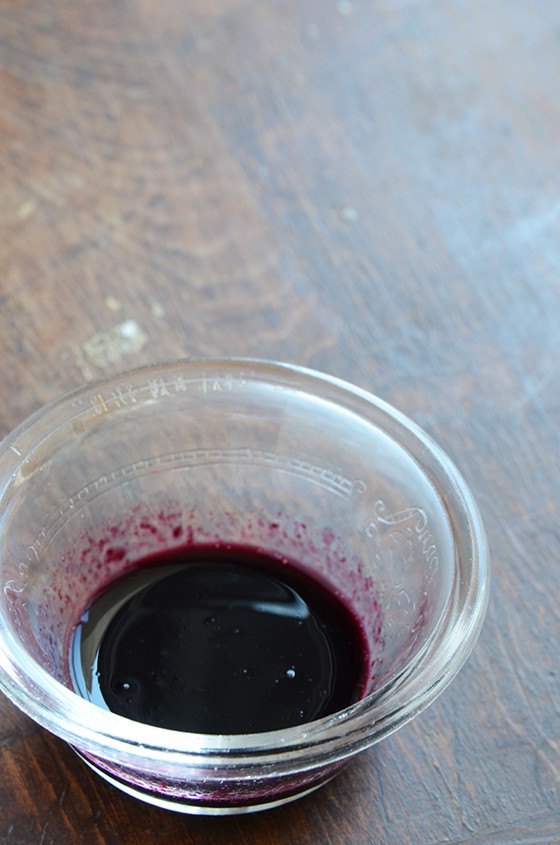
Blueberry Method: Natural purple coloring.
And here’s how it looked when I swirled about 2 teaspoons into a batch of frosting…
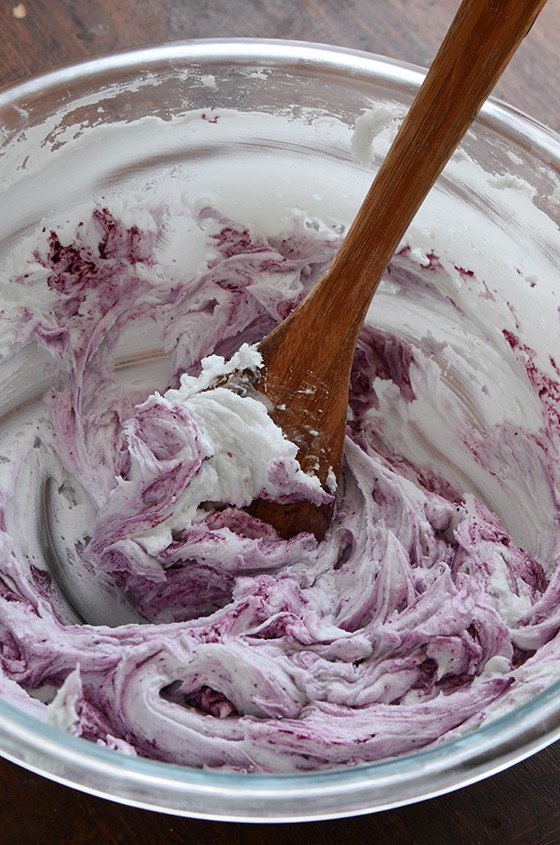
I was going for a streaked look with the frosting!
I thought the natural blueberry coloring served this purpose perfectly!
Below I give the recipes (which are really more methods than actual recipes), along with my notes on each.
I will definitely be trying my hand at making more natural dyes, so I might do a sequel post to this one at some point.
Here are a few other color ideas I have in mind:
- Red: Beets, pomegranate molasses, cranberries
- Pink: Raspberries, strawberries, cherries, hibiscus, rose
- Orange: Carrot juice
- Yellow: Turmeric
- Green: Spinach (or other leafy greens), chlorella, liquid chlorophyll
- Blue: Some kind of herbal tea, such as blue Thai tea, which is also called Butterfly Pea Tea
- Purple: Blackberries
- Brown: Tea, coffee, cocoa powder
Natural Purple, Teal (Blue-Green), and Fuchsia (Purple-Pink) Food Colorings {Red Cabbage Method}
1 lb (455 g) cabbage, core removed and thinly sliced (about 5 cups sliced)
Water
Baking soda
Distilled white vinegar
- Add the cabbage and enough water to cover it (about 5 cups/1.2 liters) to a medium lidded saucepan.
- Bring to a boil over high heat, then turn heat down and simmer (covered) 10 minutes. Turn the heat off and let it steep for 5 minutes.
- Strain the cabbage out, reserving the purple liquid. Let the liquid cool to room temperature and then divide it in thirds in 3 separate bowls.
- The purple liquid is ready to use at this point.
- To make teal (blue-green), stir in 1/4 teaspoon baking soda at a time until it reaches your desired shade.
- To make fuchsia (purple-pink), after making teal (blue-green), stir in 1/4 teaspoon distilled white vinegar at a time until it reaches your desired shade.
NOTES {RED CABBAGE METHOD}:
- After being boiled, the cabbage is a bit softer than you might normally cook it, but it is still completely edible. Once you strain the cabbage out of the liquid, you can toss it in a little olive oil-sautéed onion, garlic, and/or ginger with salt and pepper for an instant side dish.
- Using the red cabbage method, you should get a total of about 4 cups/1 liter of food coloring.
- The cabbage food colorings are not concentrated, so foods that are dyed with them have pastel hues instead of deep colors.
- The purple cabbage coloring smells like cabbage, but its flavor is quite mild and can be easily covered with bolder flavors (and it can even be used to dye sweets like frosting into soft, pastel colors). The teal and fuchsia colorings both have much stronger flavors due to the addition of baking soda and distilled white vinegar, so their flavors are harder to mask or blend into something else; however, they still have their uses too!
- Uses for purple food coloring (red cabbage method): making frosting; making other dyed foods (like mashed potatoes or cauliflower); coloring Easter eggs; crafting (like making naturally-dyed paper).
- Uses for teal (blue-green) food coloring (red cabbage method): coloring Easter eggs; crafting (like making naturally-dyed paper); you can also use it sparingly to dye things like frosting – just be careful because it may change the flavor!
- Uses for fuchsia (purple-pink) food coloring (cabbage method): coloring Easter eggs; crafting (like making naturally-dyed paper). With vinegar in this coloring I don’t recommend using it in things like frosting.
Natural Purple Food Coloring {Blueberry Method}
1/4 cup (35 g) frozen blueberries
1/4 cup (60 ml) water
- Add the blueberries and water to a small saucepan over medium heat.
- Bring to a boil, then give the berries a good mash; turn the heat down slightly and simmer (uncovered) 10 minutes. Turn the heat off and steep 5 minutes.
- Strain the berries, reserving the liquid.
- Cool the liquid completely before using.
NOTES {BLUEBERRY METHOD}:
- Using the blueberry method, you should get about 1 tablespoon of dye – but it is very concentrated, so a little goes a long way!
- Although the color of the blueberry food coloring is concentrated, its flavor isn’t. It smells and tastes only very faintly fruity, which is nice because it lets you easily mask its flavor if you don’t want it to stand out.
- Uses for purple food coloring (blueberry method): making frosting; making other dyed foods (like mashed potatoes, cauliflower, or risotto); coloring Easter eggs; crafting (like making naturally-dyed paper).


I’m the writer, recipe developer, photographer, and food stylist behind this blog. I love finding the human connection through something we all do every day: eat! Food is a common ground that we can all relate to, and our tables tell a story. It’s my goal to inspire you to get in the kitchen, try something new, and find a favorite you didn’t know you had.
Free Bonus


Shelley says, You are wonderful!! I make soap. I’m trying my hardest to keep everything natural. I’ve been looking at colors for sale for 2 hours and couldn’t find any lavender. Purple cabbage and blueberries. Who would’ve ever thought
Blueberries are also pH reactive, you can add baking soda to turn them blue/teal and vinegar or lemon juice for fucshia. The lemon juice would probably work better for frosting :)
For the blueberries, you really need more water to keep them from burning. When I doubled the recipe it was fine but when I did it a second time as written, I had to add more water as the berries were starting to burn
Hi Lauren, Thanks so much for sharing your experience with this! The rate of evaporation depends largely on the weather. I’m happy that you added more water and it worked for you!
My art teacher said I should look at your page so I did it’s a amazing I tryed the dye resope
Hi! This is exactly what I was looking for. Quick question: I would love to dye my vanilla buttercream frosting the closest thing to lavender as possible…but not sure if I should go with the cabbage method or the blueberry method. Which one would you recommend? Also, if I went with the blueberry method, would pureeing them instead of boiling them help?
Thanks!
Vanessa, I’m glad you found this helpful! For a lavender color, I’d probably go with the blueberry method. I haven’t tried pureeing the blueberries instead of boiling them, but it may work. My guess is that the color wouldn’t be as concentrated, but I don’t know for sure. If you try pureeing the berries, please let me know how it works out!
Omg I almost used these tips to dye my hair! I was googling tips for dying hair naturally and this came up. Bahahaha I was seriously thinking “frosting? In my hair?! I guess….” so glad I read the comments because now I know. Sounds yummy….for cupcakes XD
The blueberry method picture looks swirled with white as you mentioned. I was wondering, did you purposely lightly swirl it so it would be that way? I need to make purple frosting – not swirled – and was wondering if this would work. Thank you.
Hi Chris, Yes, I purposely lightly swirled it because this was the “stormy” look I was going for.
So cool! Would it work on freshly whipped cream? Tq!
Mich, I haven’t tried this technique on whipped cream so I don’t know for sure. If I were going to play with it, because of whipped cream’s tendency to deflate I’d probably used stabilized whipped cream (recipe is in this post), which is basically whipped cream with a little gelatin. Please let me know how it goes if you give it a try!
Hey! I am making paint using the list of fruits and vegetables as the dyes and I was wondering if the color could be preserved for a longer amount of time.
Isha, I haven’t tried using these colors in that way, so I have no idea how well it would work. If you give it a try, please let me know how it goes!
Cream cheese instead of shortening for the frostings is healthier and tastes soooo much better
Hi! I’m so excited to try this out. How long did the “food coloring” keep? Does it last a long time?
Hi Susie, I used it all the same day it was made, so I have no idea how long it would keep. I’d assume it would probably keep up to a week covered in the fridge though. Let me know if you give it a try! :)
If you used lemon juice instead of vinegar you could use the iceing on cakes.
I ABSOLUTELY LOVE IT… THANKYOU!!!! I need to make lipsticks for a project and I am so doing this! <3
Very cool idea to try and make your own food coloring. I guess it would be hard to keep leftovers for any long period of time. Paprika could be a good one too.
This is AMAZING! I use red cabbage to make kimchi but have never thought to use it to make natural food dyes. You are a genius (so is Whole New Mum :) ). Cheers for sharing this with us and I will be trying this out ASAP. I wonder if it would run to dying cloth? Might need a bit of alum to set it. For now I am just happy that my icing and fillings can be completely homemade AND hand coloured, talk about artisan! ;)
I’ve been waiting for this post!!! I’m never using fake dyes again. Actually, I use them very, very infrequently just because the taste is always so yucky. LOVE this!
This is so cool! Love it :)
This is so fun! I actually did something similar last night for a cake I’m baking over the weekend ;) xo
DOING THIS! I’m making under the sea cupcakes for Kay’s birthday and I’m totally using the blueberry method!! Thanks ;)
Erica, Yay, that is awesome!!! And oh my gosh, under the sea cupcakes are the cutest! :)