This post may contain affiliate links, view our disclosure.
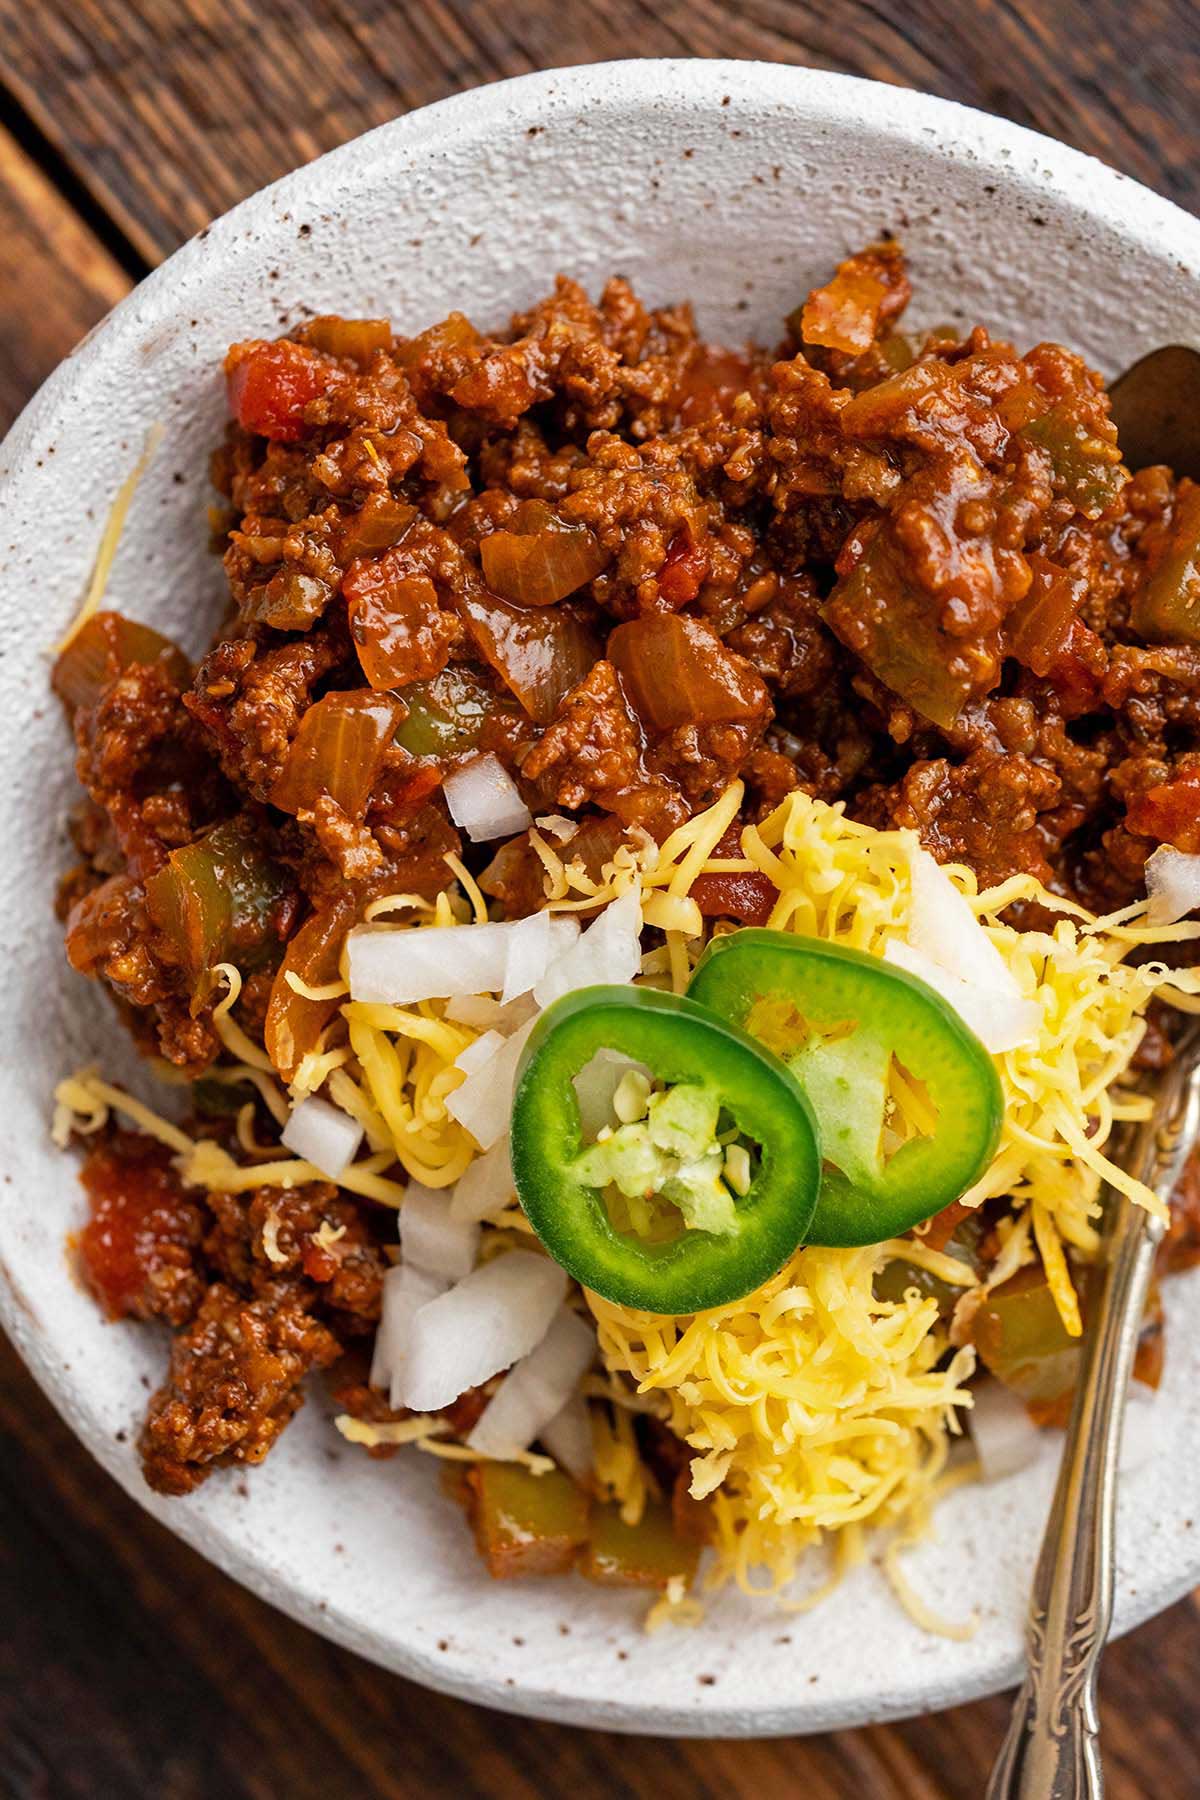
Quick and easy, 30-minute no bean chili is flavorful and satisfying even though it has no beans! Serve it as-is along with cornbread or grilled cheese, or make it into chili cheese dogs or loaded chili baked potatoes.
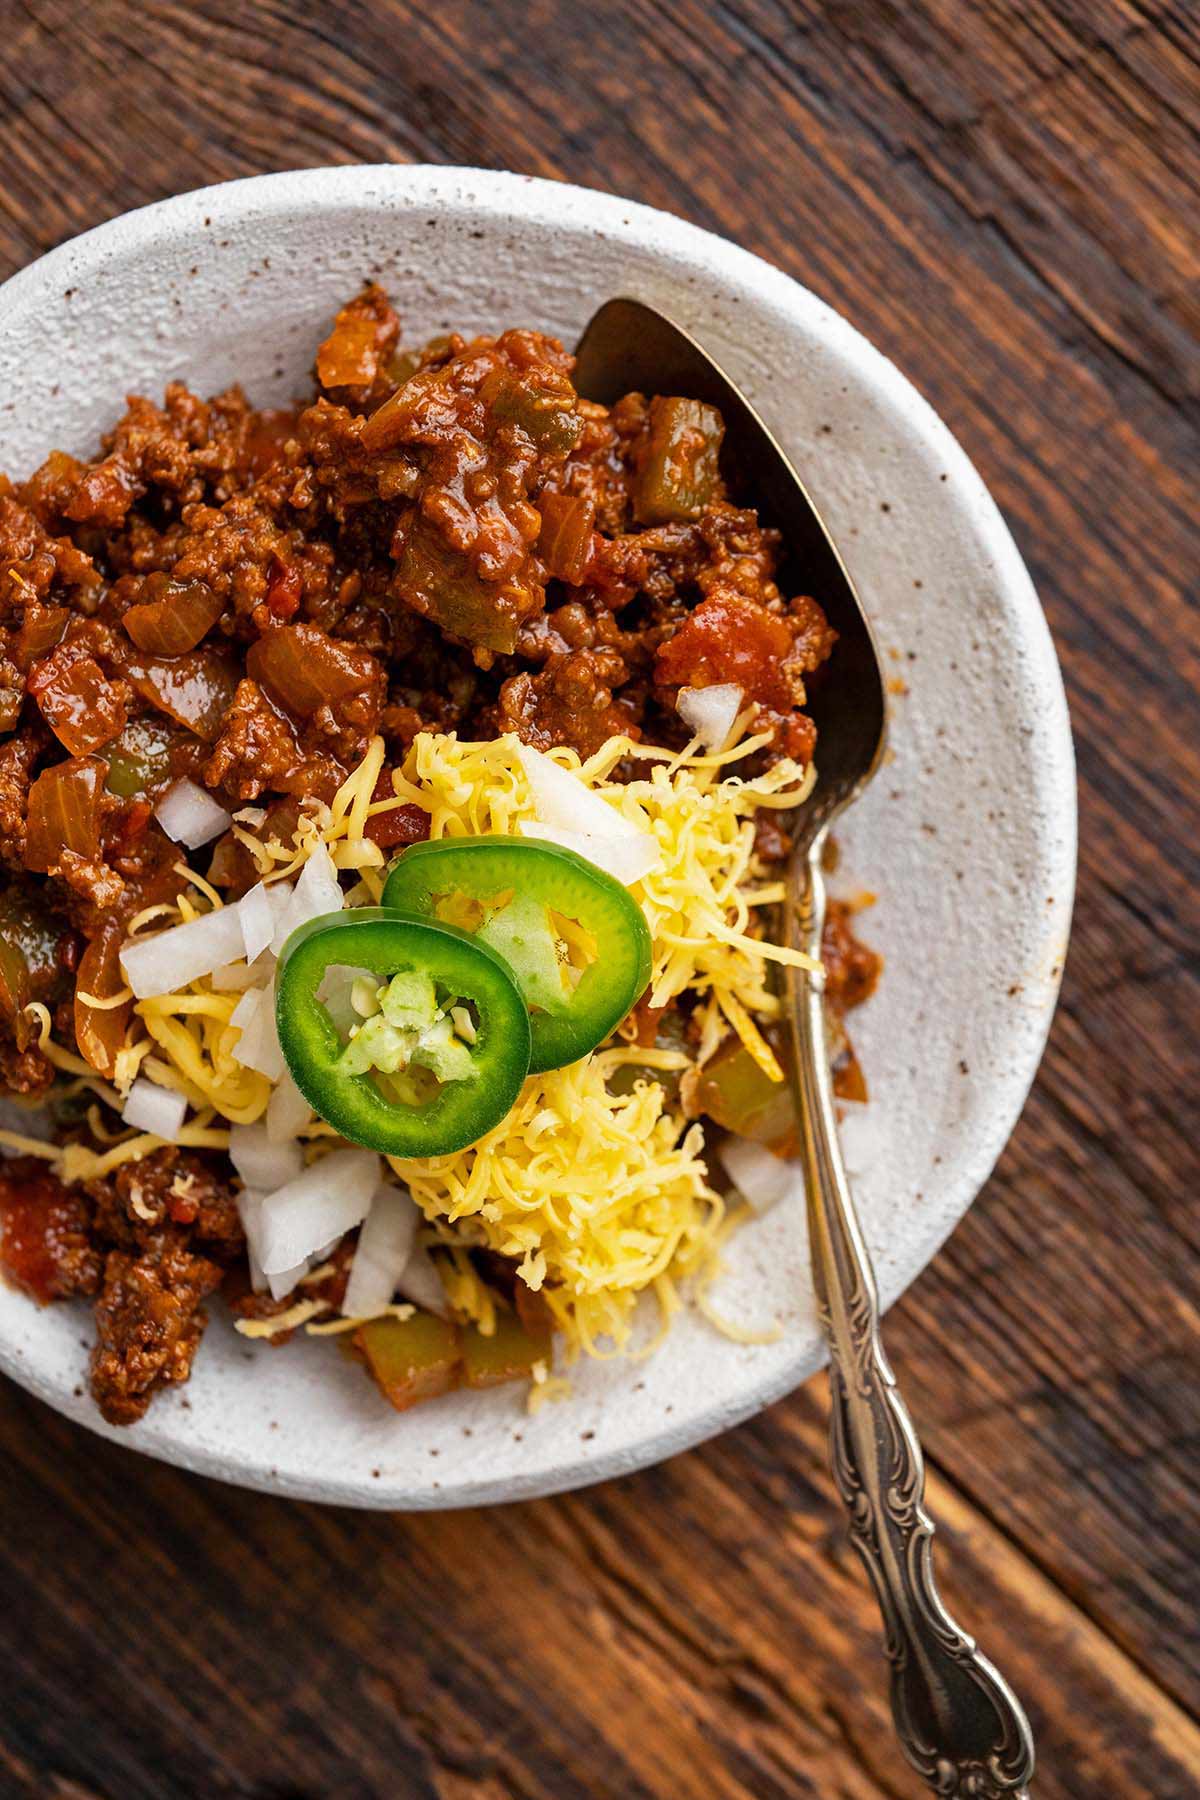
If you’re cooking for picky eaters who don’t like beans, this is the chili recipe for you. (It’s also a good recipe if you want a lower carb chili option!) With ground beef, vegetables, a variety of spices, a few traditional chili seasonings and a couple surprise ingredients, the end result is a well-balanced flavor profile that tastes like it takes way longer to make than just 30 minutes!
What to Serve with Beanless Chili
One of the best things about this recipe is that there are a ton of different ways to eat it! I recommend making a double batch for meal prep. You can stash it in the freezer for emergency meals on busy nights, or enjoy it in a completely different way later in the week. Here are a few ideas for how to serve it:
- Along with cornbread or cornbread muffins, garlic bread, or grilled cheese
- With a side of tortilla chips for dipping to add crunch
- On a bed of rice or with a scoop of rice on top
- Similar to Cincinnati chili, on a bed of spaghetti
- Make it into chili cheese hot dogs
- Transform it into loaded baked potatoes with all the fixings
Beanless Beef Chili Ingredients
Breaking It Down
Ingredients Explained
In this section I explain the ingredients and give substitution ideas where applicable. For the full recipe (including the ingredient amounts), see the recipe card below.
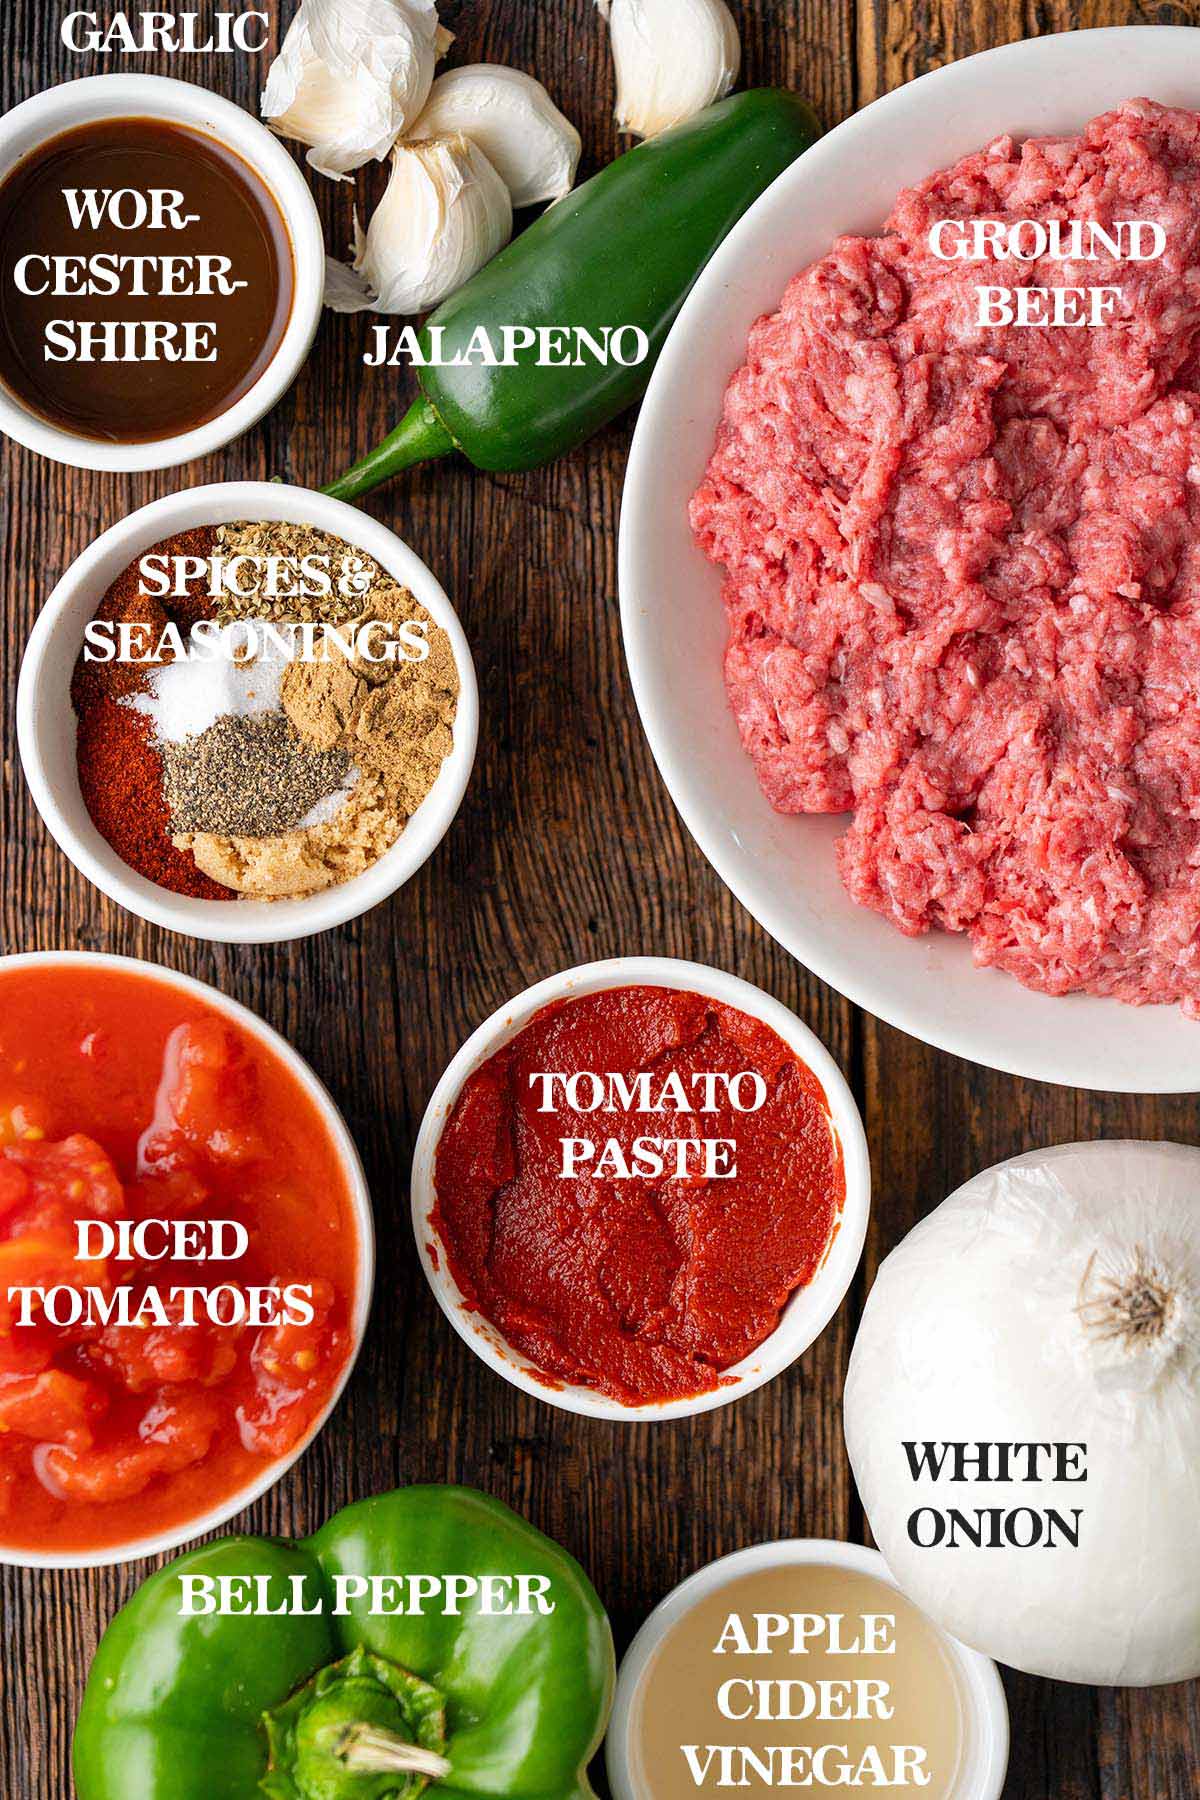
- Ground beef – 85% lean ground beef works well here.
- White onion – Yellow onion will also work well here. I used white onion because I also like it as a garnish on top.
- Green bell pepper – Any color bell pepper will work fine, I just like the contrast of green pepper here.
- Jalapeños – For a little bit of a kick. Feel free to adjust the amount to suit your preference for spicy-hot foods.
- Garlic – A hefty dose of garlic adds a ton of flavor to this chili.
- Canned diced tomatoes – Diced tomatoes are a classic ingredient in a many chili recipes. For this recipe, make sure you add the juices along with the canned tomatoes.
- Tomato paste – Tomato paste helps thicken the chili and gives it rich, deep flavor.
- Apple cider vinegar – A splash of vinegar adds bright tanginess to balance the brown sugar and wake up the flavor.
- Worcestershire sauce – Because this easy chili recipe is quick cooking, Worcestershire sauce is a great way to bump up the umami factor and add complexity.
- Light brown sugar – Brown sugar adds sweet flavor with a hint of molasses for richness.
- Chili powder, dried oregano, cumin, smoked paprika, salt, and black pepper – These are pretty classic chili seasonings. If you can find Mexican oregano (instead of Mediterranean oregano), use that; its citrusy, slightly anise-like flavor adds a pungent herbal earthy component to the dish that really elevates it.
Instructions

- Brown the beef. Add the ground beef to a large skillet over high heat, spreading it out in an even layer. Let the meat sear and brown on the bottom for a couple minutes before stirring. Cook until browned, about 5 minutes, using a wooden spoon (or potato masher) to break up the meat into small crumbles.
- Sauté the vegetables. Turn the heat down to medium. Add the onion, bell pepper, jalapeños, and garlic, and cook until the veggies are starting to soften, about 5 minutes, stirring occasionally.
- Add the remaining ingredients. Add the diced tomatoes, tomato paste, vinegar, brown sugar, Worcestershire sauce, chili powder, dried oregano, cumin, smoked paprika, salt, and black pepper, and give it a stir.
- Cook it down. Bring it up to a boil, then cover, turn the heat down slightly to simmer, and cook until the mixture is thickened a bit, about 5 minutes, stirring occasionally. If needed to help it thicken, remove the lid and cook uncovered for the last minute, but stay with it and stir frequently so it doesn’t burn.

Storage and Reheating Tips
Once cooled, store leftovers in an airtight container in the fridge for up to 4 days or in the freezer for up to 6 months. Reheat leftover chili in the microwave or on the stovetop.
My Best Tips For This Beanless Chili Recipe
- Make sure to add the juices along with the canned tomatoes. We don’t use additional water or broth here, so we need the tomato juices.
- If beef isn’t your thing, no bean chili also great with ground turkey. Add 1 tablespoon of olive oil when you brown the ground turkey, and keep everything else the same.
- To help the chili thicken more, you can remove the lid and cook it uncovered for the last minute or so. Just stay with it and stir frequently so it doesn’t burn. One of the nice things about this chili recipe is that we don’t need anything additional to thicken it.
Frequently Asked Questions
Just about anything you like! If you aren’t a fan of the types of beans that are commonly used for chili (such as kidney beans, black beans, pinto beans, etc.), you can use another type of beans (try cannellini beans) or legumes (like lentils). Or just use meat and vegetables, like we do in this recipe!
Some recipes call for adding a thickener like corn meal, masa harina, or even a cornstarch and water slurry. Here we’re keeping it simple and going with the simmer-to-thicken method, also known as evaporation.
Let me start by saying that this is not a recipe for Texas chili! Just because chili has no beans doesn’t mean it’s Texas style chili. Texas chili is very unique with tender chunks of beef (frequently chuck roast), no tomato products, no beans, dried chile peppers, chili spices, and frequently a thickener like masa harina.

More Easy Ground Beef Dinner Recipes
- Crockpot Enchiladas (Ground Beef Slow Cooker Enchilada Casserole)
- Cabbage Vegetable Beef Soup
- Weeknight Beef Bolognese
Let’s Connect

Did you make this recipe? Please rate it and leave a comment below. You can also tag @anediblemosaic on social media.
To stay up-to-date, follow me on Facebook, Instagram, Pinterest, and Twitter!

Beanless Chili Recipe
Email This Recipe
Get this recipe link emailed straight to your inbox!
Ingredients
- 1 pound 85% lean ground beef
- 1 1/4 cups chopped white onion about 1/2 a large
- 1 1/4 cups chopped green bell pepper about 1 medium
- 1 to 2 jalapeños minced (optional)
- 5 large cloves garlic crushed
- 14.5 ounce can diced tomatoes with juices
- 4 tablespoons tomato paste
- 1 tablespoon apple cider vinegar
- 1/2 tablespoon Worcestershire sauce
- 1 tablespoon light brown sugar lightly packed
- 4 teaspoons chili powder
- 1 teaspoon dried oregano
- 1 teaspoon cumin
- 1 teaspoon smoked paprika
- 1 teaspoon salt
- 1/2 teaspoon black pepper
Instructions
- Brown the beef. Add the ground beef to a large skillet over high heat, spreading it out in an even layer. Let the meat sear and brown on the bottom for a couple minutes before stirring. Cook until browned, about 5 minutes, using a wooden spoon (or potato masher) to break up the meat into small crumbles.
- Sauté the vegetables. Turn the heat down to medium. Add the onion, bell pepper, jalapeños, and garlic, and cook until the veggies are starting to soften, about 5 minutes, stirring occasionally.
- Add the remaining ingredients and cook it down. Add the diced tomatoes, tomato paste, vinegar, brown sugar, Worcestershire sauce, chili powder, dried oregano, cumin, smoked paprika, salt, and black pepper, and give it a stir. Bring it up to a boil, then cover, turn the heat down slightly to simmer, and cook until the mixture is thickened a bit, about 5 minutes, stirring occasionally. TIP: If needed to help it thicken, remove the lid and cook uncovered for the last minute, but stay with it and stir frequently so it doesn’t burn.
Notes
- Recipe Yield and Serving Size: This recipe makes about 4 cups of chili or 4 (1-cup) servings.
- Storage and Reheating: Once cooled, store leftovers in an airtight container in the fridge for up to 4 days or in the freezer for up to 6 months. Reheat leftover chili in the microwave or on the stovetop.
Nutrition
Nutritional information is automatically calculated and should be used as an approximate.
Share it with me on Instagram and leave a comment to let me know your thoughts!


I’m the writer, recipe developer, photographer, and food stylist behind this blog. I love finding the human connection through something we all do every day: eat! Food is a common ground that we can all relate to, and our tables tell a story. It’s my goal to inspire you to get in the kitchen, try something new, and find a favorite you didn’t know you had.
Free Bonus