Today I have a few exciting announcements!
Announcement #1: If you haven’t checked out Lazaro’s blog at Lazaro Cooks! be sure to do so! He is one of the most genuine people I know, and he is incredibly talented and passionate about what he does. Looking through his blog you’ll notice that everything he makes is a masterpiece (really, his food is that impressive). He’s starting a new series today called Foodie Friend Deconstruction Saturday and I am honored to say that he’s reinventing a couple of my dishes...I’m so excited to see what he makes! Thank you so much, Lazaro! Update: I've seen Lazaro's reinventions of my dishes and they are absolutely stunning (I like his recreations better than my originals!). Ready to be wowed? If so, head over and check them out!
Announcement #2: The lovely Brandy of Nutmeg Nanny will soon be announcing our All Through the Year Cheer Halloween event! Stay tuned for that within the next couple days.

Before I can get into my candy recipes, I first have to tackle tempering chocolate. (Aaaahhhh! I know, I might as well have said today I’ll be tackling the French Macaron (my personal nemesis) or boning a duck (which I’ve heard is a pretty serious endeavor). Bottom line, I’m not a professional chocolatier or even a chef (they didn’t teach me Chocolate Tempering 101 in law school, lol!). If I can do this, then you definitely can. Really. I’ve consulted several respectable online sources, gleaning information from each that should help make the process smoother.**
Personally, I always feel like it's helpful to know a little more about what I'm making before I make it, so the first thing I'll do is answer some questions you might have about chocolate and the tempering process. Then I'll share some useful tips for tempering, and lastly I’ll break down the tempering process into steps.
What is chocolate?
Chocolate comes from seeds that grow in pods of Cacao Trees. As they ripen, the pods turn lovely shades of red, orange, yellow or purple; once ripe, the pods are harvested and the seeds and pulp are left to ferment for up to a week. The seeds are then extracted, roasted, cracked into cocoa nibs, and ground into a paste comprised of cocoa butter and cocoa powder. This paste is melted to form chocolate liquor; once cooled and hardened, this is referred to as unsweetened chocolate.
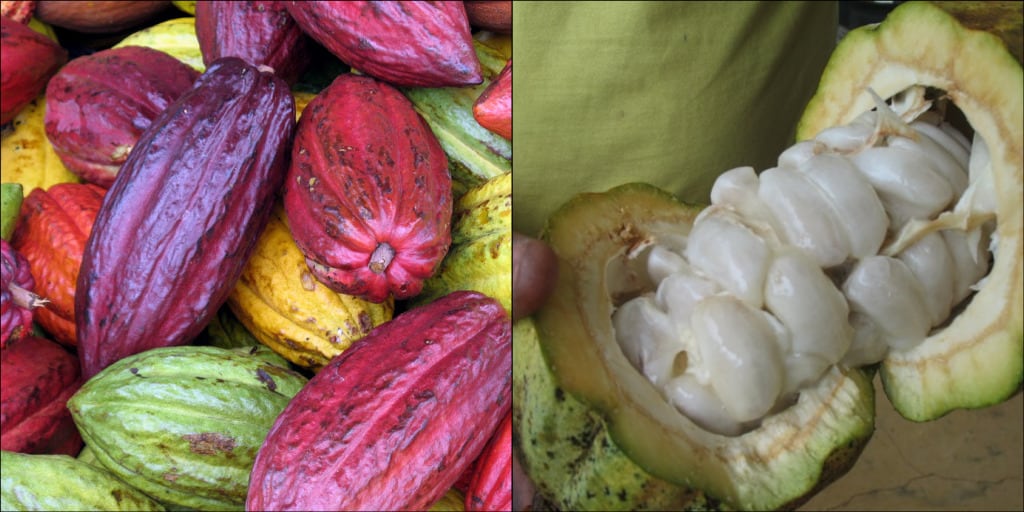
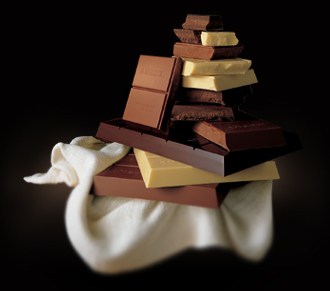
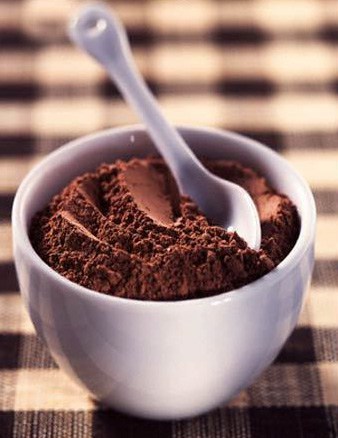
Different types of chocolate contain different proportions of cocoa butter and cocoa powder; for example, dark or bittersweet chocolates have less cocoa butter and more cacao than milk chocolate. White chocolate contains cocoa butter and no cacao; it also usually has additives like milk and sugar. Coco powder is made by removing most of the cocoa butter from chocolate liquor, and then crushing what is left into a powder.
Cocoa Powder (Image Source)
Why does chocolate need to be tempered?
When melted chocolate hardens, the cocoa butter forms a crystalline structure. The type of crystalline structure that forms depends on the temperature at which it forms. If you melt chocolate the same way you would melt a stick of butter, the crystalline structure will be unstable, causing a dull and/or sticky surface. The tempering process of heating the chocolate to a specific temperature and then cooling it to a specific temperature ensures that a uniform crystalline structure is formed, resulting in a smooth, glossy finish.
What is “seeding”?
Many people think of seeding as the easiest method of tempering chocolate. In this method, chocolate is melted and then tempered chocolate (remember, most chocolate you purchase is already tempered) is added to the melted chocolate to act as a source of seed crystals that the melted chocolate can form around.
What does tempering do to chocolate?
Tempering chocolate gives it a smooth, glossy appearance and a nice snap when broken. This process is a good way to preserve chocolate, as tempered chocolate will keep for quite a while at cool room temperature. Tempered chocolate is quite stable, hardens very quickly, and can be used in many different applications, including as a decoration (think chocolate leaves), mould, dip, or coating. The last (and perhaps most important) reason to temper chocolate is to prevent fat bloom (resulting from extreme temperature) and sugar bloom (resulting from moisture), which causes a dull finish and white or gray spots.

What kind of chocolate should be tempered?
The fast answer is real chocolate. The more detailed answer is chocolate that contains a high percentage of cocoa butter (also known as couverture chocolate), must be tempered. Most of the real chocolate you buy comes tempered, but must be tempered again if you’re planning to melt it and use it as a decoration, mold, dip, or coating. There is no need to temper chocolate-flavored items like chocolate chips, since the cocoa butter has been removed and replaced with vegetable or palm oil.
When do I have to temper chocolate?
This depends on what you’re using the chocolate for. If chocolate will be used in a recipe (such as chocolate custard, brownies, or truffle filling) there is no need to temper it. However, if you’re using chocolate as a decoration, mold, dip, or coating it really should be tempered.
What are the biggest pitfalls in tempering chocolate?
There are two that I know of: scorching and seizing. To prevent scorching, chocolate should never be heated above 200F; the best way to ensure this is to use a double boiler when melting chocolate. If your chocolate scorches there is no way to save it.
Seizing occurs when water comes in to contact with melted chocolate. (To prevent seizing: If you’re using a double boiler, be sure to dry the bottom of the bowl once you remove it from the boiler; also, don’t let any steam reach the chocolate.) Because chocolate is so dry, the sugar and cacao in it absorb any water that comes into contact with them, causing the chocolate to clump or seize. Seized chocolate can’t be tempered, but you can add liquid (such as water, milk, or oil) to thin the chocolate into a sauce and use it in other recipes.
Tempering Tips
- Work with chocolate on a relatively cool, dry day (or in a temperature-controlled environment).
- Use a rubber or silicone spatula to stir the chocolate (wooden spoons can carry odor or moisture and metal spoons can condense if their temperature is too drastically different from the chocolate’s temperature).
- Have everything you’ll need out and ready to use before you start.
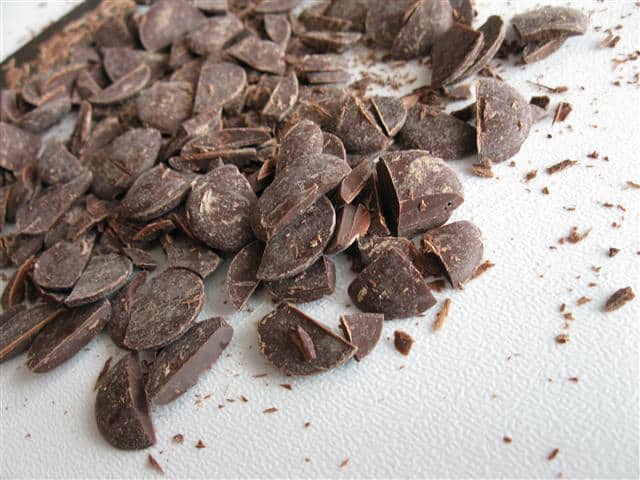
- The size of the chocolate should be fairly small. The small disks are ok for melting, but the chocolate that will be used for seeding should be chopped smaller, about the size of chocolate chips.
- It's easiest to work in batches of at least 1 pound of chocolate (over 1 pound is ok, but any less than that is very difficult to temper correctly).
How to Temper Chocolate:
Step 1: Mis en Place: Get out your equipment: chocolate, cutting board, knife (for chopping chocolate), double boiler, rubber/silicone spatula, instant-read thermometer, kitchen towel, and butter knife (for testing chocolate).
Step 2: Chop: Chop your chocolate into small pieces. The small disks are ok for melting, but the chocolate that will be used for seeding should be chopped smaller, about the size of chocolate chips.
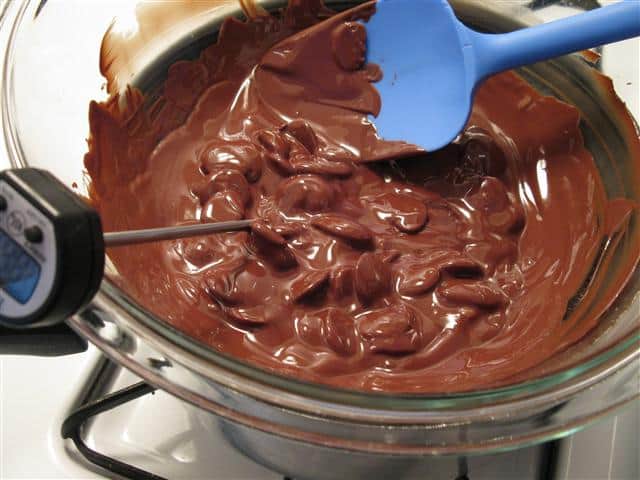
Step 3: Melt: Heat the water in the double boiler until it boils, then turn the heat off. To the bowl on top add ¾ of the chopped chocolate (reserving ¼ of the chocolate for seeding), and stir with the rubber spatula until the chocolate is melted (dark chocolate should be around 115F, milk and white chocolate should be around 110F). If you need to, you can turn the double boiler on again so the chocolate reaches the correct temperature.
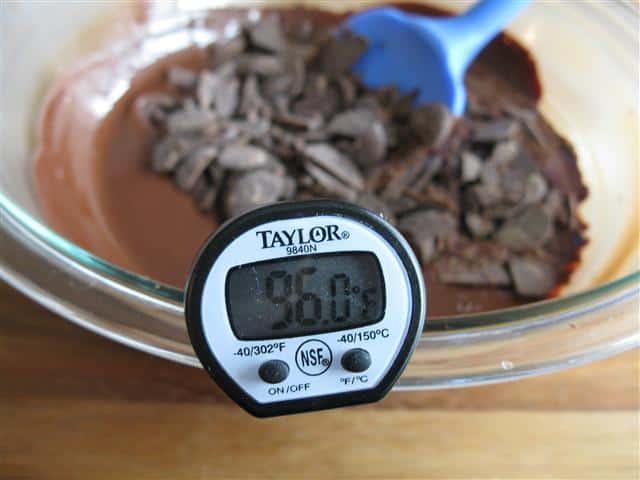
Step 4: Cool: Remove the bowl of melted chocolate from the double boiler and dry the bottom of the bowl with the kitchen towel. Stir the chocolate with the rubber spatula until it reaches between 95-100F.
Step 5: Seed: When the chocolate is between 95-100F, stir in the reserved ¼ of the chopped chocolate and continue stirring until the temperature drops to 80-85F.
Step 6: Reheat: Slightly reheat the chocolate (dark should reach about 88-90F, milk and white about 85-87F). The easiest way to do this is boil the water in the double boiler, then turn the heat off and briefly place the bowl of chocolate on the double boiler until it reaches the correct temperature. Hold this temperature until you’re done using the chocolate.
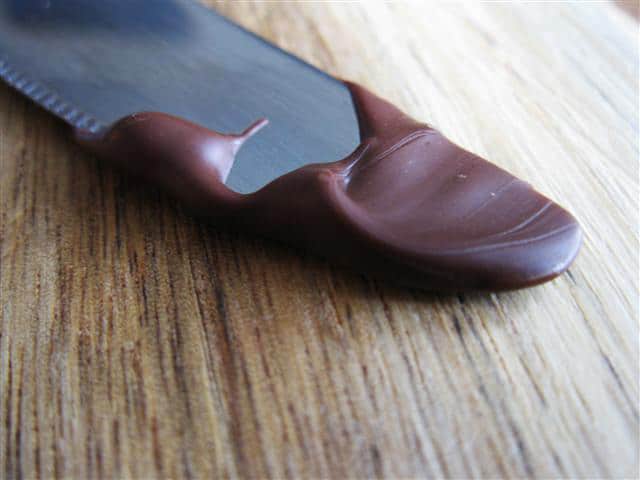
Step 7: Test: Dip a butter knife in the chocolate and let it sit for a couple minutes. It should set completely (and not be sticky at all) within a couple minutes. It should look smooth with a satiny/slightly glossy finish.
Quick Reference Temperature Chart:
| Chocolate Type | Melt | Seed | Cool | Reheat & Hold |
| Dark | 115-120F | 95-100F | 80-85F | 88-90F |
| Milk | 110-115F | 95-100F | 80-85F | 85-87F |
| White | 110-115F | 95-100F | 80-85F | 85-87F |
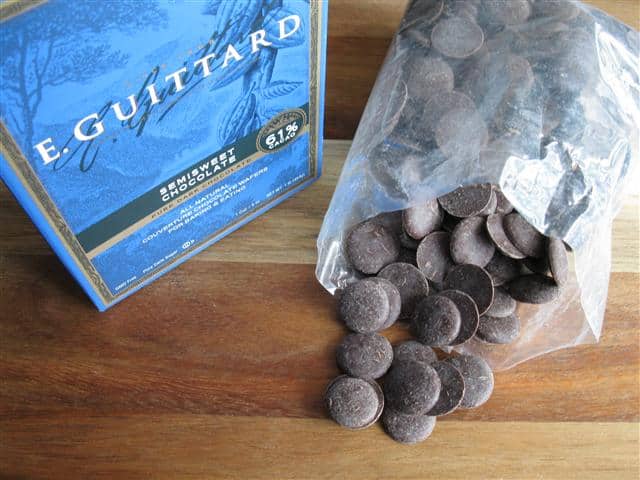
*I want to send a thank-you to Guittard, my sponsor for this event! Also, I want to note that while I received the chocolate free of charge, I received no monetary compensation. As always, opinions stated are my own.
**A few of the most helpful sites I found that talk about tempering chocolate are as follows (in no particular order): CHOW, David Lebovitz, Serious Eats, Cooking for Engineers, and Tasteful Times.



themacaronqueen says
Thank you for sharing. I will try to do it this weekend :)
http://www.themacaronqueen.blogspot.com
ingrid says
Thanks, Faith! The info is just in time for the holiday baking season. :)
~ingrid
Carolyn Jung says
Thank you so much for this great tutorial on tempering. I am printing it out and saving it.
I'm a huge fan of those Guittard chocolate disks, too. They are so great for melting. And they make for great, bodacious chocolate chip cookies, too. (Well, if you like monster chips like I do!)
marla {family fresh cooking} says
Thanks for all these helpful tid bits on chocolate. The inside of the cacao is nasty! Can't wait to see your chocolate posts :)
Anna Johnston says
Faith, you big groover you :) I love, love chocolate so much & learnt lots here today, as always great post my friend. Very excited about Halloween too.
FOODESSA says
Faith...as much as I though I knew about chocolate...all this assembly of info is precious, thanks.
This project of yours sounds like lots of fun ahead...I'm glad you can make the time to make and enjoy all the upcoming treats ;o)
About the 'deconstruction' of your creations...I personally don't think that your unique dishes should be questioned by you since you are already a great talent in your own right. Your time in the kitchen is much appreciated ;o)keep up the great work!
Ciao for now,
Claudia
Reeni says
This is an excellent tutorial Faith! Thank you so much for all the useful tips.
Xiaolu @ 6 Bittersweets says
I recently bought a book about chocolate and read a bit about tempering chocolate but have yet to deal with the intricacies of it myself. Thanks for these directions!
Blond Duck says
I'm so scared to work with candy!
Swathi says
Faith,
I think i missed this post, glad i see now. Delicious. Great info on chocolate.
coco says
great info about chocolate! I didn't know about any of these!!! :D
Nutmeg Nanny says
This looks amazing! I love love love chocolate :) In fact as I was reading this post I was eating a piece of dark chocolate that I bought while I was in Hawaii.
The ATTYC post is up and I'm super excited to see what everyone comes up with :)
Faith @ lovelyascharged says
Oh, YUM! This should be a really fun series to follow. Chocolate? I'm in!
Heavenly Housewife says
You are totally right, Halloween candy ISN'T just for kids :), after all, we are the ones who buy it LOL. Great info on tempering.
*kisses* HH
Diane says
What a great post I learnt so much today. Diane
Barbara says
Marvelous post, Faith. Full of info and you've tweaked our interest!
Tempering chocolate is just the beginning of some super chocolate recipes; can't wait!
chriesi says
Great post! I am looking forward to see what is coming up!
The Southern Cookbook says
Great post! A lot of useful information. I love chocolate :)
Krista says
What a fun and fabulous project!!! Homemade candies are so delicious and I haven't made any in ages. I look forward to seeing your scrumptious creations this month. :-)
Ameena says
I just came back from Trader Joe's and saw very similar chocolate discs - they are now making them under their own brand!
Thanks for the chocolate education Faith! :)
Lorraine @ Not Quite Nigella says
Great story and information Faith! I can't wait to see the rest of the series too! :D I'm so excited about Halloween!
Emily Z says
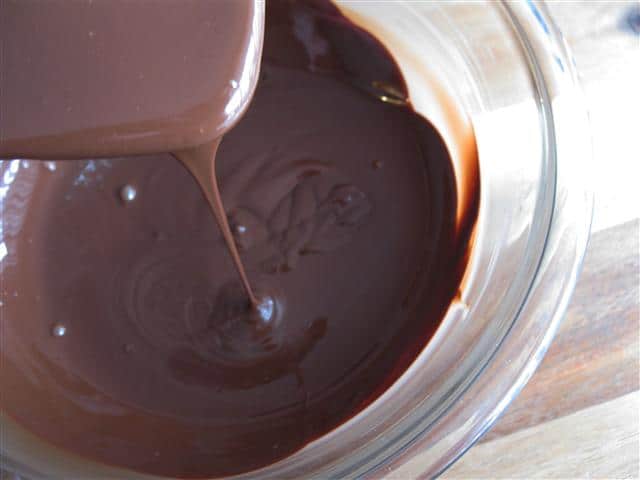
Holy cow, all this talk of chocolate has made me VERY hungry for it now! Especially that third picture down where it's all liquid and delicious looking! Can't wait to hear more about your Halloween goodies!
Krista says
October is going to be one exciting month on this site! Can't wait to follow you through it, Faith! :)
Mo says
Faith, this is a fantastic post. I just learned SO much, so thank you! I look forward to learning how to make candy from you! :)
Psst... I think my reaction to the last picture could be described as "swooning".
BeadedTail says
I learned a lot today and am now craving chocolate! Can't wait to see what you make in the coming weeks!
Rosa says
A great post! very informative.
Cheers,
Rosa
Carol says
Great post! Can't wait to see what chocolate treats you come up with! I don't even bother to cook with those Guittard buttons, I eat them from the box :)
Katerina says
Thanks for the chocolate tips! I am a chocoholic and I love it.
Betty @ scrambled hen fruit says
I've heard of tempering chocolate but have never done it, or even known when I was supposed to do it! Thanks for the great reference. :)
Joanne says
Man I feel like I've learned so much in this post! I'm bookmarking it to save as a chocolate resource! And I checked you out over at Lazaro's - good stuff. As always. :)