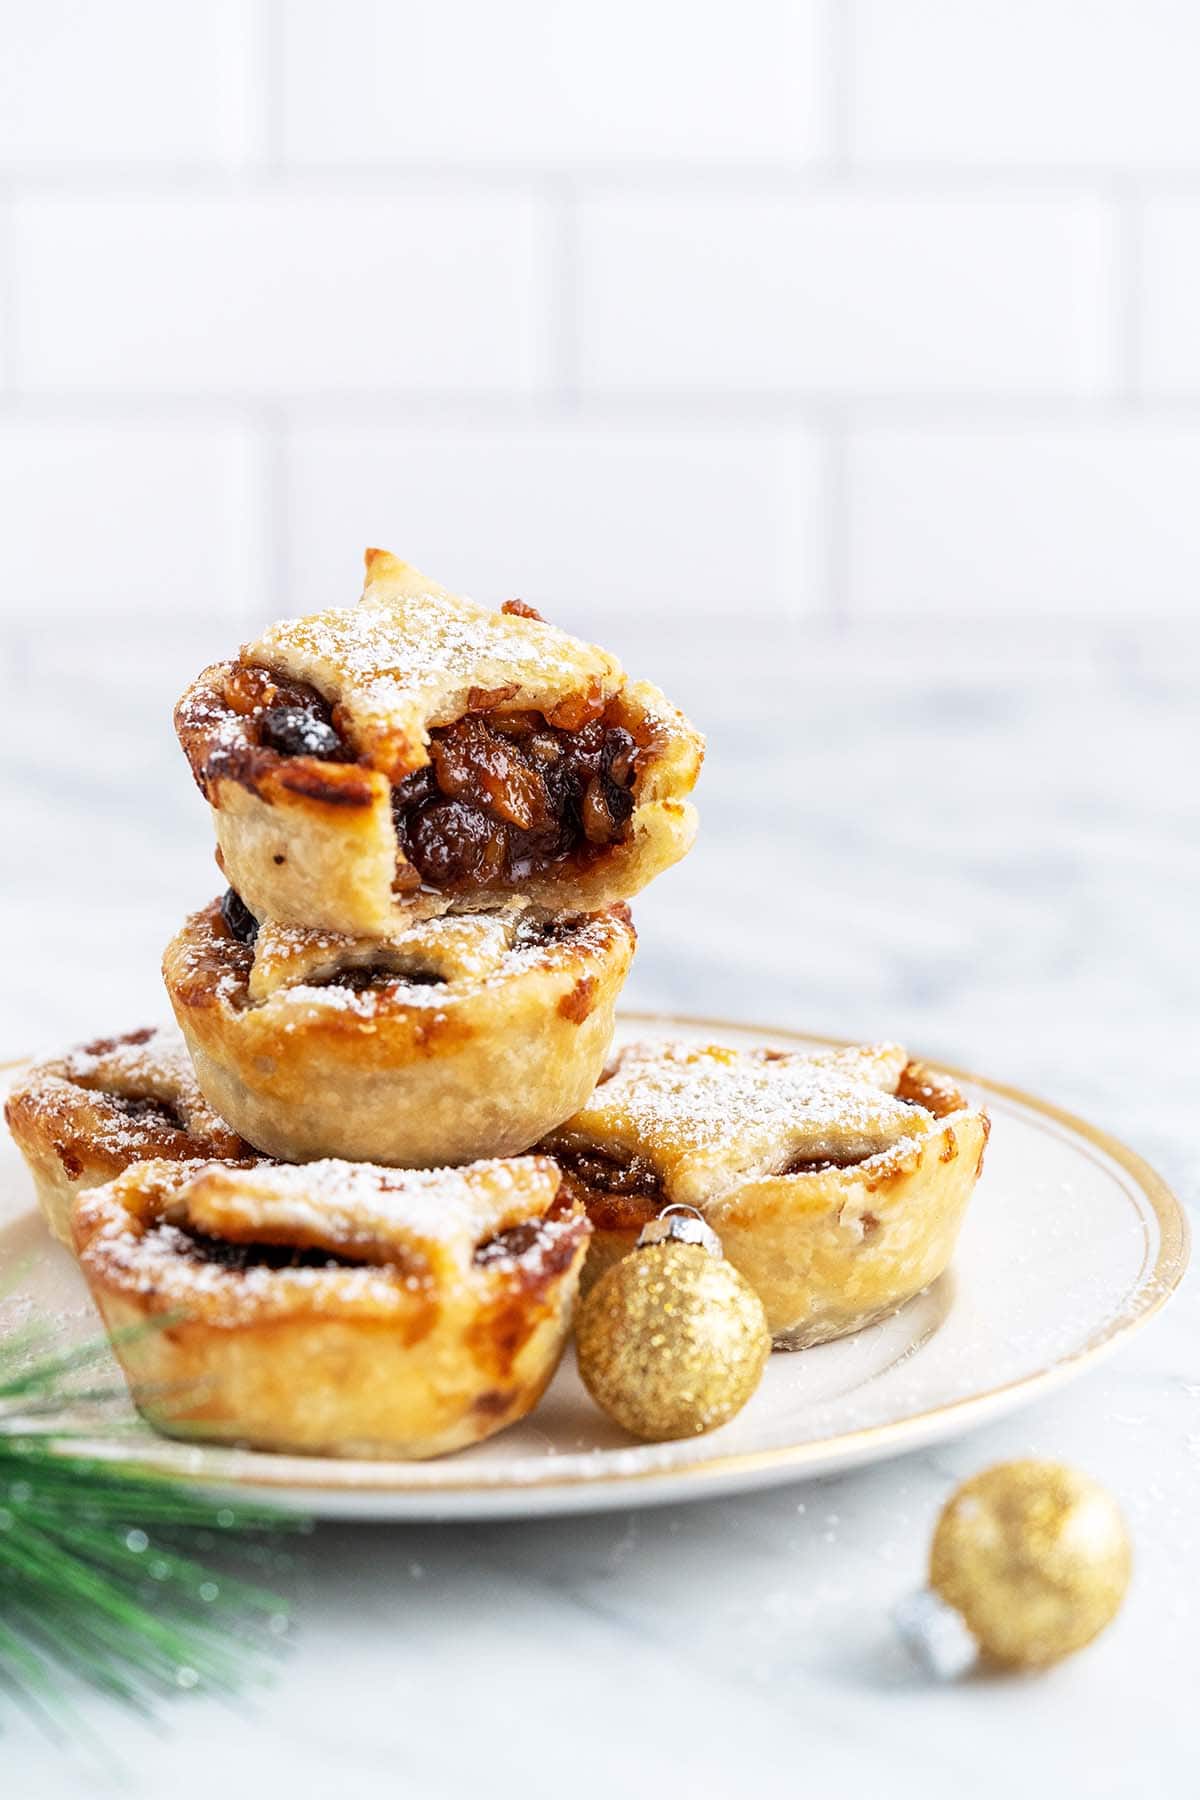
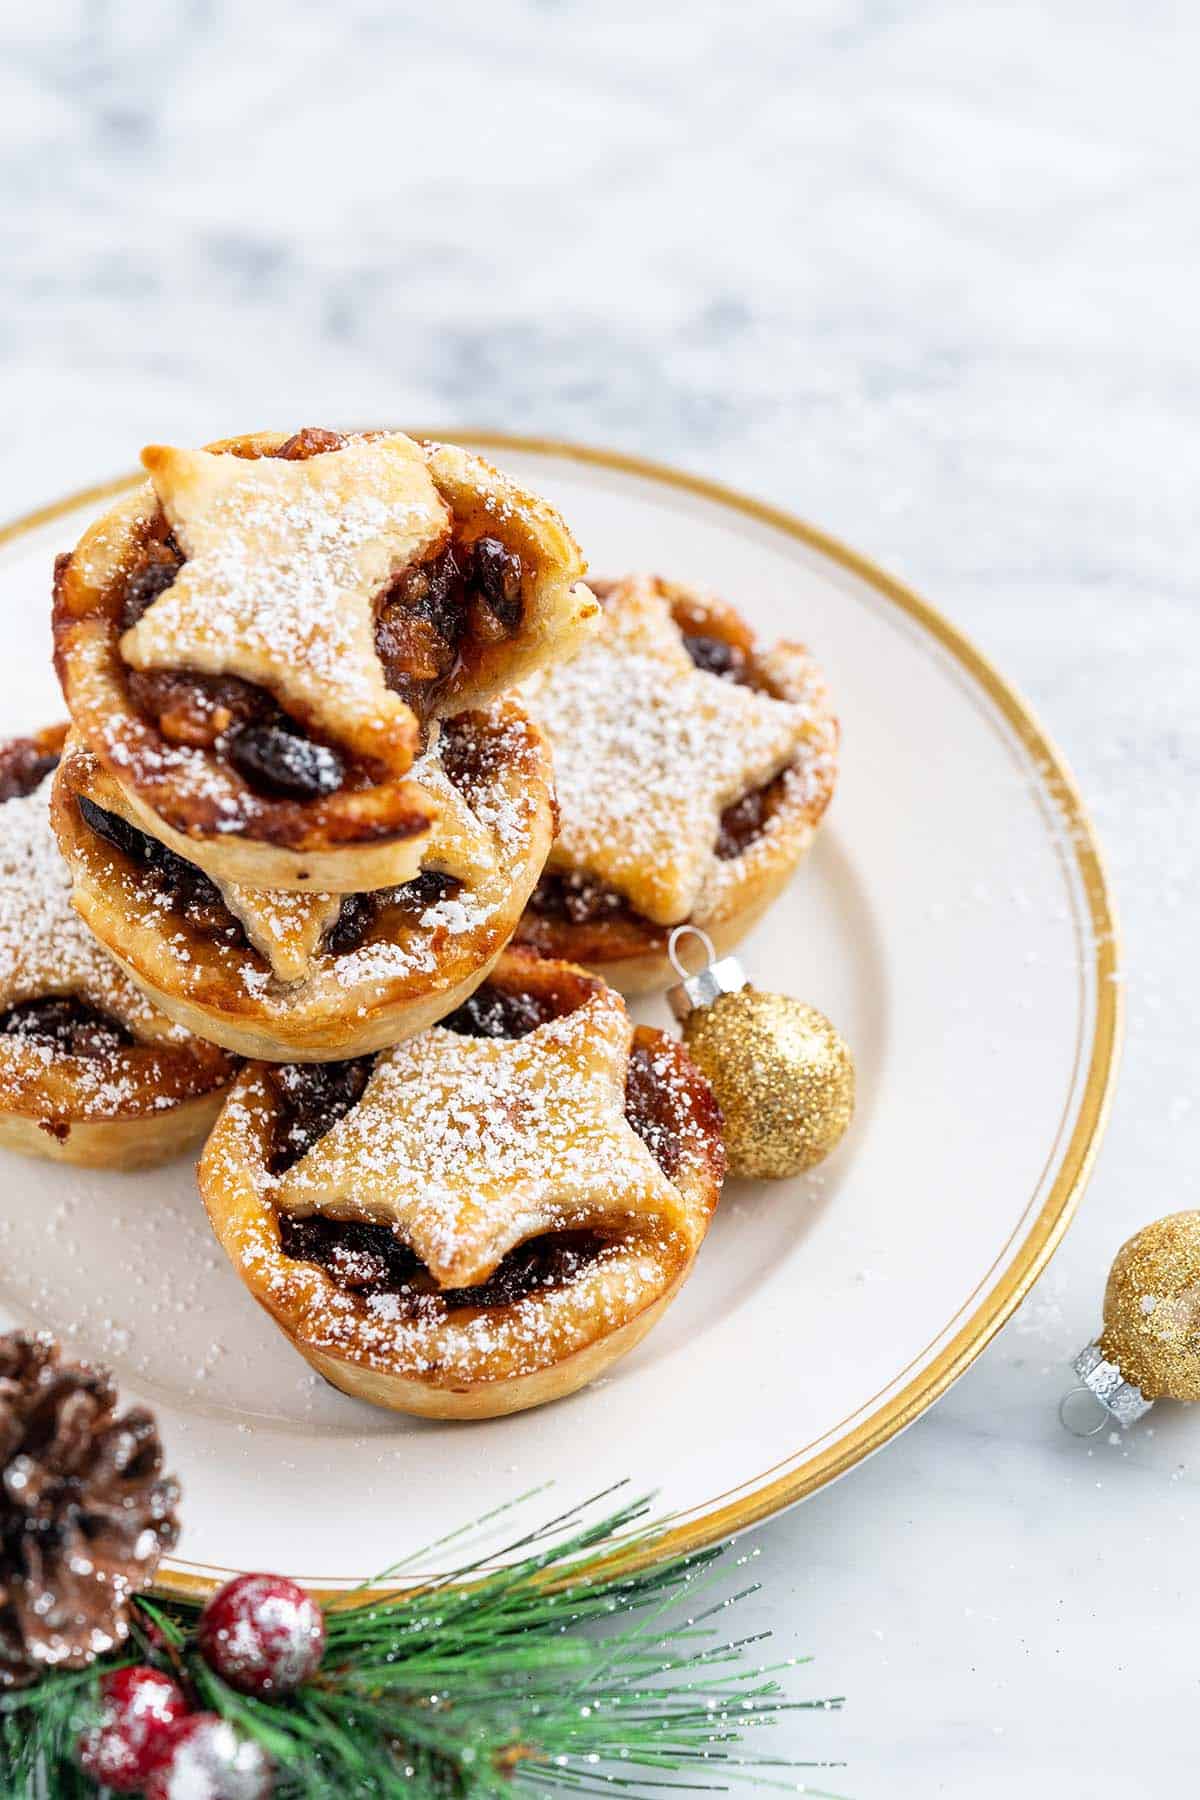
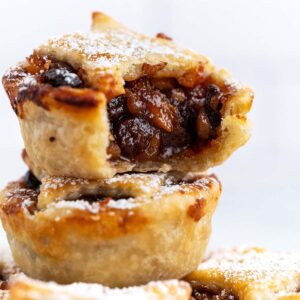
Mincemeat tarts have a spiced fruit filling with notes of citrus and brandy baked in a rich, buttery, flaky crust. They’re aromatic and festive, and make a lovely holiday dessert. And these mini mince pies are baked in a muffin pan, so they’re individually-sized and perfectly portioned.

This traditional British treat says Christmas!
Warmly spiced, aromatic mincemeat filling that’s full of apple and raisins, laced with citrus, and spiked with brandy is baked into a flaky all-butter crust for a festive dessert that’s redolent with holiday tradition. And hard to pass up!
If you’ve never had mincemeat, you’re in for a real treat. Yes, mince pie used to contain meat, but no, it generally doesn’t anymore.

I go into the history behind this festive dessert in my post on mincemeat filling, so if you’re interested, head over and check it out. But what you need to know now is that this iconic Christmas classic dessert is doable in your own kitchen.
And once you make it, I think it might just become a new tradition in your family.
Why You’ll Love This Recipe
- It’s easy, and pretty fast too. After you have the mincemeat made, it requires just 20 minutes of hands-on prep time.
- And you can make it even easier. If you’re in a time crunch, you can use store-bought pie dough (look for it in the frozen desserts area or in the refrigerated cookie dough area) and store-bought mincemeat (it will likely be located near the other pie fillings) to make these mini pies. You can also find both these items on Amazon.
- It doesn’t get any more festive than mince tarts. These will make your whole house smell like Christmas as they bake.
The Best Mincemeat Tarts Recipe with Step by Step Photos
Ingredients
In this section I explain the ingredients and give substitution ideas where applicable. For the full recipe (including ingredient amounts), see the recipe card below.
- All-purpose flour – this is the base of our dough recipe for the crust
- Salt – to season the dough so the crust isn’t bland
- Unsalted butter – we use butter as the fat in our crust for rich flavor and flaky texture
- Ice water – make sure it’s icy cold so it doesn’t melt the little butter bits
- Mincemeat Filling – This homemade recipe only takes 1 hour and you can make it ahead of time
- Egg + water – this is for the eggwash on top of our tarts to make them golden and glossy
- Powdered sugar – to decorate the top of the tarts (optional)
How to Make Mince Tarts
Step 1: Make the Mincemeat:
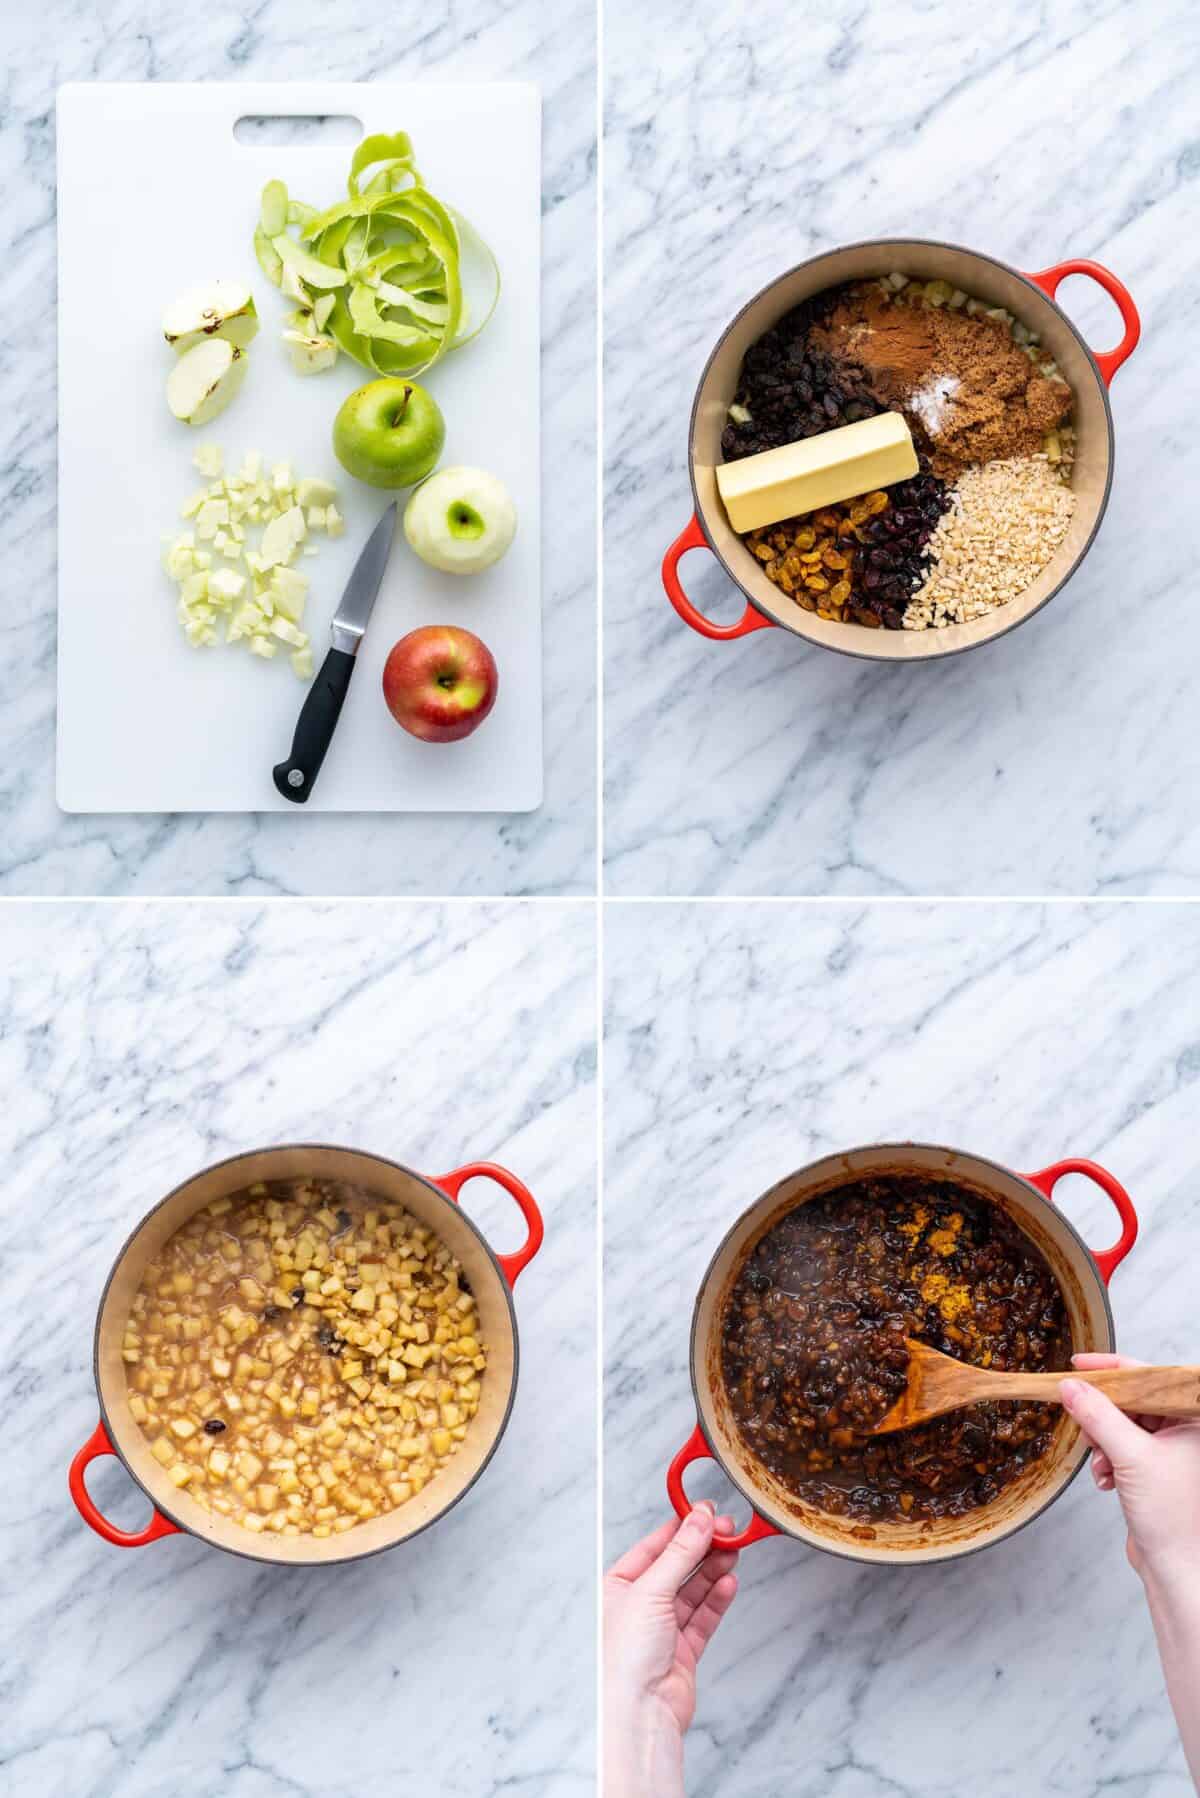
- Peel, core, and chop the apples small.
- Add the chopped apple, raisins, golden raisins, dried cranberries, orange juice, lemon juice, apple cider, brown sugar, almonds, cinnamon, ginger, nutmeg, allspice, cloves, salt, and butter to a medium-large pot over medium heat.
- Once boiling, cover the pot, turn the heat down to a simmer, and cook 30 minutes, stirring occasionally. After that, remove the lid and continue cooking uncovered until the mixture has turned dark and is thickened, about 15 minutes, stirring frequently.
- Remove from the heat and stir in the orange zest, lemon zest, and brandy. Let it cool completely before using to make mince pie or mince tarts.
Step 2: Make the Dough:
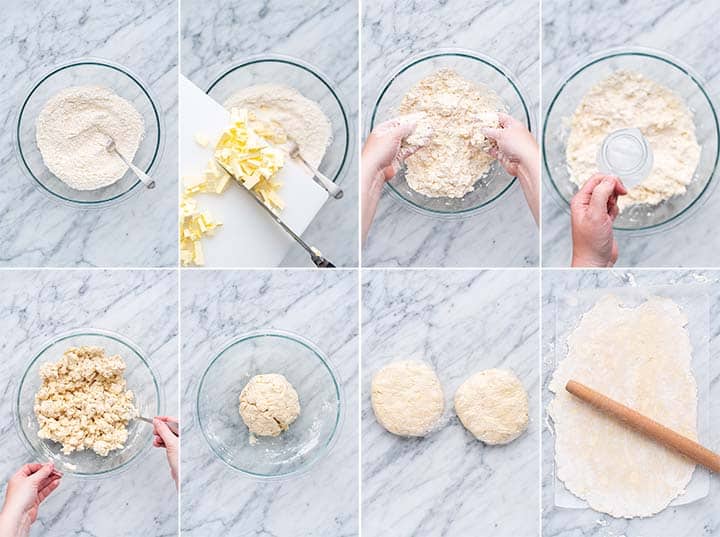
- Whisk together the flour and salt in a large bowl.
- Add the chilled, diced butter.
- Cut the butter into the dry ingredients with a fork, a pastry cutter, or your fingertips. It should look crumbly, with some pieces of butter the size of small peas.
- Drizzle the water in a little at a time, mixing as you go.
- You can mix the dough with a fork, but it works best mixing with your fingertips.
- Add just enough water so it comes together to form a ball of dough (you may need more or less water).
- Divide the dough ball into 2 equal parts. Roll each into a ball, flatten each ball slightly into a disk, wrap them in plastic wrap, and refrigerate until chilled, about 30 minutes.
- After chilling, place 1 disk of dough onto a floured work surface. Working from the center out, roll the dough out to a rectangle about 11 to 12 by 16 to 18 inches.
Step 3: Stamp Out the Dough Shapes You Need:
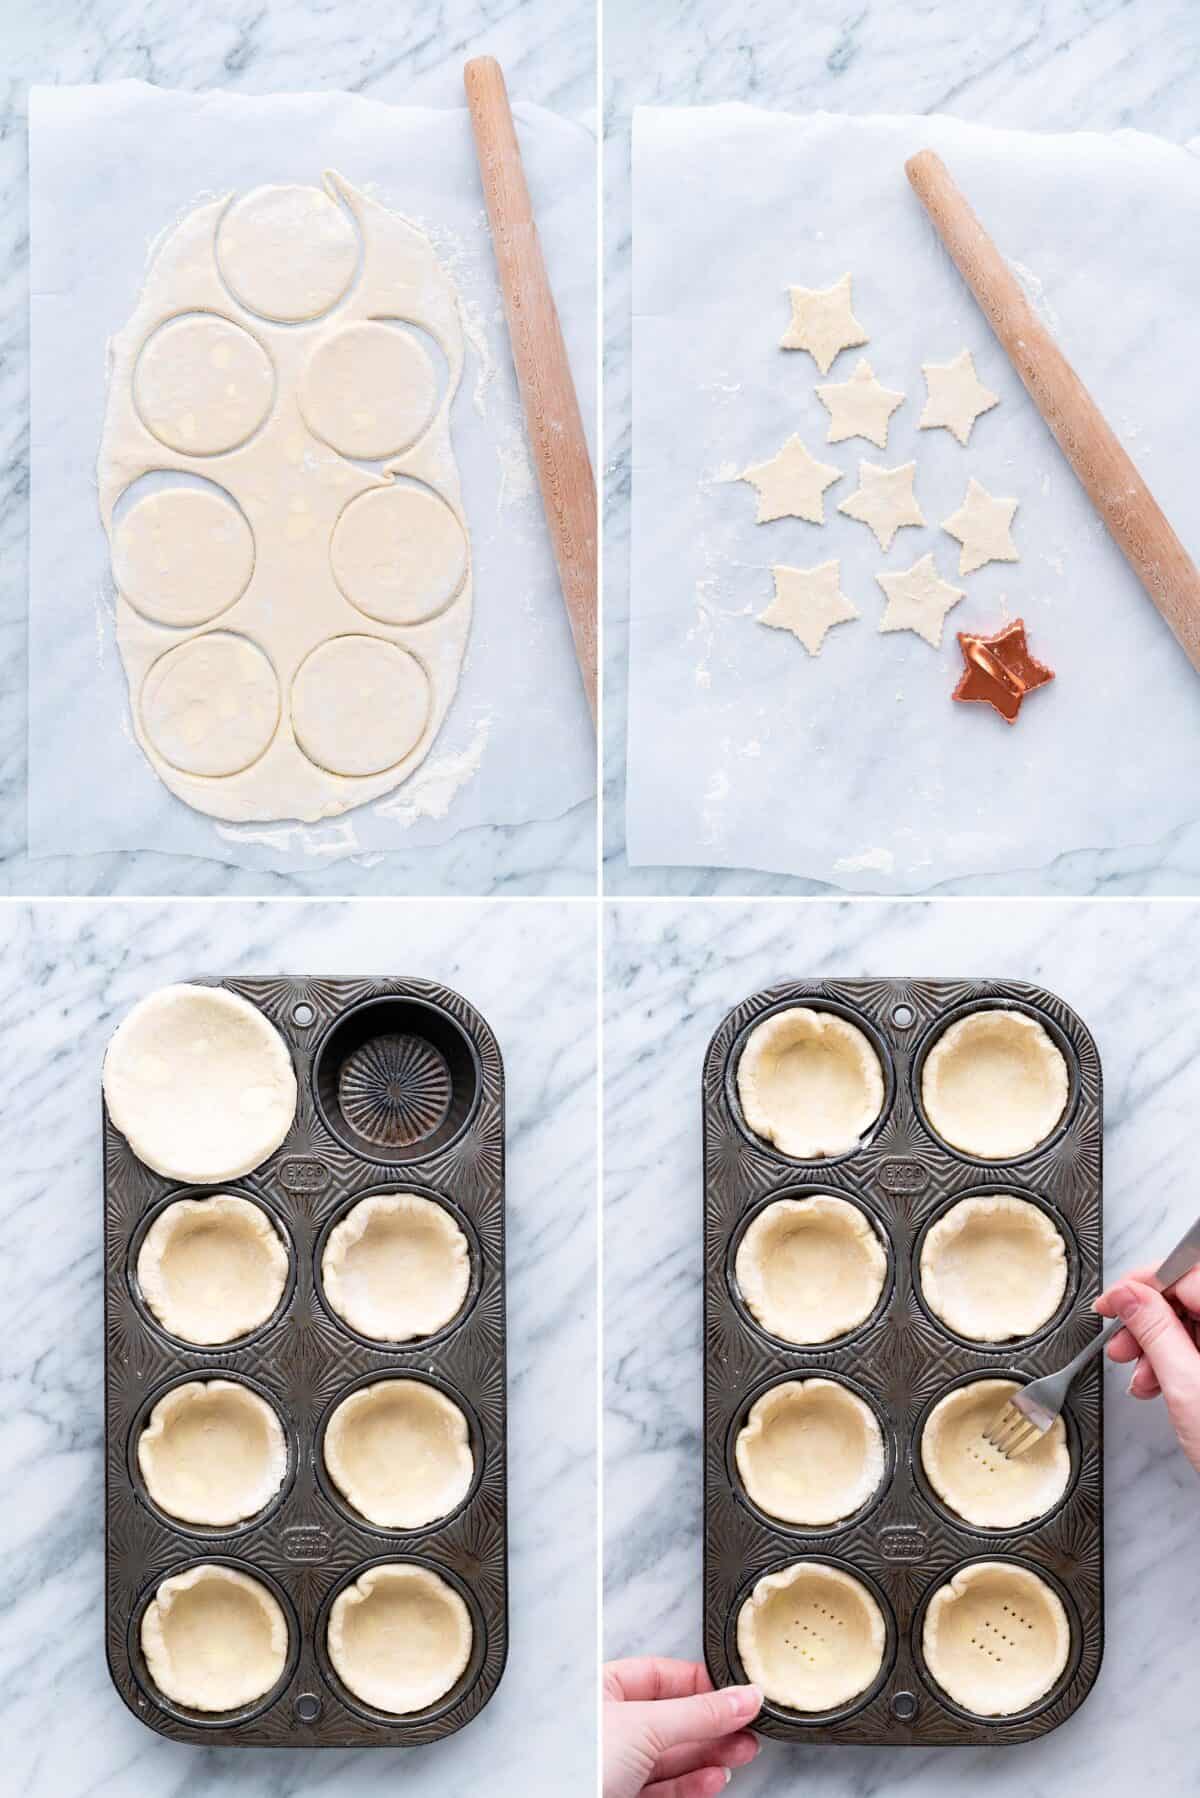
- To make the tarts in a regular muffin pan, you will need 16 (3.5-inch) circles.
- And you will need 16 (2 to 2 ¼-inch) stars for topping. Stamp out as many as you can, and then repeat this process with the second ball of dough. Gather the dough scraps, re-roll the dough, and stamp out more if needed.
- Gently press each circle of dough into a muffin well in a muffin pan.
- Use a fork to poke a few holes in the bottom crust of each tart.
Note: Instead of stars, feel free to do whatever shape you like on top.
Step 4: Fill the Tarts with Mincemeat Filling:
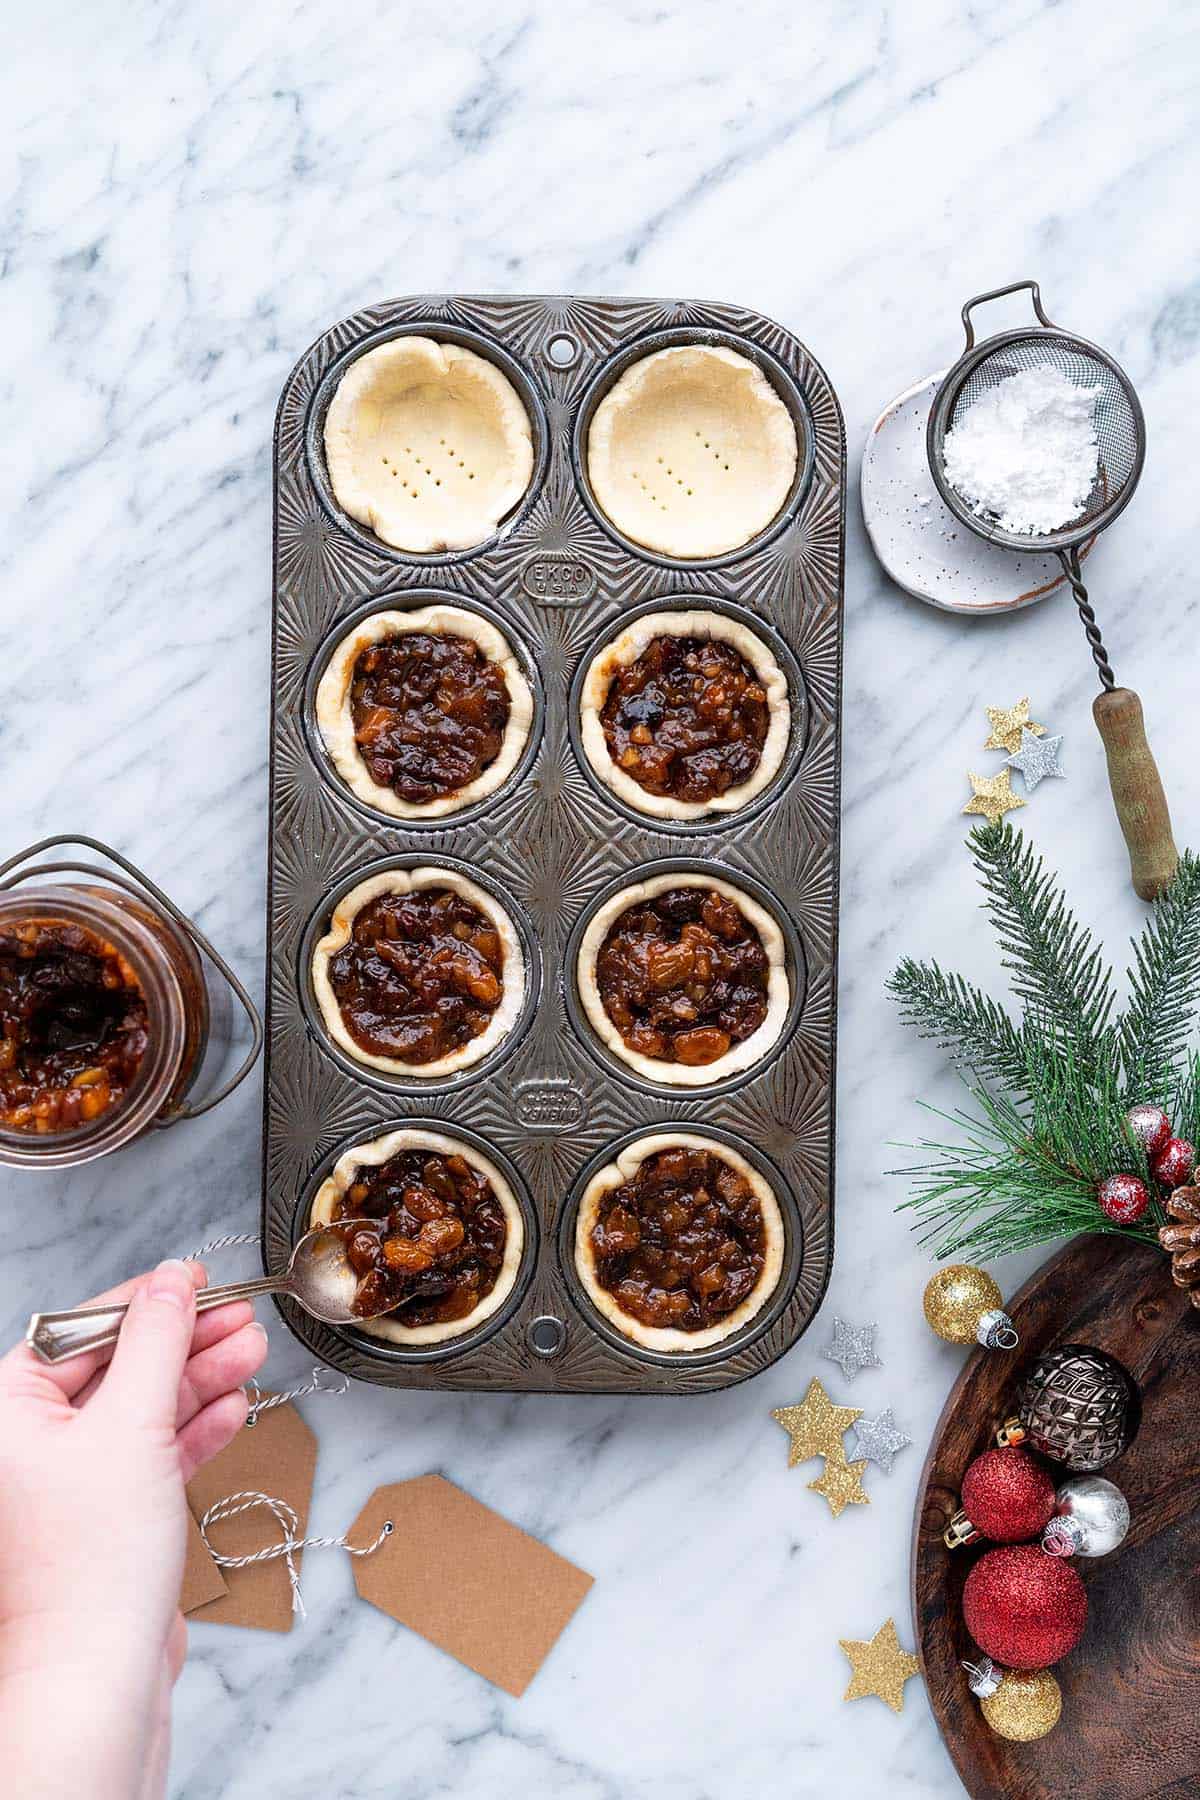
Fill each muffin well about ¾ full with mincemeat filling (about 2 tablespoons per tart), making sure the filling is compact and there are no air bubbles.
Step 5: Put Stars and Eggwash on the Tarts:

- Place 1 star on top of each tart.
- Lightly brush each star with eggwash, discarding any extra eggwash. Bake in an oven preheated to 400F until the tarts are golden, about 20 to 22 minutes.
Step 6: Cool and Dust with Powdered Sugar:
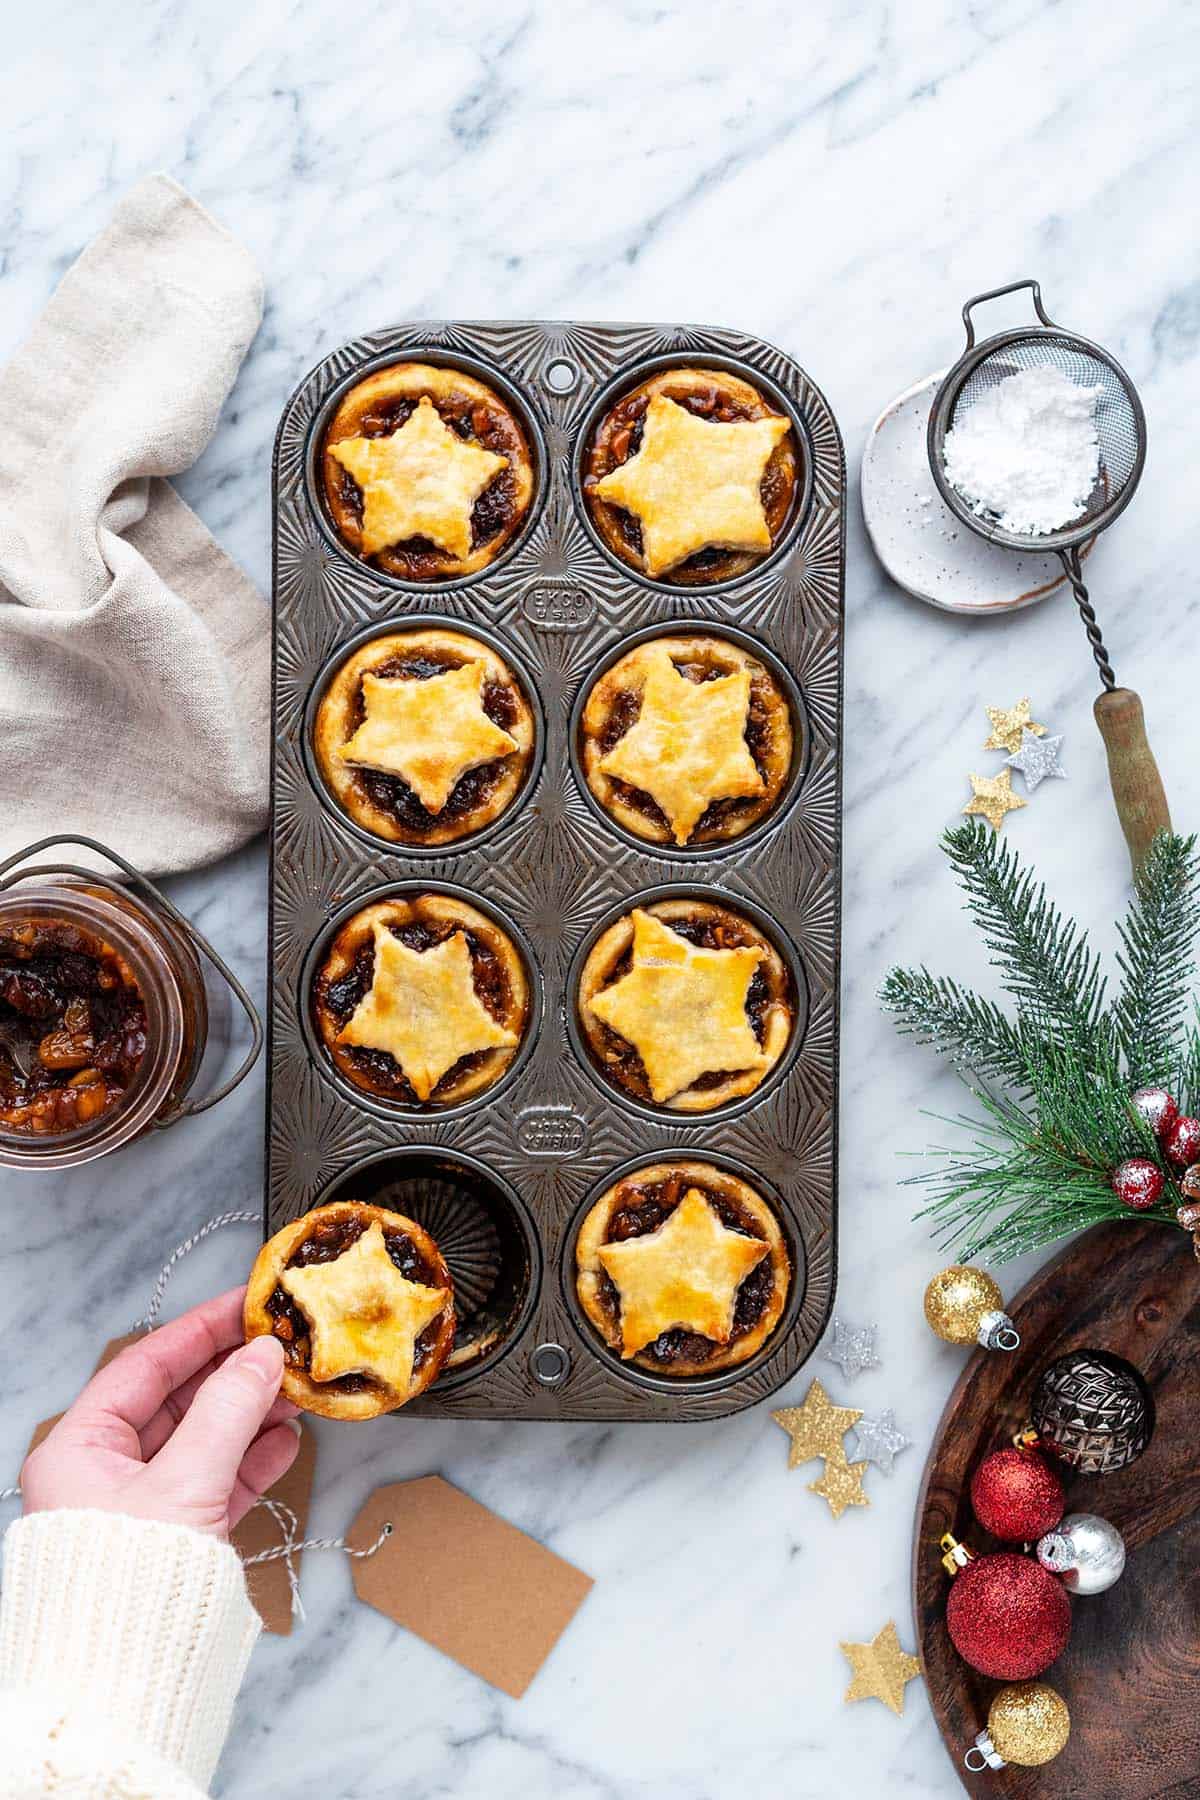
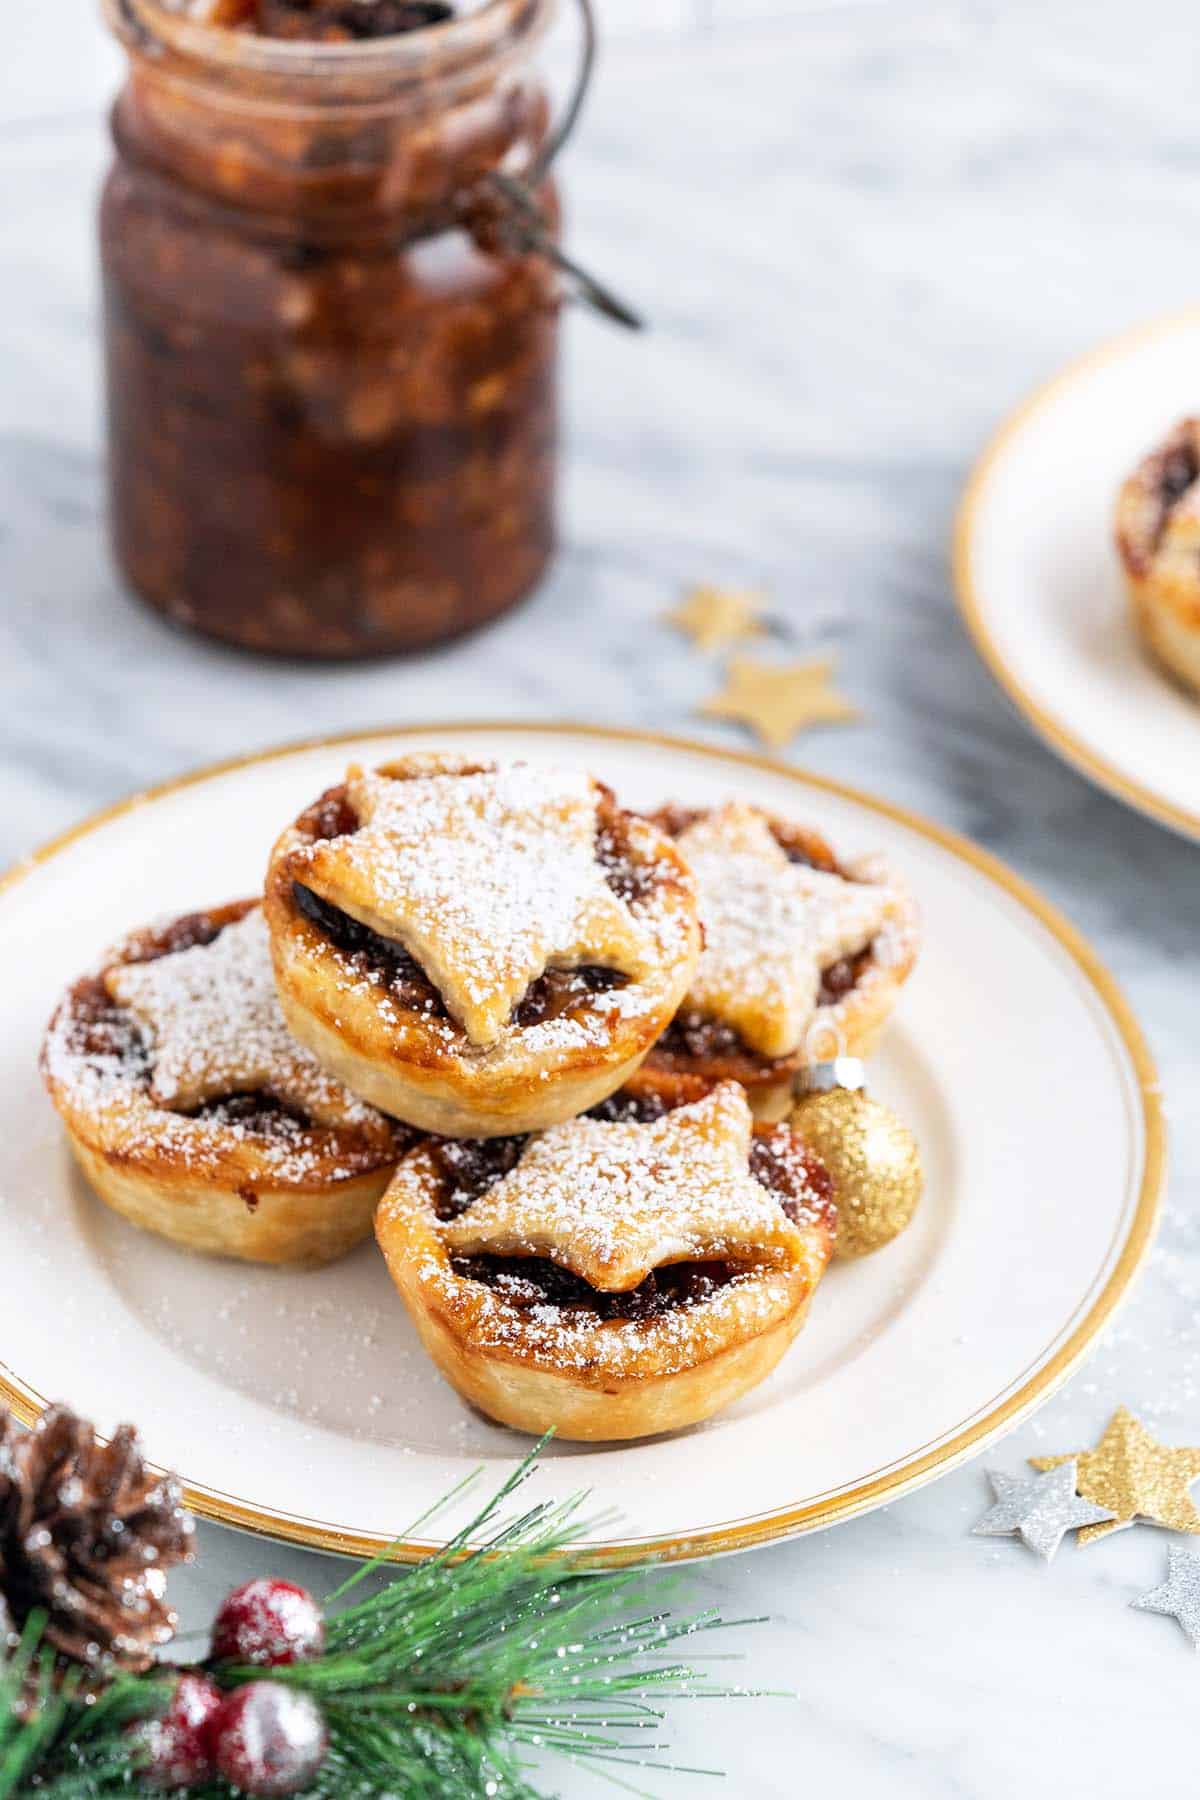
Let the little mince pies cool for 15 minutes in the tray before removing (if you run a paring knife along the outside of each tart, they should pop right out). Lightly dust with powdered sugar.
Mincemeat Tarts and Pie FAQs
How Long Does Mince Pie Last?
You can store mince tarts and pie in an airtight container in the fridge for up to 1 week.
After they’ve been in the fridge, I like to reheat them before serving. To so do, preheat the oven to 350F, put the tarts on a baking tray, and bake until warm, about 5 to 8 minutes.
Can I Make Mincmeat Pies Instead of Tarts with This Recipe?
Yes! You can also make 1 (9-inch) double-crust pie with this recipe. Bake it in a 400F oven until golden, about 45 minutes to 1 hour.
Can You Freeze Mincemeat Tarts?
Yes! You can freeze mince tarts and mince pie.
To freeze these tarts, let them cool to room temperature, and then store them layered between pieces of parchment paper in an airtight container for up to 3 months.
When you want to serve them, thaw them to room temperature and then reheat them in a 350F oven on a baking tray for 5 to 8 minutes.
More Festive Christmas Recipes to Make
- Copycat Starbucks Cranberry Bliss Bars
- Spiced Gingerbread Scones
- Eggnog Muffins with Cranberry Filling
- Gingerbread Cocktail

Let's Connect

Did you make this recipe? Please rate it and leave a comment below. You can also tag @anediblemosaic on social media.
To stay up-to-date, follow me on Facebook, Instagram, Pinterest, and Twitter!
Mincemeat Tarts Recipe
Ingredients
- 2 ½ cups all-purpose flour
- ¾ teaspoon salt
- 1 cup unsalted butter chilled and diced
- ¾ cup ice water plus more as needed
- 4 cups mincemeat filling
- 1 large egg lightly beaten with 1 tablespoon water (for eggwash)
- 2 tablespoons powdered sugar for sifting on top of the tarts
Instructions
- Lightly brush the wells of a muffin pan with butter.
- Whisk together the flour and salt in a large bowl. Cut in the butter with a fork, a pastry cutter, 2 butter knives, or your fingertips. It should look crumbly, with some pieces of butter the size of small peas.
- Drizzle the water in a little at a time, mixing as you go (you can use a fork to mix, but it works best mixing with your fingertips). Add just enough water so it comes together to form a ball of dough (you may need more or less water).
- Divide the dough into 2 equal parts. Roll each into a ball, flatten each ball slightly into a disk, wrap them in plastic wrap, and refrigerate until chilled, about 30 minutes.
- Place 1 disk of dough onto a floured work surface. Working from the center out, roll the dough out to a rectangle about 11 to 12 by 16 to 18 inches.
- To make the tarts in a regular muffin pan, you will need 16 (3.5-inch) circles and 16 (2 to 2 ¼-inch) stars for topping (or whatever shape you like for topping). Stamp out as many as you can, and then repeat this process with the second ball of dough. Gather the dough scraps, re-roll the dough, and stamp out more if needed.
- Gently press each circle of dough into a muffin well in a muffin pan. Use a fork to poke a few holes in the bottom crust of each tart.
- Fill each muffin well about ¾ full with mincemeat filling (about 2 tablespoons per tart), making sure the filling is compact and there are no air bubbles.
- Place 1 star on top of each tart. Lightly brush each star with eggwash, discarding any extra eggwash.
- Bake in an oven preheated to 400F until the tarts are golden, about 20 to 22 minutes.
- Let them cool for 15 minutes in the tray before removing (if you run a paring knife along the outside of each tart, they should pop right out).
- Lightly dust with the powdered sugar.
Faith's Tips
- The Shortcut Version: Use store-bought pie dough and store-bought mincemeat filling.
- Storage: You can store mince tarts in an airtight container in the fridge for up to 1 week. After they’ve been in the fridge, I like to reheat them before serving (but reheating is optional; these are also delicious cold). To so do, preheat the oven to 350F, put the tarts on a baking tray, and bake until warm, about 5 to 8 minutes.
- Freezer-Friendly: To freeze these tarts, let them cool to room temperature, and then store them layered between pieces of parchment paper in an airtight container for up to 3 months.
- To Make a 9-Inch Pie Instead: You can also make 1 (9-inch) double-crust pie with this recipe. Bake it in a 400F oven until golden, about 45 minutes to 1 hour.
Nutrition


Susan says
Pretty and so delicious. Thank you for sharing your recipe. I plan on making them every year. All your tips were helpful too.
Betsy says
These are absolutely beautiful and full of festive flavor. My new favorite Christmas dessert!