An Edible Mosaic™

Everyday Fare With Extraordinary Flair

  • Facebook
  • Google+
  • Instagram
  • Pinterest
  • RSS
  • Twitter
  • about
    • faq
    • legal
  • recipes
  • books
  • portfolio
  • my other blog
  • press
  • work with me
  • contact

Home » Recipes » Swiss Cheese and Thyme Homemade Gluten Free Crackers

Swiss Cheese and Thyme Homemade Gluten Free Crackers

July 20, 2018 by Faith Leave a Comment

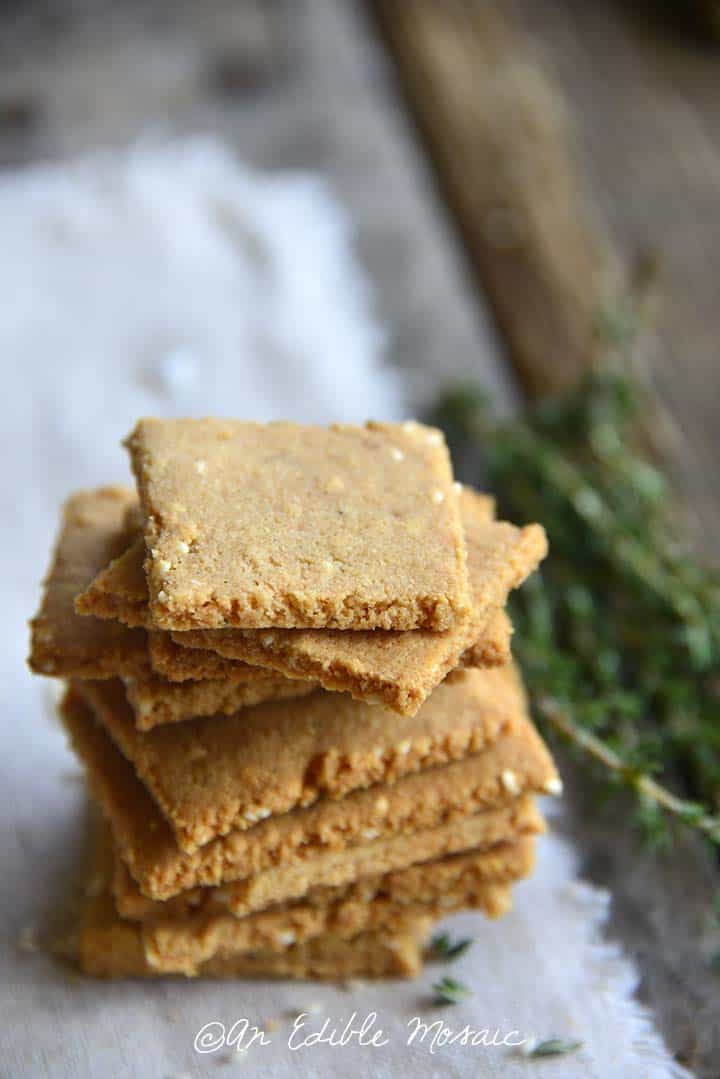
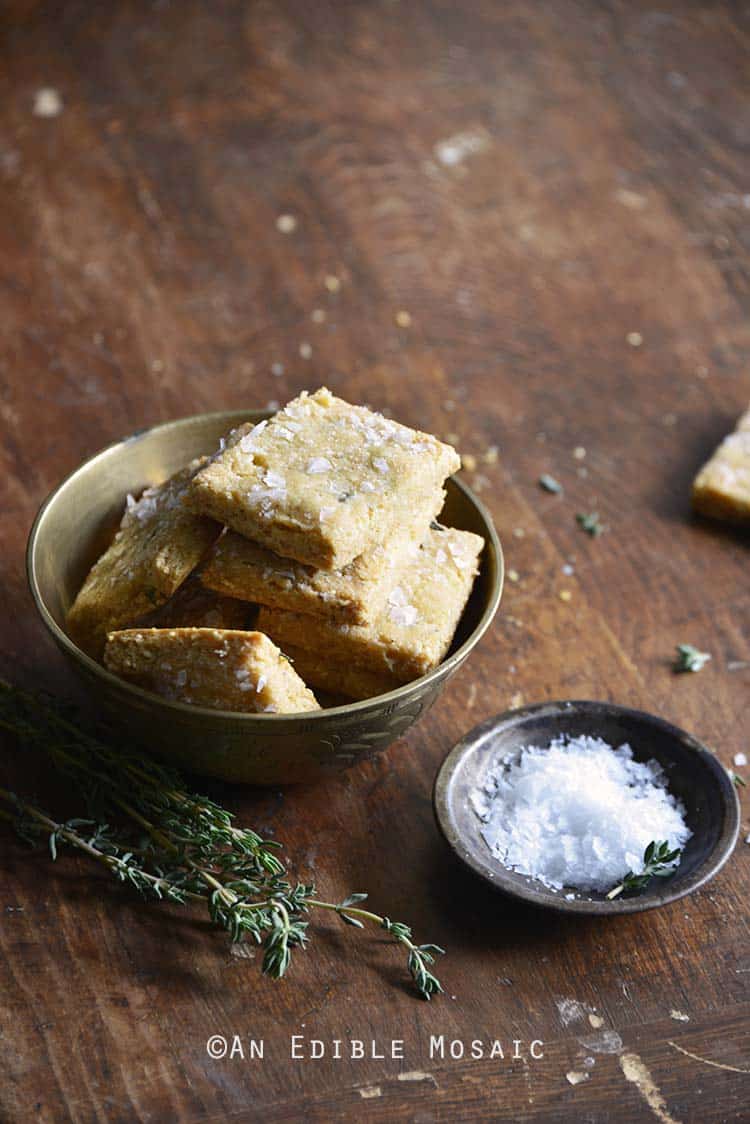
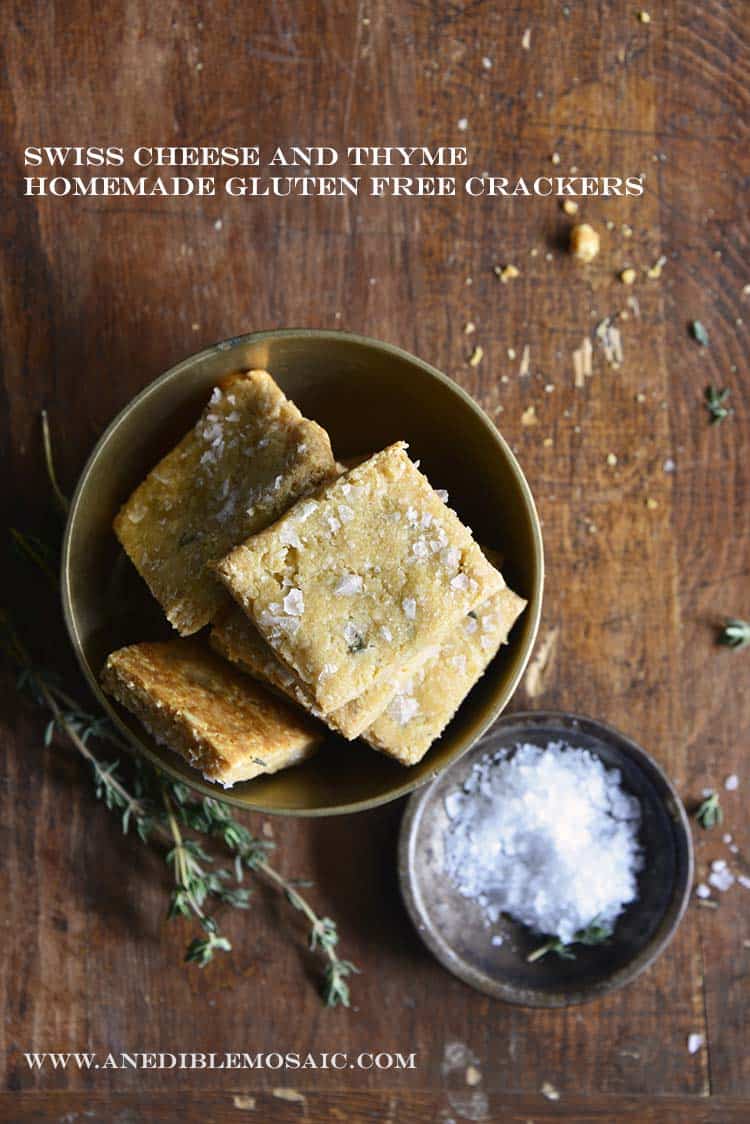
Swiss Cheese and Thyme Homemade Gluten Free Crackers are crispy with a slightly nutty cheesy flavor and a good thickness that makes them sturdy enough to serve with dip.

Swiss Cheese and Thyme Homemade Gluten Free Crackers Front View

Gluten free baking is its own entity. Gluten is a protein found in wheat, rye, and barley, and it helps give regular baked goods their structure, rise, and chewy texture. Baking without gluten can yield wonderful results in everything from gluten free crackers, to cookies, muffins, and breads. However, the key is to understanding which gluten free flours to use.

This recipe for Swiss Cheese and Thyme Homemade Gluten Free Crackers is a spin-off of my Gluten Free Savory Parmesan-Garlic Crackers. Here, I amped up the cheese flavor with Swiss cheese, which also adds a bit of nuttiness. Additionally, I used fresh thyme instead of dried herbs to pack a punch. These gluten free crackers are great for when you’re feeling snacky; they’re perfect for serving with cheese and are also sturdy enough for dipping.

Baking with Gluten Free Flours

There are so many gluten free flours available out there, I want to briefly touch on a few of them that I use most frequently.

Almond Flour

Almond flour is made from ground blanched almonds; it’s similar to almond meal, but almond meal also contains the almond skins. I find that almond flour gives a “white flour” look to baked goods, and almond meal results in a “whole wheat” look. Almond flour lends a slightly nutty flavor to baked goods, and it also results in great structure. It’s fairly easy to work with and generally won’t dry out baked goods because it doesn’t absorb too much liquid.

I make a lot of baked goods using almond flour as the main flour.

Coconut Flour

I don’t typically use coconut flour as the main flour in my baked goods for a couple reasons. First of all, personally I find coconut flour to have a strong coconut flavor. Additionally, I’m not entirely crazy about the texture of baked goods made with just coconut flour. This is because coconut flour is typically used in conjunction with a lot of eggs (because the eggs act as binder so the baked good doesn’t crumble apart because of how dry coconut flour is), and I find the final product too eggy. Lastly, coconut flour absorbs a lot of liquid, so it can be a bit more difficult to work with.

In general, if you’re trying to replace wheat flour with coconut flour, use 1/4 the amount of coconut flour. For example, if a recipe calls for one cup wheat flour, you would use 1/4 cup coconut flour (and I typically wouldn’t use more than 1/4 cup coconut flour in a recipe). I like to use a little bit of coconut flour in conjunction with other gluten free flours (such as almond flour), but I don’t usually use coconut flour as the base by itself.

Tapioca Flour

Tapioca flour (also called tapioca starch) comes from the cassava plant. I find that tapioca flour lends lightness and a bit of chew to gluten free baked goods, which can help achieve a good simulation of regular baked goods containing gluten.

When I’m making gluten free baked goods, I don’t typically use tapioca as the main flour. Instead, I’ll use a bit of it (around one to four tablespoons) for every one cup or so of almond flour. Tapioca flour is also used as a thickener in sauces, similar to cornstarch.

Chickpea Flour

Also known as garbanzo bean flour, besan, or gram flour, chickpea flour is a really useful gluten free flour. It lends beautiful color to baked goods, and also helps with rising. Chickpea flour can have a bean-y flavor (surprise, surprise, lol!), but it’s covered well in the final product when used with other flours.

Swiss Cheese and Thyme Homemade Gluten Free Crackers in Bowl

Playing With the Flavor of These Crackers

You can easily change the flavor profile of these homemade gluten free crackers; just use a different kind of cheese and herb! One thing to note, be sure to use a hard cheese, and not something soft like cream cheese or semi-soft like mozzarella. Here are a few combinations I like: cheddar and minced dried cranberries; Gruyere and dried herbs de Provence; and Gouda and rosemary.

More Gluten Free Crackers Recipes:

  • Nutty Spiced Pumpkin Crackers from An Edible Mosaic
  • Sweet Potato and Rosemary Crackers from Rachel Cooks
  • Ritz-Style Crackers from Gluten Free on a Shoestring
  • 1-Bowl Vegan Crackers from Minimalist Baker
  • Date and Walnut Paleo Crispbread from An Edible Mosaic

Close Up of Swiss Cheese and Thyme Homemade Gluten Free Crackers

Print
Swiss Cheese and Thyme Homemade Gluten Free Crackers
Author: Faith Gorsky
Prep time:  10 mins
Cook time:  28 mins
Total time:  38 mins
Yield: 16 crackers, 4 servings
 
These savory Gluten Free Crackers are crispy with a slightly nutty cheesy flavor and a good thickness that makes them sturdy enough to serve with dip.
Ingredients
  • 1 cup (112 g) almond flour
  • ¼ cup (30 g) chickpea flour
  • ½ oz (15 g) freshly grated Parmesan cheese
  • 3 oz (45 g) Swiss cheese, grated
  • 1 teaspoon minced fresh thyme leaves
  • ½ teaspoon onion powder
  • ⅛ teaspoon ground black pepper
  • 1 tablespoon olive oil
  • 1 to 3 tablespoons water (slightly more or less as needed)
  • ½ teaspoon flaky sea salt
Instructions
  1. Preheat oven to 350F.
  2. Whisk together the almond flour, chickpea flour, Parmesan, Swiss cheese, thyme, onion powder, and black pepper in a medium bowl. Stir in the olive oil; start with 1 tablespoon water and add enough water so it comes together as a dough.
  3. Line an 8 by 8-inch baking dish with parchment paper so that the paper hangs over 2 sides. Press the dough into the prepared baking dish, using a metal spatula to even out the dough.
  4. Once the dough is pressed into uniform thickness, carefully use the overhanging parchment paper to pull out the dough in 1 square. Sprinkle on the sea salt, lightly pressing it into the top of the dough, and then cut it into 16 crackers.
  5. Arrange the crackers about 1 inch apart on a large baking sheet and bake until the crackers are golden and crisp, about 25 to 30 minutes, rotating the tray once. Cool completely before removing from the tray and serving.
  6. Store in an airtight container at room temperature for up to 1 month.
3.5.3251

Swiss Cheese and Thyme Homemade Gluten Free Crackers with Description

Disclosure: This post contains Amazon affiliate links to products I believe in, which means that even though it doesn’t cost you anything extra, I will receive a small amount of money from the sale of these items, which helps me keep this site alive – thank you for helping to support An Edible Mosaic!

Filed Under: Recipes Tagged: Appetizers, Gluten Free Crackers, Gluten-Free, Grain-Free, Homemade Crackers, Snacks, Swiss Cheese, Thyme

Leave a Reply Cancel reply

Your email address will not be published. Required fields are marked *

Recipe Rating


Rate this recipe:  


Hello! I’m Faith and I write An Edible Mosaic. This is my recipe collection of international favorites and updated American classics, with an emphasis on seasonal dishes. I focus on real foods that sustain body and mind, bring people together, and make a house a home. Welcome to my mosaic of recipes.

Languages

archives

categories

meet faith

I’m Faith Gorsky, the writer, cook, and photographer behind An Edible Mosaic. My goal is to inspire you to get in the kitchen and try something new! Feel free to email me with questions or comments.

  • Facebook
  • Google+
  • Instagram
  • Pinterest
  • RSS
  • Twitter

faith's book

on instagram

anediblemosaic

anediblemosaic
Pelmeni are Russian meat dumplings frequently serv Pelmeni are Russian meat dumplings frequently served with a dollop of sour cream and a sprinkling of fresh dill. You can boil or fry them, they freeze like a dream (and they cook directly from frozen!), and they make a big batch so you’ll have a freezer stash of easy dinners for busy nights. But fair warning, these are definitely a labor of love. I made them last spring on a Zoom call with ma chérie Evelyne of @cultureatz that involved ridiculous amounts of laughter, and the shenanigans of us hand making about 100 dumplings each! I’m definitely a bad blogger for not sharing the recipe until now lol. But it’s (finally!) up and you can check it out on @anediblemosaic 🥰 —> https://www.anediblemosaic.com/pelmeni-recipe-russian-dumplings/ #dumplings #dumplingsfordays #russianfood #pelmeni #foodstyling #foodstylist #foodphotography #photography #moodygrams #lightandshadow
The other day Dan and I were at an antique store a The other day Dan and I were at an antique store and we happened to find one of the vendors who was putting out #vintage #valentinesday cards she had found in one of her storage units. 💌 These are from the 1930s/1940s! She was a third generation antique dealer and she said she still has several full rooms to sort through! (I love the treasure hunt of that, it’s like exploring in your grandparents’ attic.) Anyway, I had to buy a couple cards because they’re completely charming. #happyvalentinesday, lovelies. 🥰 #valentines #romantic #flatlay #valentinesmood #vintageprops #propstyling #propstylist #photography
#ad If you’re looking for a romantic meal to mak #ad If you’re looking for a romantic meal to make for your sweetheart for Valentine’s Day this weekend, you’ve come to the right place! This meal is easy, fast (no one will guess it whips up in less than 15 minutes!), and impressive. And soooo good. 🥰
 
What’s on the menu? Pan seared chicken in a savory cream sauce. Steamed green beans. And Fresh Blends Ready to Cook Idaho Potatoes!
 
Let’s talk sides first. Steamed green beans are easy, and they round out the meal well. Or you could go with broccoli if you want.
 
The real star of the side dish show are these flavorful @eagleeyeproduce potatoes! They’re family grown in Idaho. Fresh-cut, never cooked, never frozen, with no preservatives. And they cook up easily with a one-step cooking process (just 8 minutes in the microwave, or you can do them on the stovetop to get them crispy). Check out their website to find their store locator to see where they’re available near you --> https://eagleeyeproduce.com/store-locator/
 
And now the chicken! Inspired by the famous “Marry Me Chicken”, this recipe checks all the right boxes and has all the bells and whistles. Chicken cutlets cook up quick on the stovetop, and then a luscious cream sauce flavored with garlic, fresh herbs, and sundried tomatoes cooks in the same skillet. Take a look at the recipe in the comments below.
 
Who says a beautiful, romantic meal has to be complicated, right? ❤️
 
#homecooked #romanticdinner #valentinesday #valentinesdinner #saveur #foodandwine #f52grams #f52food #thekitchn #beautifulcuisines #foodstyling #foodphotograhphy #eeeeeats
“My dream concept is that I have a camera and I “My dream concept is that I have a camera and I am trying to photograph what is essentially invisible. And every once in a while I get a glimpse of her and I grab that picture.” - Leonard Nimoy 🌿 #photography #storytellingphotography #lightandshadow #moodygrams #flatlay #instamood
This small batch recipe of Red Velvet Cupcakes is This small batch recipe of Red Velvet Cupcakes is the perfect dessert for you and your sweetheart this Valentine's Day, and it's even more special because it was made for a cause. ❤️

This is the 5th year in a row that Julie from @thelittlekitchn has organized the Cookies for Kid's Cancer Valentine's Event to raise money and awareness for childhood cancer, and I'm honored to be part of it.

Cancer is the top cause of death of children by disease in the U.S. There are 40,000 U.S. children actively battling cancer right now. And the National Cancer Institute’s budget for childhood cancer is less than 4%.⁣
⁣
You can help make a difference by donating to @cookies4kids. Our goal is to raise at least $3000. Thank you to @OXO, @Mediavine and @Dixie_Crystals who have each pledged to match our donations raised through this campaign up to $3000!⁣

Find out more and grab my cupcake recipe in my latest blog post --> https://www.anediblemosaic.com/red-velvet-cupcakes-recipe-with-cream-cheese-frosting/

#helpingcookies #beagoodcookie #redvelvet #redvelvetcake #redvelvetcupcakes #valentinesday #valentinesfood #instacake #cakegram #cupcakesofinstagram #foodphotography #foodstyling #instasweets
I developed this recipe last year on a whim one af I developed this recipe last year on a whim one afternoon when I really just wanted a slice of chocolate cake. 🎉🙈 I wasn't going to post the recipe, but it was pretty and one thing led to another and I styled and snapped a few pictures. It really is crazy delicious and it whips up in just 10 minutes in the microwave (and it has just 5g net carbs per serving!). And so here it is, lol. Find the recipe on @anediblemosaic 😘 --> https://www.anediblemosaic.com/chocolate-keto-mug-cake-recipe/

#foodphotography #photography #lightandshadow #dslr #foodstyling #foodstylist #storytellingphotography #ketocake #ketochocolate #chocolategram #cakegram #instacake #mugcake #glutenfreecake
Load More... Follow on Instagram
Home | About | FAQ | Legal | Recipes | Books | Portfolio | My Other Blog | Press | Work with Me | Contact

Copyright © 2021 | Faith Gorsky, An Edible Mosaic™ | All Rights Reserved Design by Deluxe Designs