


This post may contain affiliate links, view our disclosure.
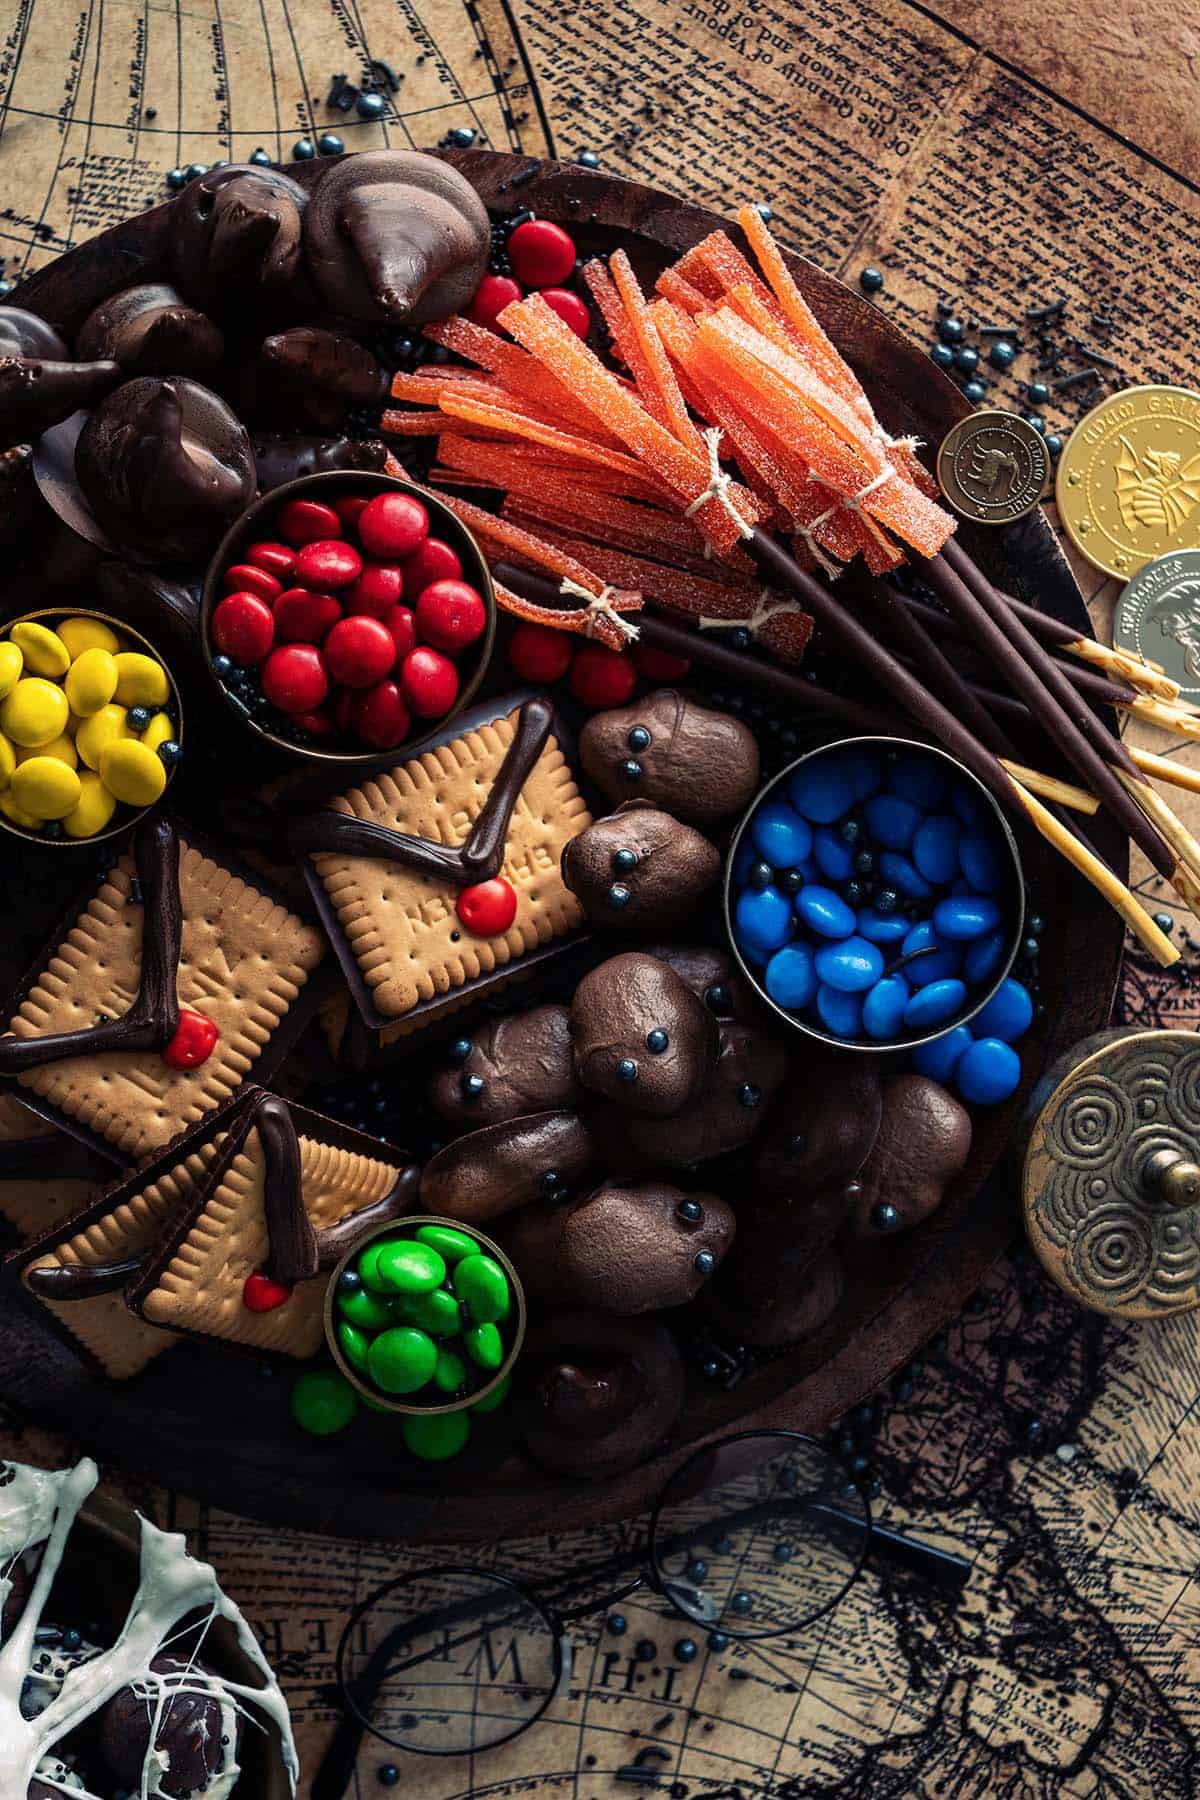
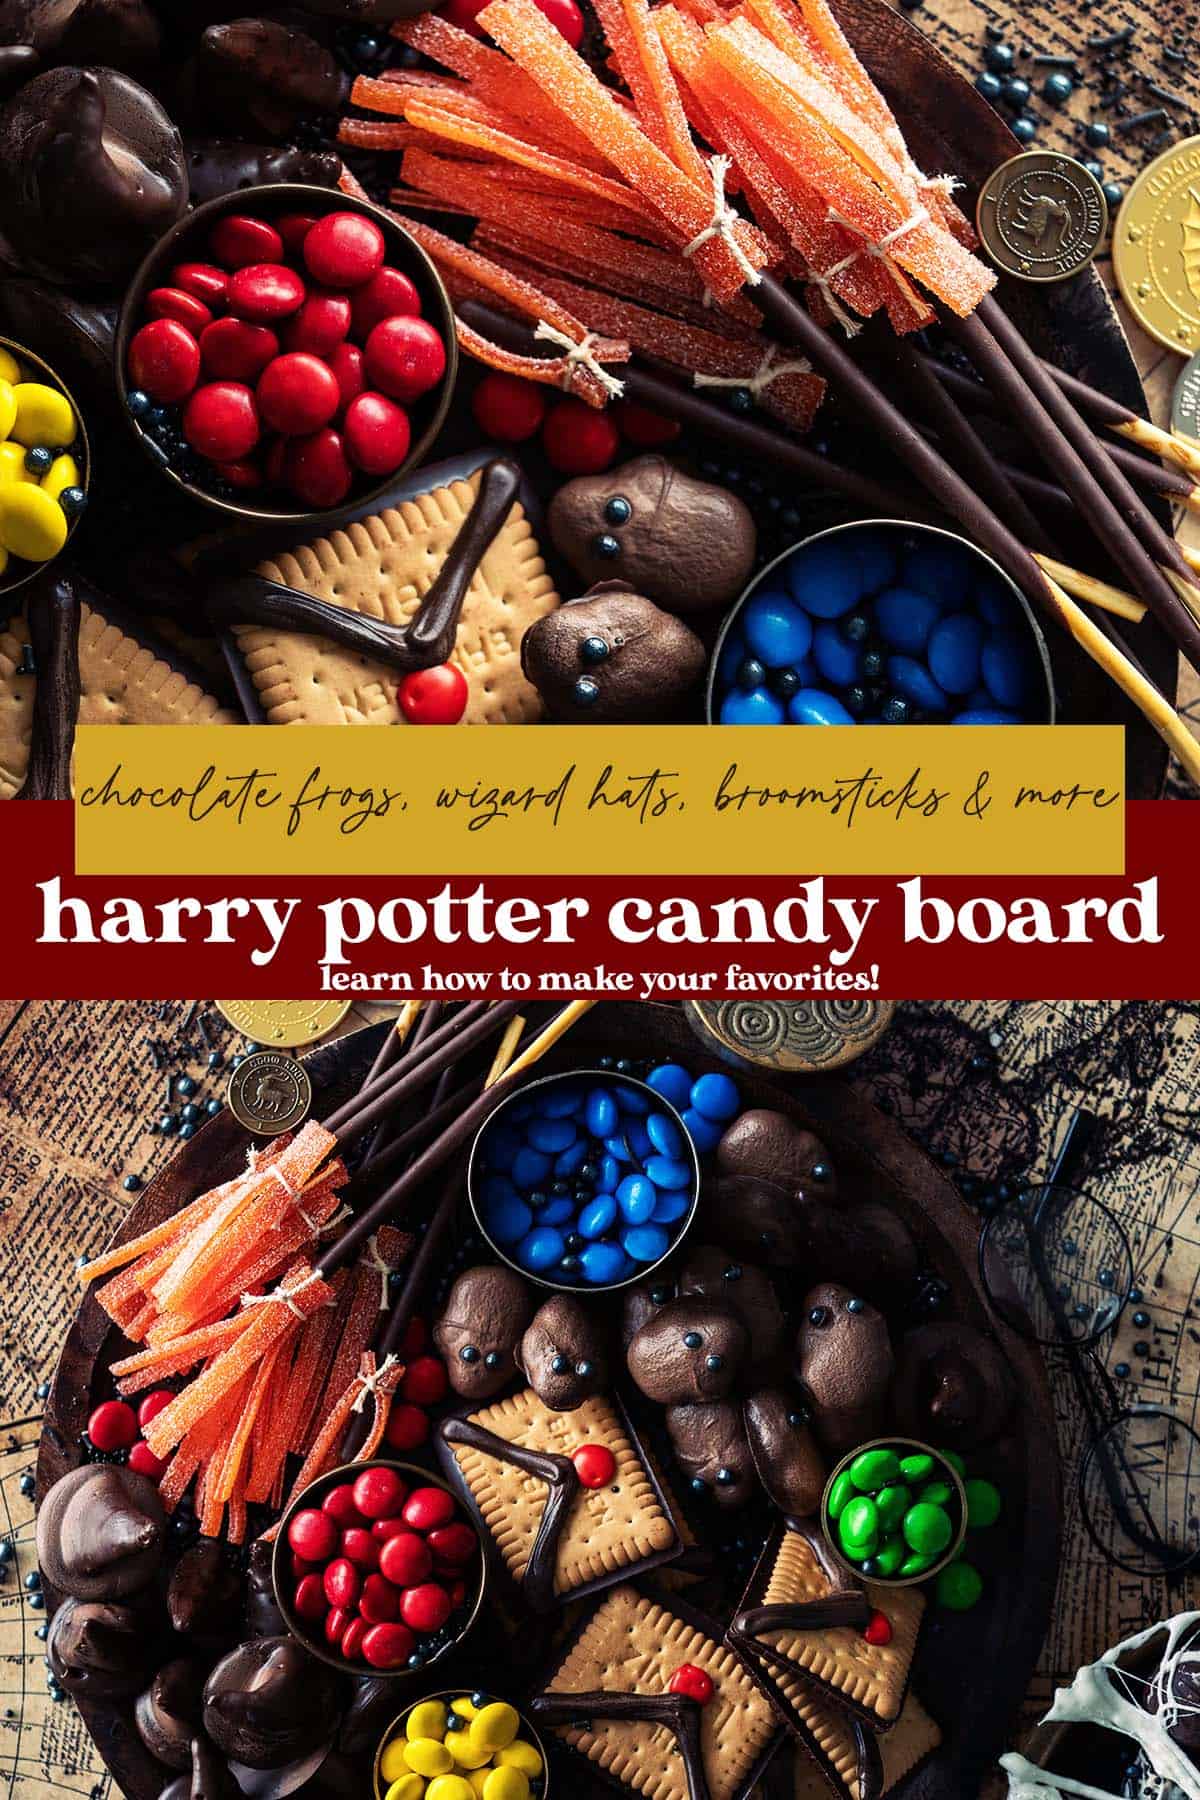
This Harry Potter sweets dessert board will teach you how to (easily) make your favorite candy from the books and movies! It makes a great snack or dessert tray for any Harry Potter-themed party (or movie night!) or Halloween gathering.
Did you know that July 31, 1980 is Harry Potter’s birthday? J.K. Rowling’s epic books painted every detail of that magical world, and the protagonist’s birthday is a date to remember.
Let’s celebrate! Harry Potter’s birthday cake was a little too obvious, lol. (Although I will always have a special place in my heart for the chocolate cake that Hagrid made Harry for his eleventh birthday).
But birthdays do call for sweet treats! That’s why I came up with this Harry Potter sweets board, which includes all your favorite candy from the books and movies.
Sweets were a big part of the Harry Potter series. It seems like just about everyone had a sweet tooth, or at least a soft spot for a sweet or two. (Even Harry with his treacle tart and Dumbledore with his sherbet lemon/lemon drops!)
There were sweets on the tea trolley on the Hogwarts Express, and of course the Honeydukes candy shop for wizards in Hogsmeade.
Not to mention all the other instances of candy mentioned throughout the Harry Potter books and movies. For example, Professor Lupin giving Harry chocolate after Harry’s encounter with the Dementors on the train ride to Hogwarts in Harry Potter and the Prisoner of Azkaban.
And this is just the tip of the iceberg in terms of sweets inspired by the Harry Potter series!
The best part is that all the Harry Potter candy I’m sharing is really easy to make. You can learn how to make it at home for your next book club night, movie marathon, Harry Potter-themed party, or Halloween party.
And if there’s a Harry Potter fan in your life, share the love and send this article to them!
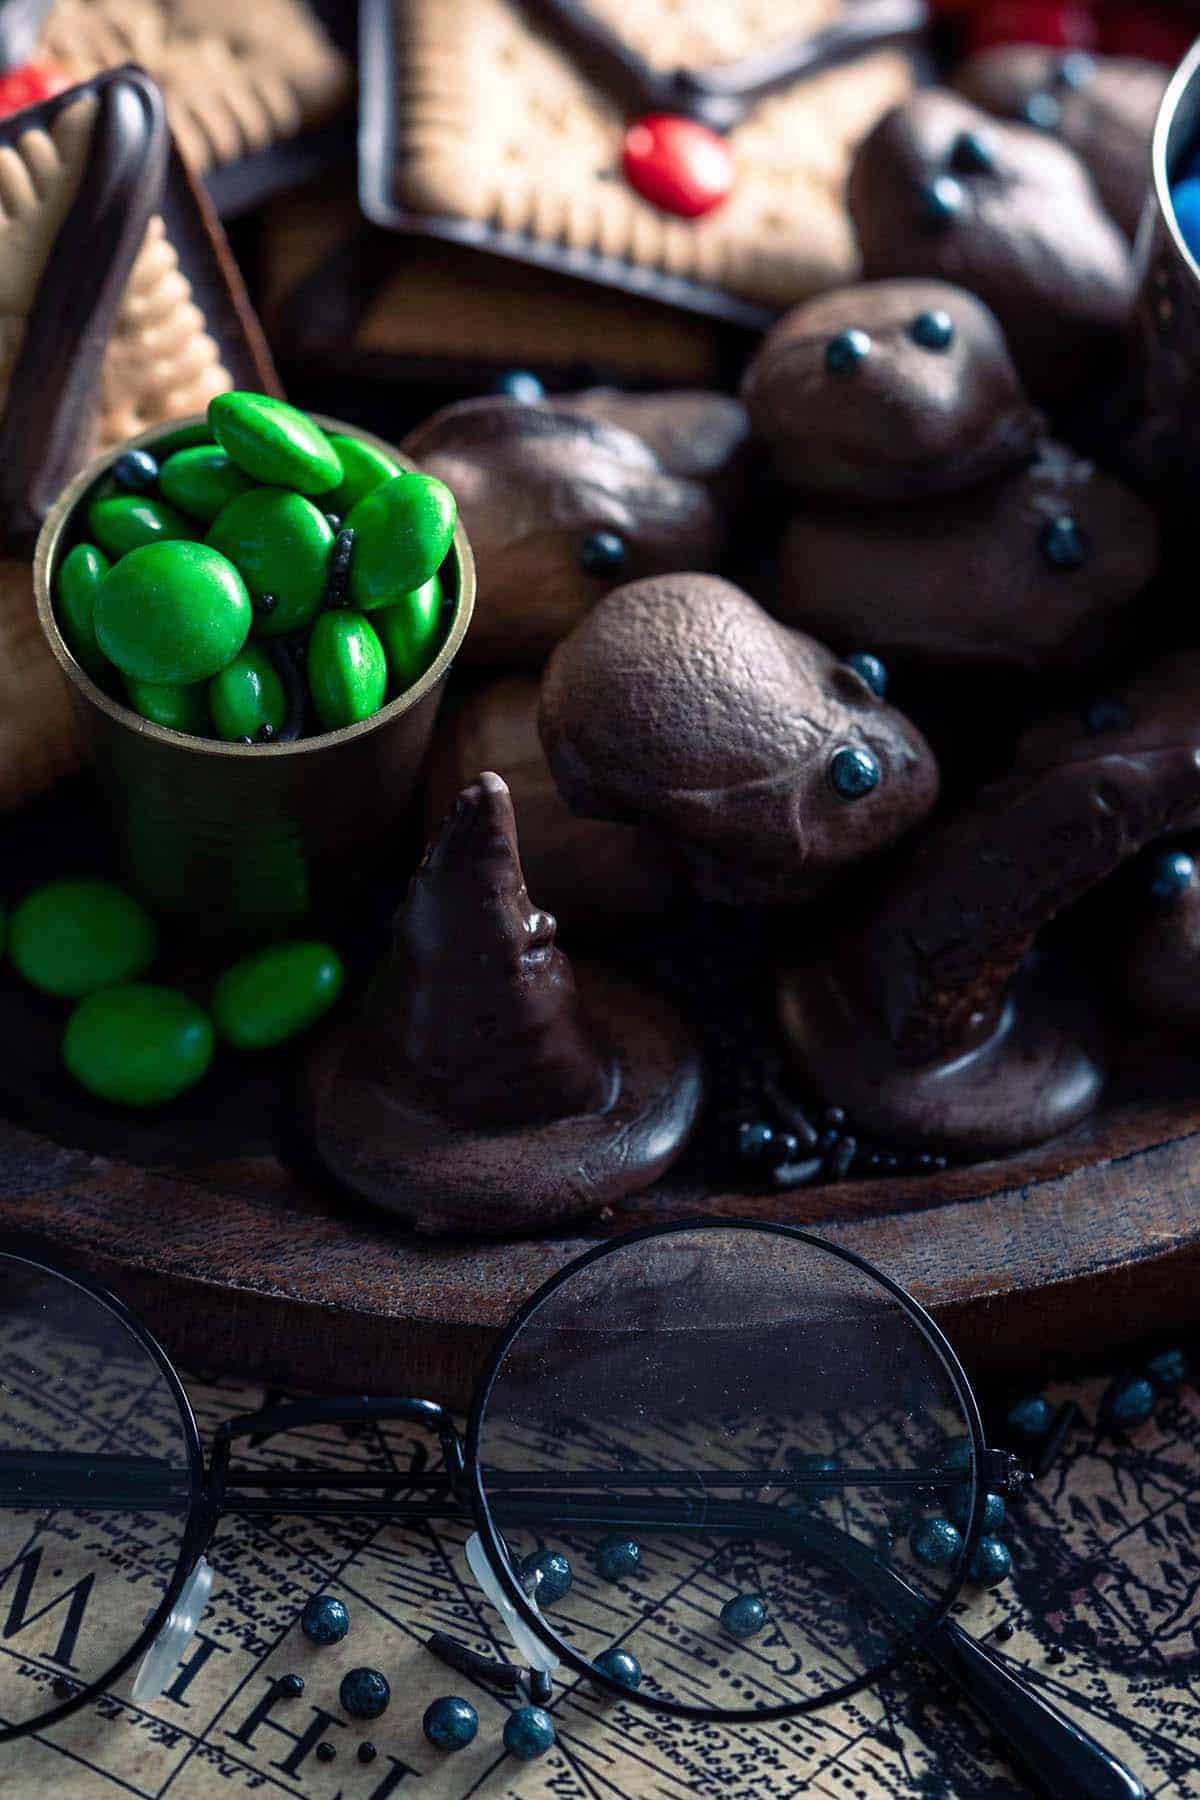
Harry Potter Chocolate Frogs

Chocolate frogs were one of the first sweets we were introduced to on the trolley during Harry Potter’s first train ride to Hogwarts. IMHO, they are the most iconic of all the Harry Potter sweets!. Of course the really cool thing about the chocolate frogs was that each came with a collectible card of a famous witch or wizard!
We don’t have the collectible cards, but I’m going to show you exactly how to easily make chocolate frogs at home without having to spend an arm and a leg buying them from Harry Potter World at Universal Studios.
There are two different ways you can make chocolate frogs at home:
- Use a candy frog mold (such as this silicone chocolate frog mold on Amazon), or
- Coat gummy frogs in chocolate.
I went with option two, coating gummy frogs in chocolate, which is definitely the quicker and easier option!
To Make Harry Potter Chocolate Frogs You’ll Need
- Gummi candy frogs – I used these HARIBO Frogs on Amazon; they were peach-flavored, which was surprisingly delicious paired with chocolate
- Chocolate melting wafers – I like to use melting wafers so I don’t have to temper the chocolate; my favorite is the Ghirardelli Dark Chocolate Flavored Melting Wafers
- Black pearl sprinkles – for the eyes on our chocolate frogs
How to Make Chocolate Frogs (The Easy Way!)
- Melt chocolate melting wafers in a microwave-safe bowl in the microwave or in a double boiler. (Or if you want to use real chocolate, temper it first.)
- Dip the frog-shaped gummy candy in the melted melting wafers candy (or the in the melted chocolate).
- Let the excess run off, and then place the chocolate-covered frogs onto a parchment paper-lined baking tray to set.
- Working quickly (before the candy coating sets), place 2 black pearl sprinkles on each frog where the eyes would be. I like to add the eyes to each frog right after I coat them because the candy can set quickly and once it’s set, the eyes won’t stick.
Chocolate Wizard Hats (Or Chocolate Sorting Hats)

In their most basic form, these are chocolate wizard hats. And when it comes to all the Harry Potter sweets I’m sharing with you, this is my favorite (taste-wise) because of the sweet and salty flavor combination – yum! And also, they’re pretty adorable.
We use Bugles for the main shape of the wizard hats. It works perfectly because Bugles are generally shaped like miniature witch and wizard hats, and no two look exactly alike. When you dip these salty bite-sized snacks in chocolate and place each on top of a small round piece of chocolate, they not only look the part, but they’re a completely addictive little treat!
And if you want, you can take these chocolate wizard hats one step further and make them into Harry Potter sorting hats! To do so, you’ll need to fill the inside of the Bugles with each of the four Hogwarts house colors (red, blue, green, and yellow). An easy way to do this is to dye vanilla buttercream and pipe it into the center of each Bugle before coating them in chocolate.
To Make Harry Potter Chocolate Wizard Hats (or Sorting Hats) You’ll Need
- Bugles – these are bite-sized, horn-shaped, crunchy, salty corn snacks; they are a great simulation of the shape of a witch hat
- Chocolate melting wafers – I like to use melting wafers so I don’t have to temper the chocolate; my favorite is the Ghirardelli Dark Chocolate Flavored Melting Wafers
How to Make Chocolate Wizard Hats
- Start out by sorting through your bag (or box) of Bugles, looking for the whole ones (they make the best witch and wizard hats!).
- Melt chocolate melting wafers in a microwave-safe bowl in the microwave or in a double boiler. (Or if you want to use real chocolate, temper it first.)
- Dollop or pipe circles of melted candy or chocolate (about the size of a quarter each) onto a parchment paper-lined baking tray. This is for the brims of our wizard hats.
- Dip the Bugles in the melted candy or chocolate, let the excess run off, and place each chocolate-covered Bugle on top of a chocolate circle.
- Let them set.
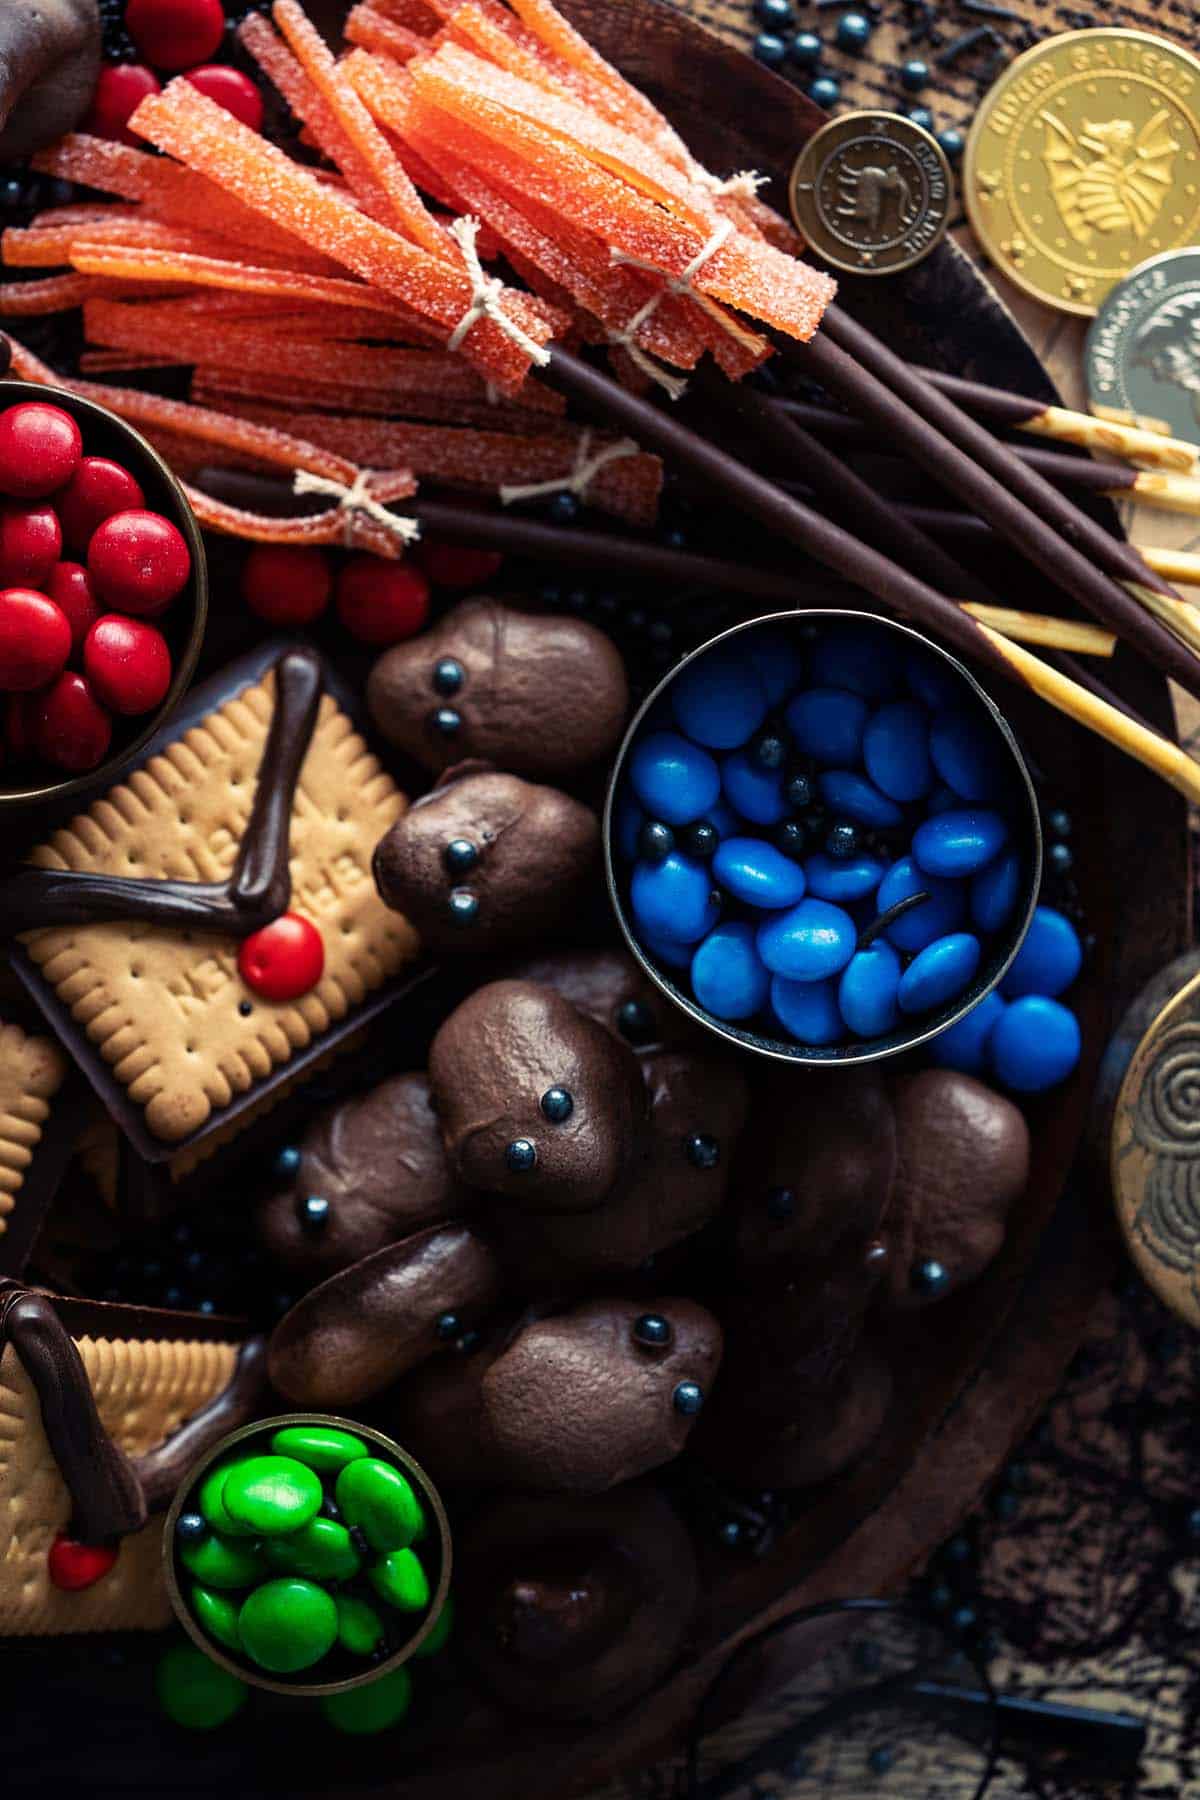
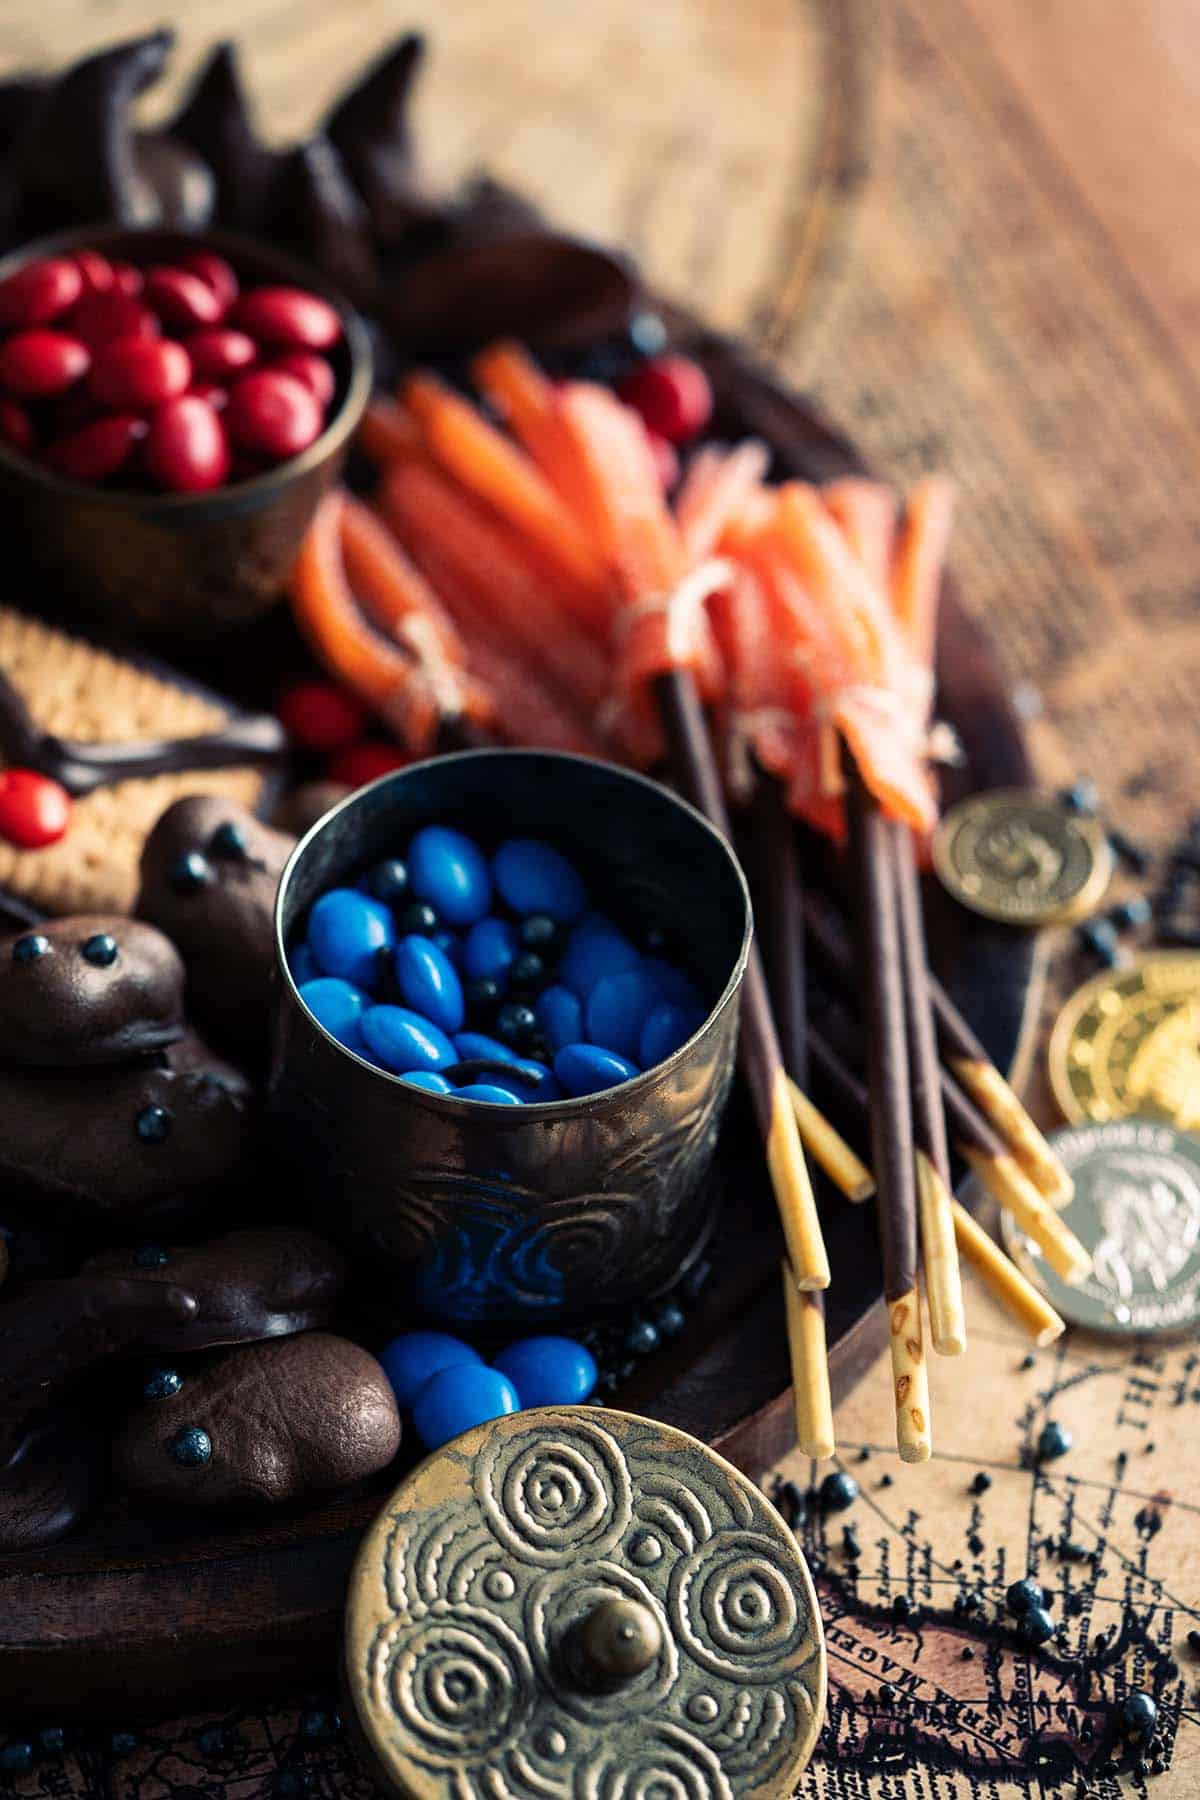
Broomstick Candy (aka Witches’ Broomstick Candy)
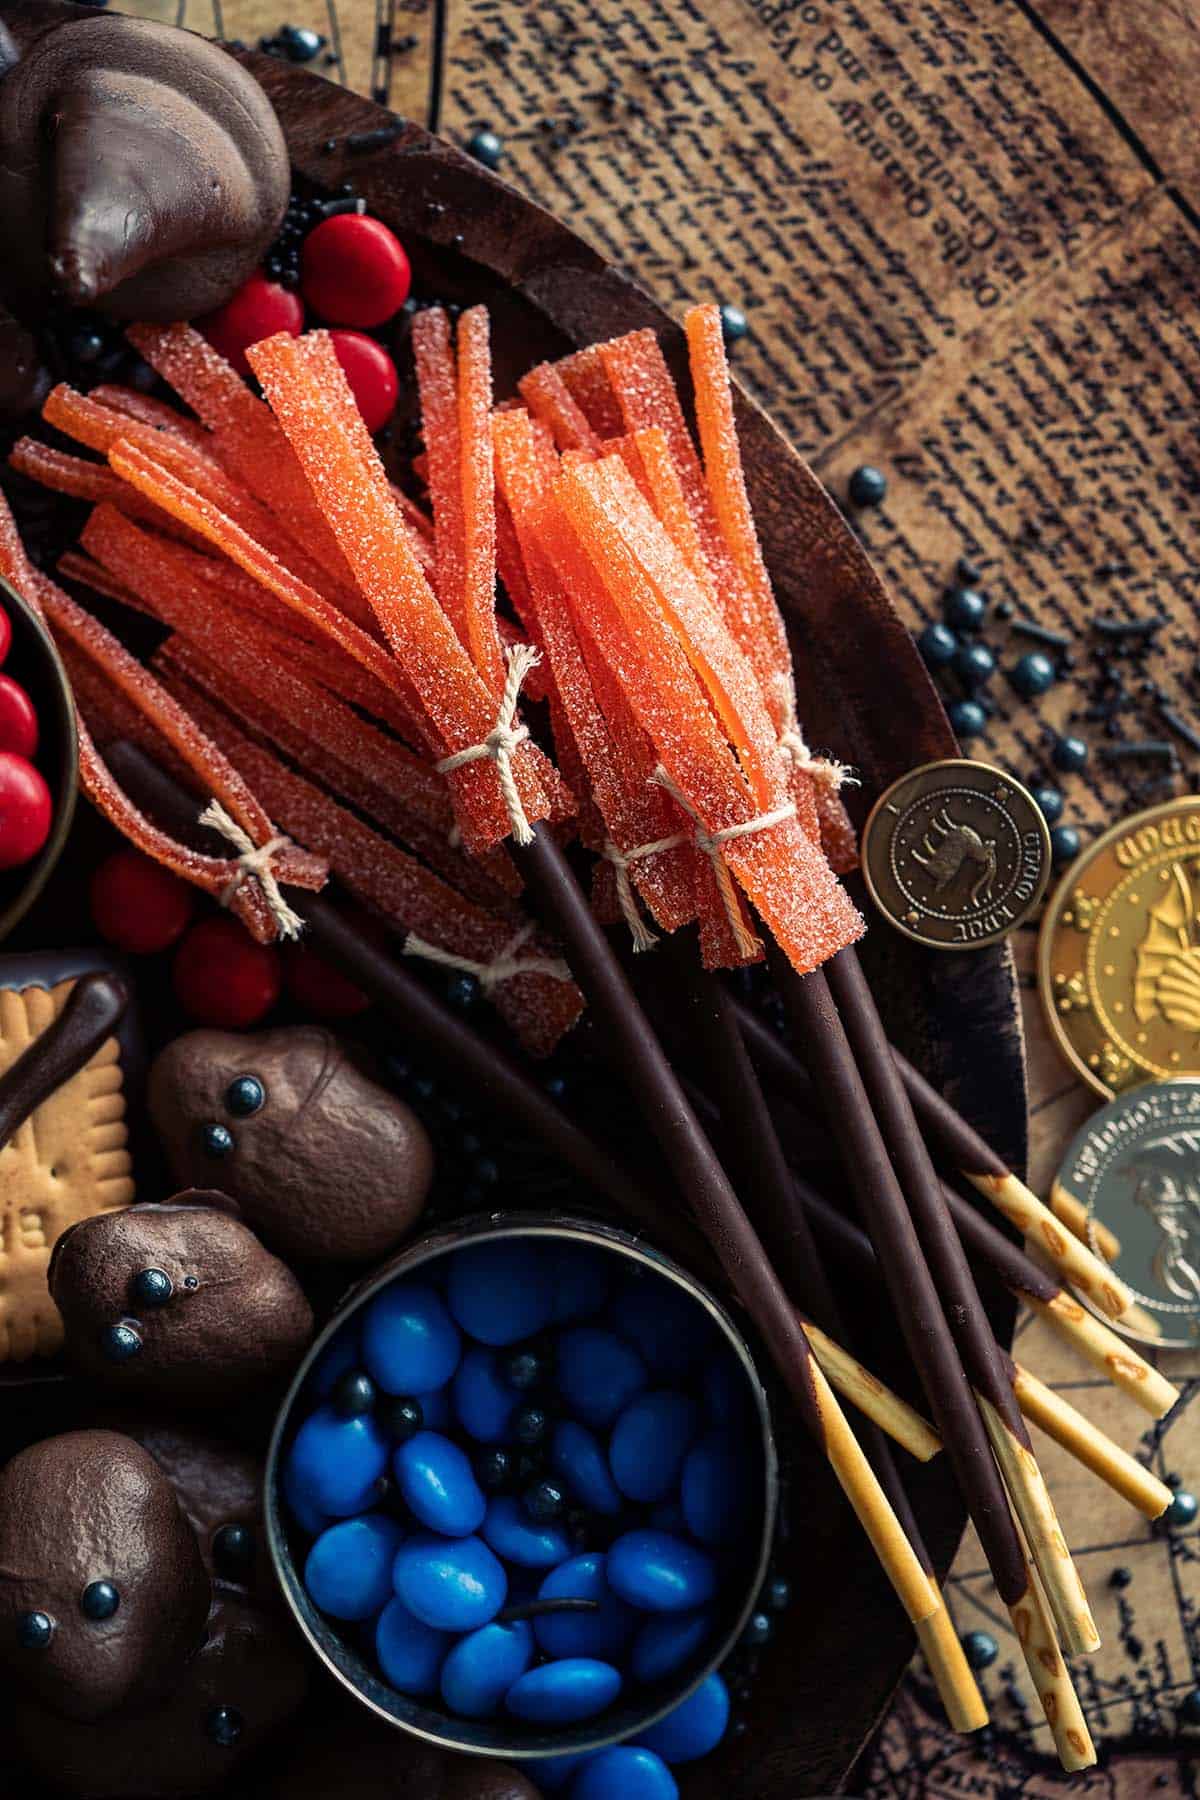
What would a Harry Potter sweets board be without a wink and a nod to the Nimbus 2000?! These little candy broomsticks I’m going to show you how to make are so incredibly easy, you’ll be surprised. And they come out so cute!
There are so many different routes you could go when you’re making broomstick candy. Pretzel rods are a common denominator.
I’ve seen pretzel rods with shredded string cheese on one end so it looks like a broom. And on the sweet side, I’ve seen pretzel rods stuck into Reese’s peanut butter cups.
Both of these ideas are cute, but I wanted something a little different because: 1) a savory cheese snack just doesn’t go with our Harry Potter desserts theme, and 2) a pretzel rod with a Reese’s peanut butter cup stuck in one end is just a little underwhelming. Absolutely delicious I’m sure, but I wanted something with a little more wow factor!
Enter these witches’ broomsticks.
I first saw the idea to use Poxy sticks for broomsticks a couple years ago, and I can’t for the life of me remember where I saw it. It’s a very basic idea, but it works really well!
To Make Broomstick Candy You’ll Need
- Poxy Chocolate Cream Covered Biscuit Sticks – I like to use the chocolate flavor because I think the dark brown makes a good look for a broomstick handle, but you can use any flavor you fancy
- Streamers Candy – I use HARIBO Sour Streamers (orange color), but sour candy strips or sour candy belts will also work
- Twine – I used regular natural jute twine for this project
How to Make Broomstick Candy
- Cut each piece of Streamers candy in half horizontally. These will get wrapped around one end of the Poxy sticks to form the bristly part of our witches’ brooms.
- Working with a half piece of Streamers candy at a time, make several vertical cuts up from the bottom of one end. Be careful not to cut all the way through the top.
- Wrap the top end of a Steamers candy around a Poxy stick and tie a small piece of twine around it to secure it in place.
Candy Wands

Side Note: I remember when I took my niece to buy her wand (at Ollivander’s Wand Shop in Diagon Alley, Universal Studios Florida, of course!), the very first spell she tried was the killing curse on me! In a fit of laughter (with me thinking she’d try to accio an ice cream cone or something innocent), she flourished her wand, pointed it at me, and barely got out avada kedavra, she was laughing so hard! Slytherin, all the way.
But anyway. The chocolate wands we’re making today are the edible sort only.
Because if your Harry Potter sweets board doesn’t have candy wands, does it really even exist? We’re about to handle that real quick, friends.
I want to say I cheated when I made these chocolate candy wands (because they were so easy to make that it felt like cheating), but really it was just a stroke of genius. Why not put leftover Poxy sticks (from making the broomsticks) to good use?!
I whipped up a basic powdered sugar glaze (which is just powdered sugar with enough water whisked in to make it drizzle-able), and added a few drops of red food coloring. Then I drizzled it on the Poxy sticks, and sprinkled them with gold sanding sugar.
Feel free to switch it up. You can use any color combination you like (the red and gold I used was for Gryffindor!).
However, if you want larger candy wands you can use old-fashioned pretzel rods or Twizzlers Twists. Dip them 3/4 of the way in melted chocolate. Place them on a parchment paper-lined baking tray, and decorate them with any color sprinkles you like.
To Make Candy Wands You’ll Need
- Poxy – I used the chocolate flavor again
- Powdered sugar + water + food coloring – this is to make powdered sugar glaze that you can drizzle on the wands so your sanding sugar or sprinkles stick
- Sanding sugar or Harry Potter sprinkles – to decorate your wands; I used gold-colored sanding sugar, but you can customize it for whatever Hogwarts house you want to represent
How to Make Edible Harry Potter Wands
- Add about 1 cup of powdered sugar to a medium bowl. Use a fork to whisk in enough water so it forms a glaze that you can drizzle, but isn’t too thin that it’ll run right off your candy wands. (Start with 1 teaspoon of water at a time and add more until it reaches the right consistency.)
- Mix in a few drops of food coloring if desired. Remember that to create some colors you might need to mix colors. For example, blue and yellow make green.
- Lay some Poxy sticks out onto a parchment paper-lined baking tray, drizzle on the glaze, and immediately decorate with the sanding sugar or sprinkles of your choice.
Arachnid Balls
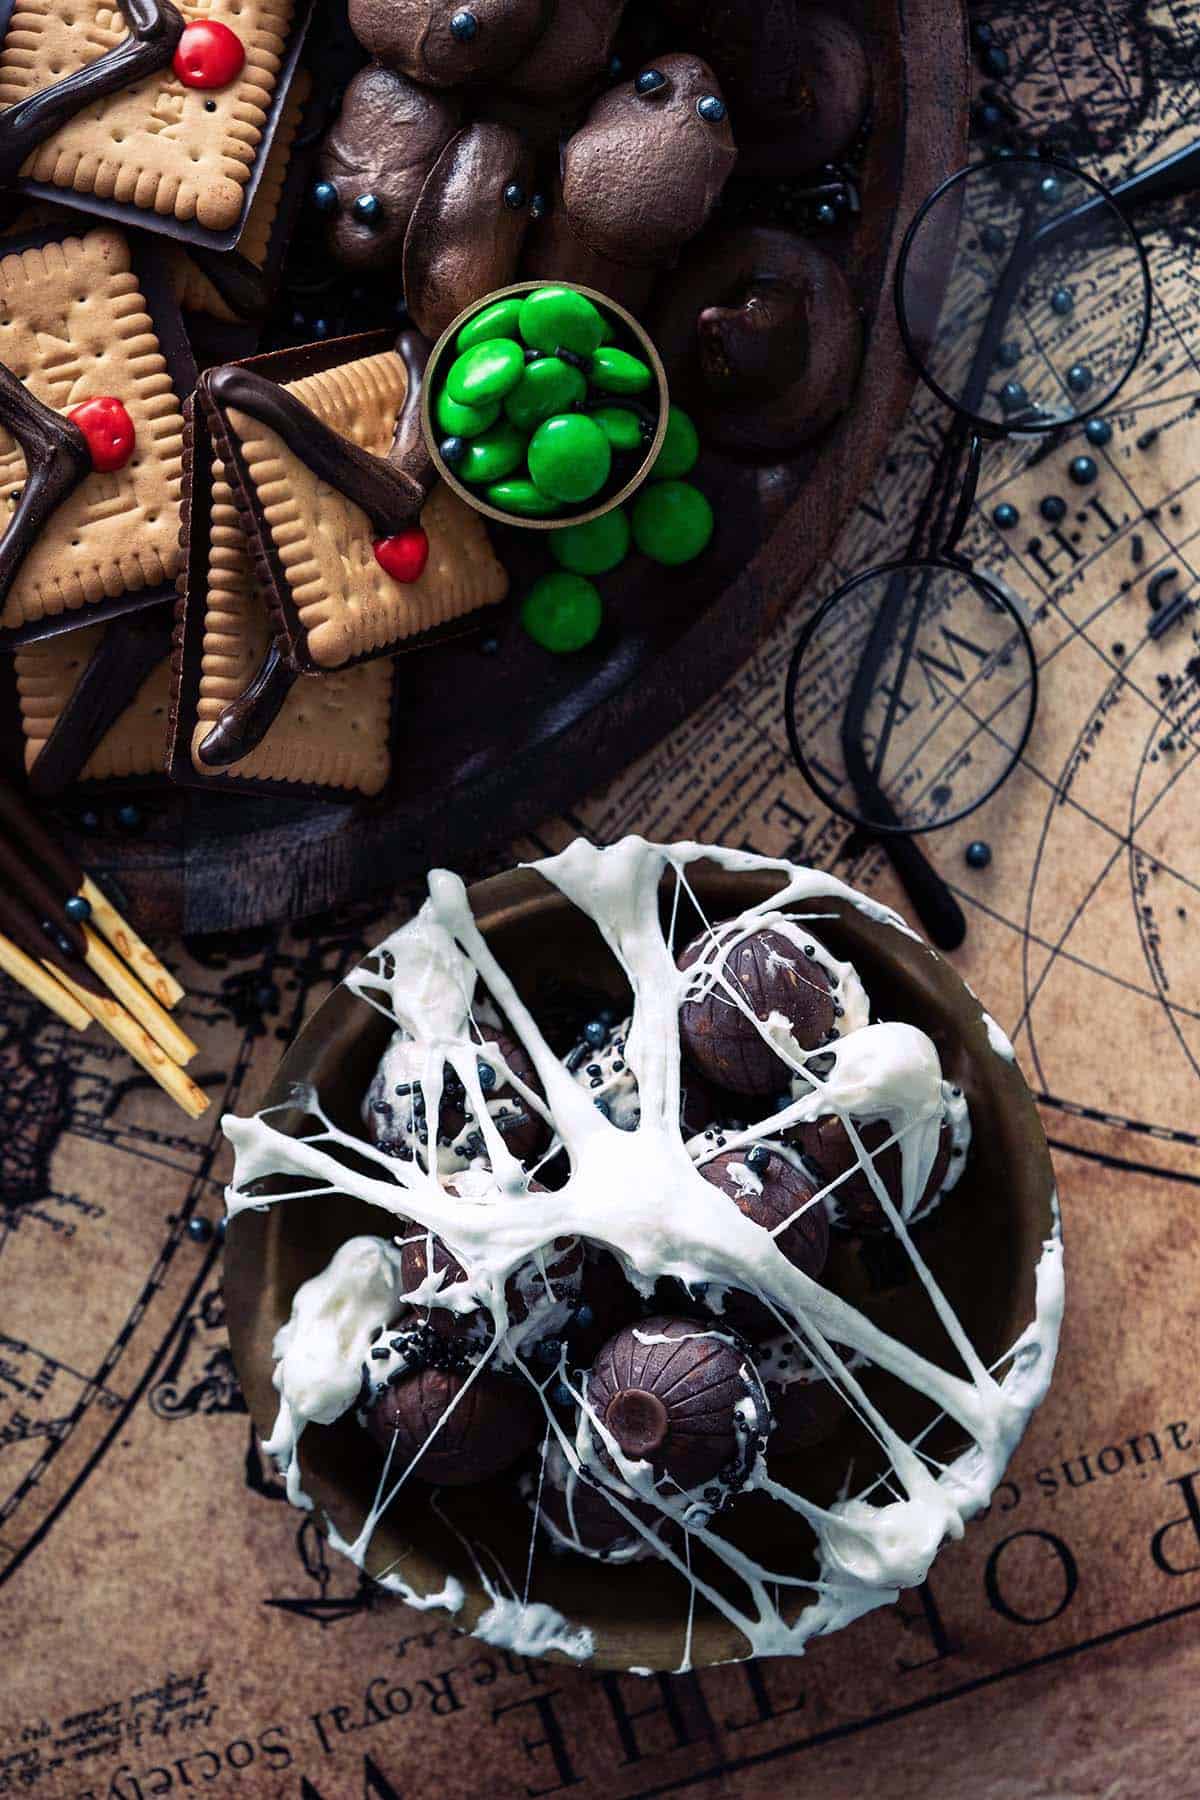
Do you remember in Harry Potter and the Chamber of Secrets when Harry and Ron followed the spiders into the Forbidden Forest and met Aragog? Ron freaked out, and it was then that we discovered his greatest fear: spiders!
Ron’s arachnophobia was completely warranted though. He looked up and saw an army of spiders descending on them! So I thought why not include a sweet treat dedicated to these creepy crawlies? (Side Note: Arachnid balls aren’t limited to Harry Potter themed parties. If you’re hosting a Halloween party in general, arachnid balls are a spooky, creepy item for the dessert table!)
Get ready to have your mind blown like the first time you read through the Harry Potter series. These grotesque arachnid balls, also lovingly known as spider balls or spider eggs, are nothing other than store-bought chocolate truffles with melted marshmallow stretched haphazardly over them, and sprinkled with black nonpareils and sprinkles!
To Make Arachnid Balls You’ll Need
- Chocolate truffles – there’s no need for expensive truffles here, they’re going to get coated in melted marshmallow strands anyway; I like to use dark chocolate truffles, but you can use any kind you like
- Marshmallows – we melt the marshmallows and stretch them over the truffles for a cobweb look
- Coconut oil cooking spray – or you can use any type of cooking spray or even butter; this is to grease your hands because the melted marshmallow will stick
- Black pearl sprinkles, black sanding sugar, and black nonpareils – to add black flecks and an extra layer of gross to our spider balls
How to Make Arachnid Balls
- Put the chocolate truffles in a serving bowl.
- Add the marshmallows to a microwave-safe bowl. Microwave in 10 to 15-second intervals, stirring between each interval, until they’re fully melted.
- Once the marshmallow is cool enough to handle without burning your hands, grease your hands. Grab a wad of melted marshmallow and stretch and pull it with your hands until it looks like cobwebs.
- Drape the cobweb-like marshmallow strands over the bowl of chocolate truffles.
- Top with the black pearl sprinkles, black sanding sugar, and/or black nonpareils.
Hogwarts Letter Cookies
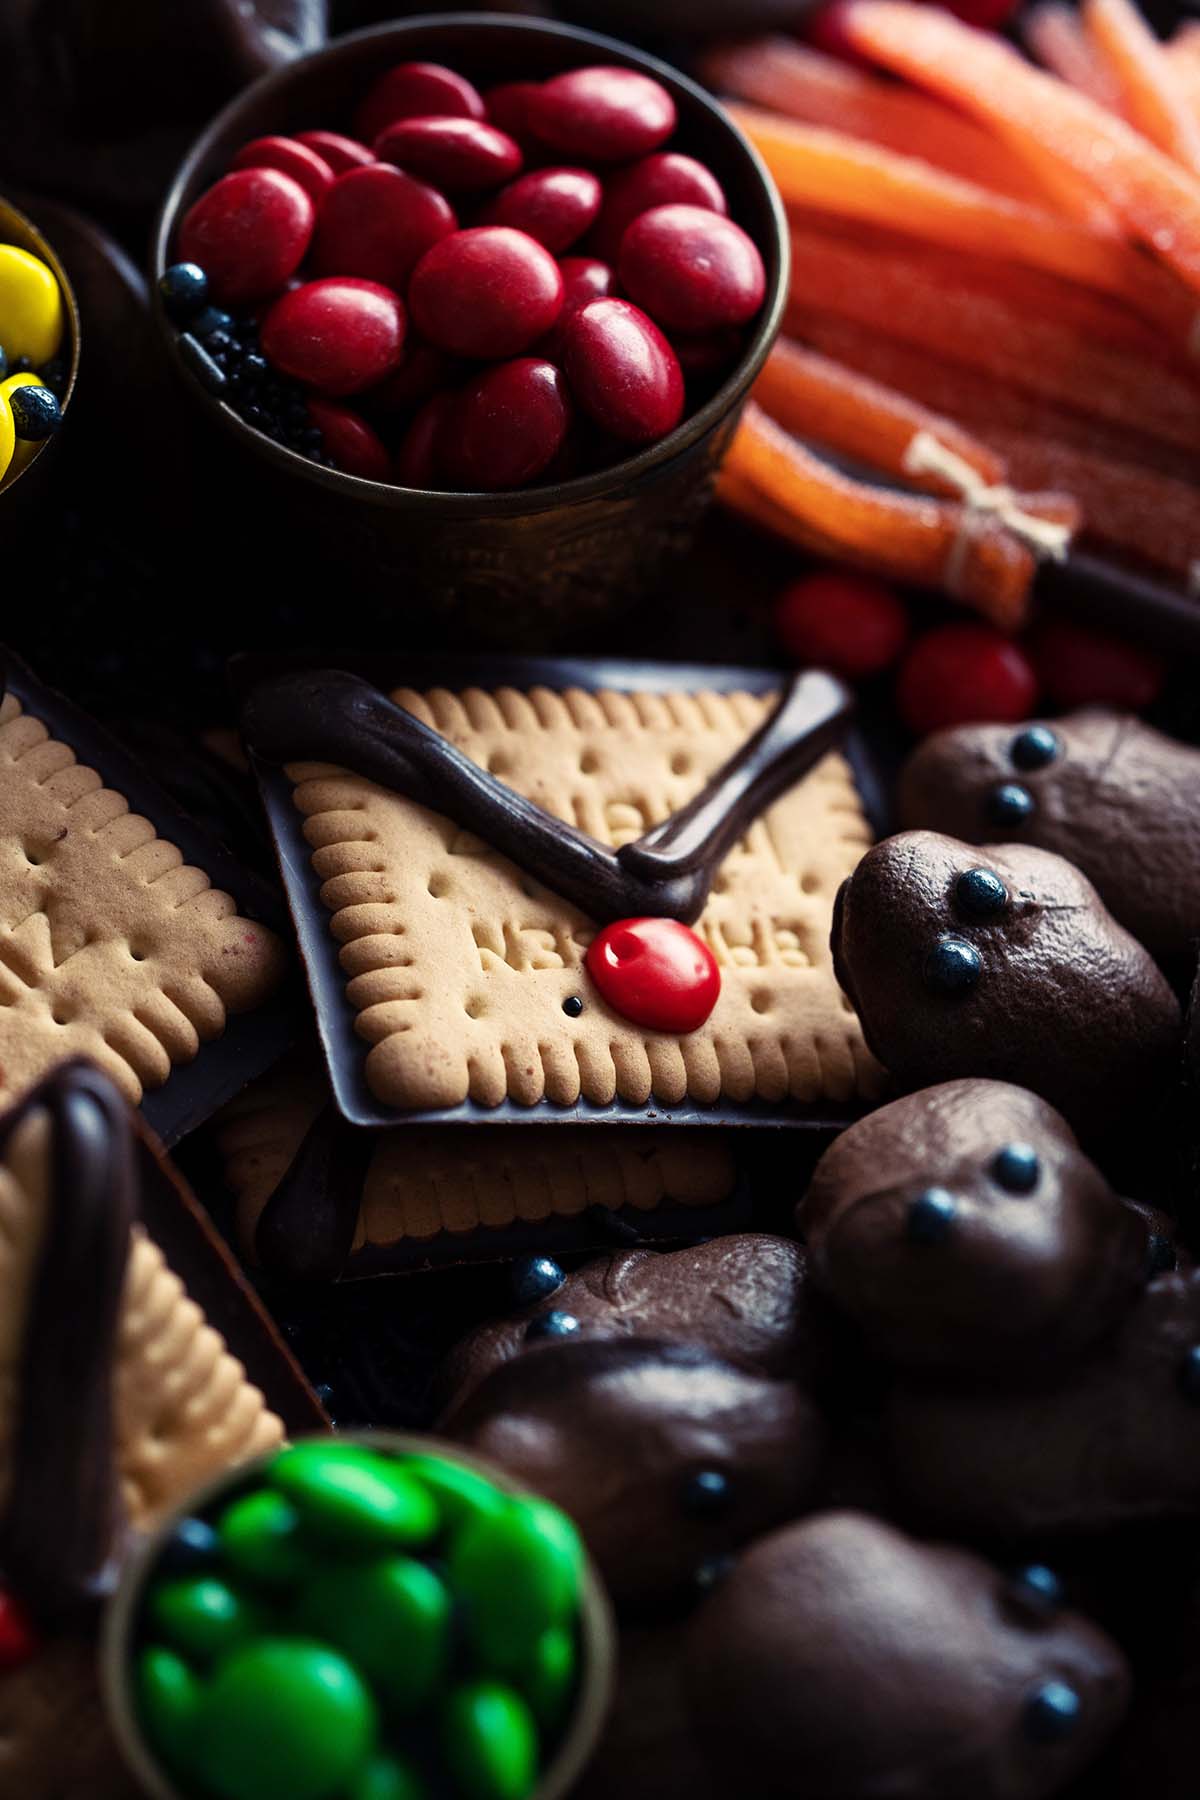
I couldn’t really decide if I wanted these to look like Hogwarts acceptance letters or Howler letters, lol! But these are cute and can go either way. They’re actually meant to look like envelopes instead of letters.
To make them look more like Hogwarts acceptance letters, you can pipe an “H” in the red circle on top of each as a Hogwarts stamp/seal.
And to make them look more like Hogwarts Howler letters, you can use edible markers to draw on the eyes and mouth.
To Make Hogwarts Letter Cookies You’ll Need
- Butter cookies coated with milk chocolate on one side – such as Lu Petit Ecolier, Bahlsen Choco Liebniz, or Specially Selected Chocolate Covered Butter Cookies
- Chocolate melting wafers – I like to use melting wafers so I don’t have to temper the chocolate; my favorite is the Ghirardelli Dark Chocolate Flavored Melting Wafers
- Powdered sugar + water + red food coloring – this is to make powdered sugar glaze to look like a stamp/seal in the center of each envelope cookie
How to Make Hogwarts Letter Cookies
- Melt chocolate melting wafers in a microwave-safe bowl in the microwave or in a double boiler. (Or if you want to use real chocolate, temper it first.)
- Put the melted chocolate wafer candy (or melted chocolate) into a piping bag (or a Ziploc bag and cut off one corner). Pipe 2 lines of chocolate on each cookie: 1 line from the top left corner to the middle of the cookie, and 1 line from the top right corner to the middle of the cookie (the 2 lines will meet in the middle). This is to simulate the shape of an envelope.
- Add about 1 cup of powdered sugar to a medium bowl. Use a fork to whisk in enough water so it forms a glaze that you can drizzle, but isn’t too thin that it’ll run right off your candy wands. (Start with 1 teaspoon of water at a time and add more until it reaches the right consistency.) Mix in a few drops of red food coloring.
- Pipe a circle of red glaze under the spot where the 2 lines meet in the center.
- Let them set.
Harry Potter House Colors Candy
The house colors of Hogwarts are as follows:
- Gryffindor: Red and gold
- Ravenclaw: Blue and bronze
- Slytherin: Green and silver
- Hufflepuff: Yellow and black
You can choose any number of different items to represent the different houses. My favorite is regular M&Ms candy; it doesn’t get any easier! Just separate the candy into different colors and put them in small dishes on your Harry Potter snack board or dessert tray.
Easy Harry Potter Candy Ideas
If you want to fill in a bigger dessert board or snack board with even more candy, here are a few super simple Harry Potter sweets ideas:
- Gummy worms – or gummy snakes
- Edible giant crickets – you can cover them in chocolate if you want
- Bertie Bott’s Every Flavour Beans – and yes, there are some flavors you want to lookout for and avoid, lol!
Harry Potter Sweets and Snacks Recipes
On the off chance that you also want to serve a few Butterbeer treats along with your Harry Potter sweets board, here are a few ideas.


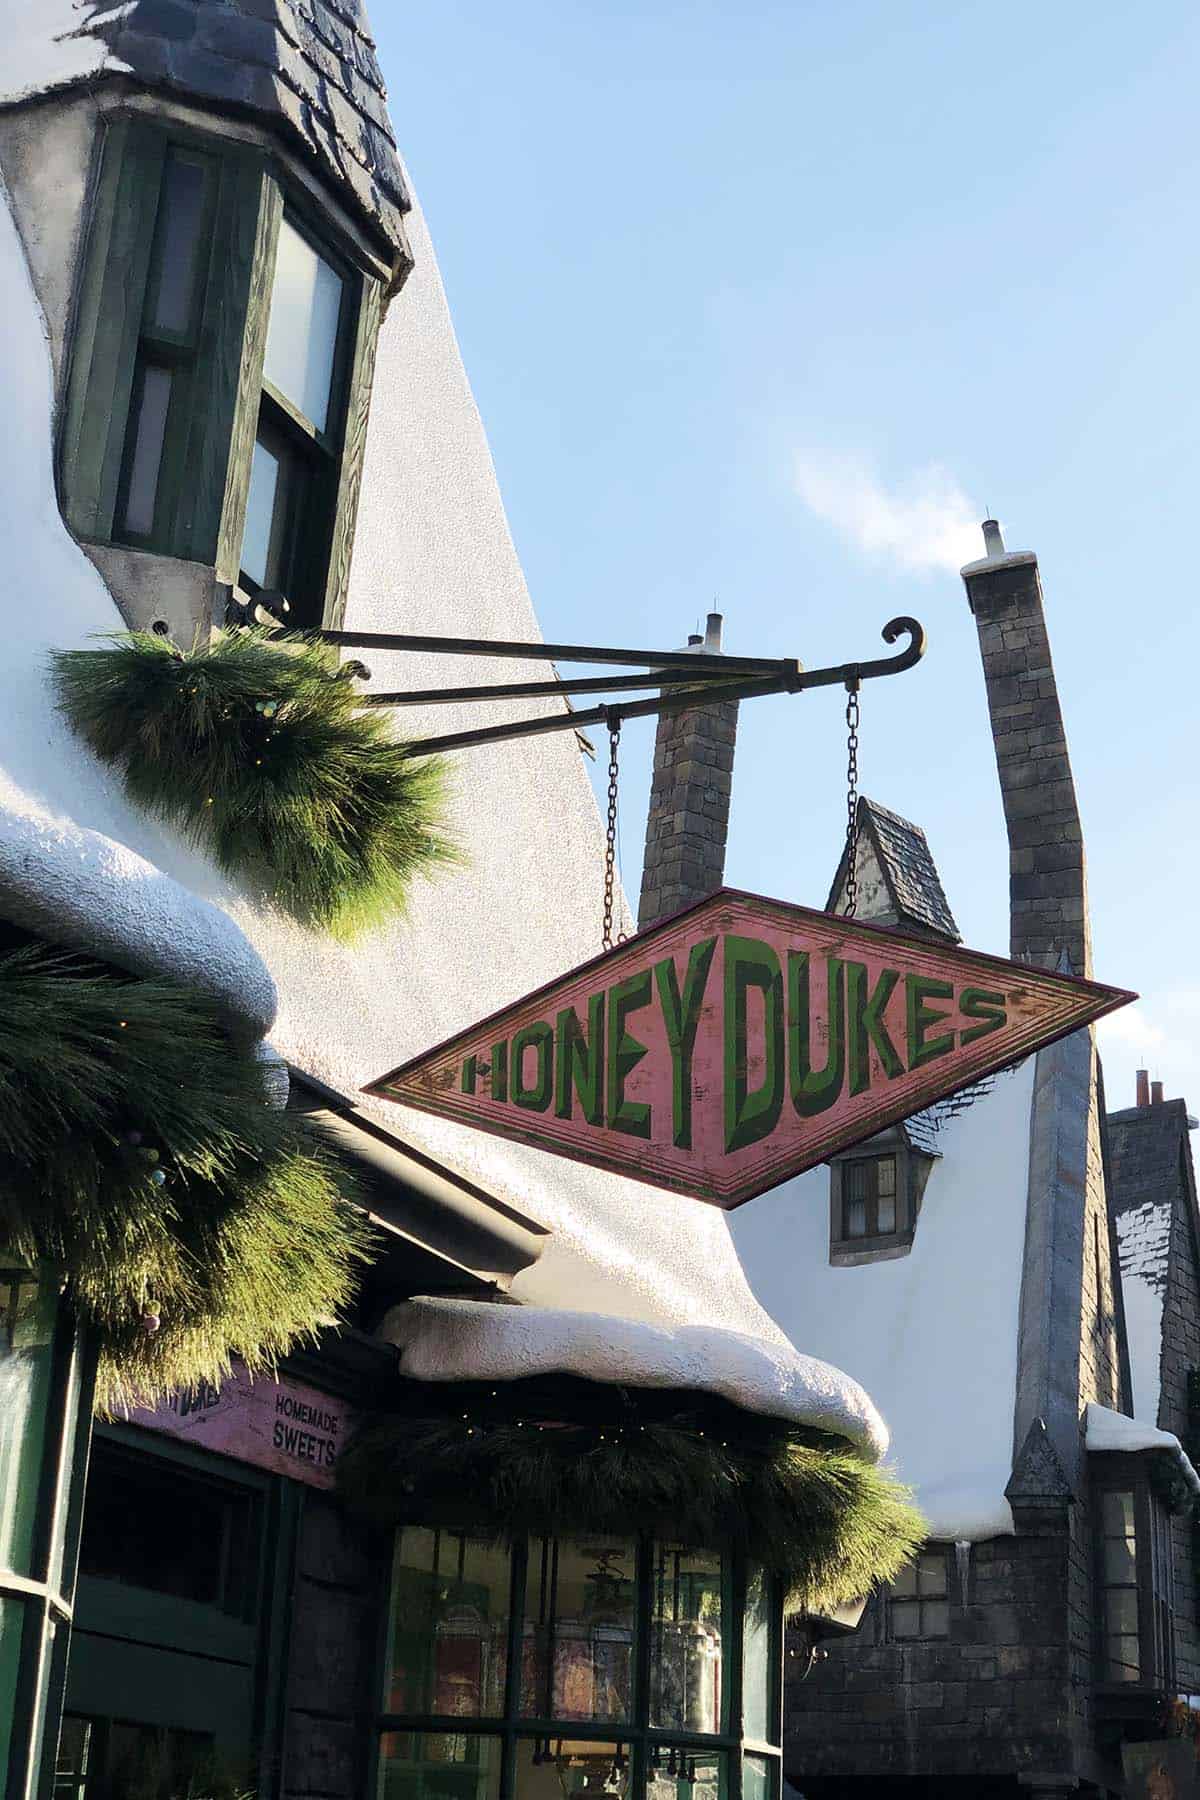
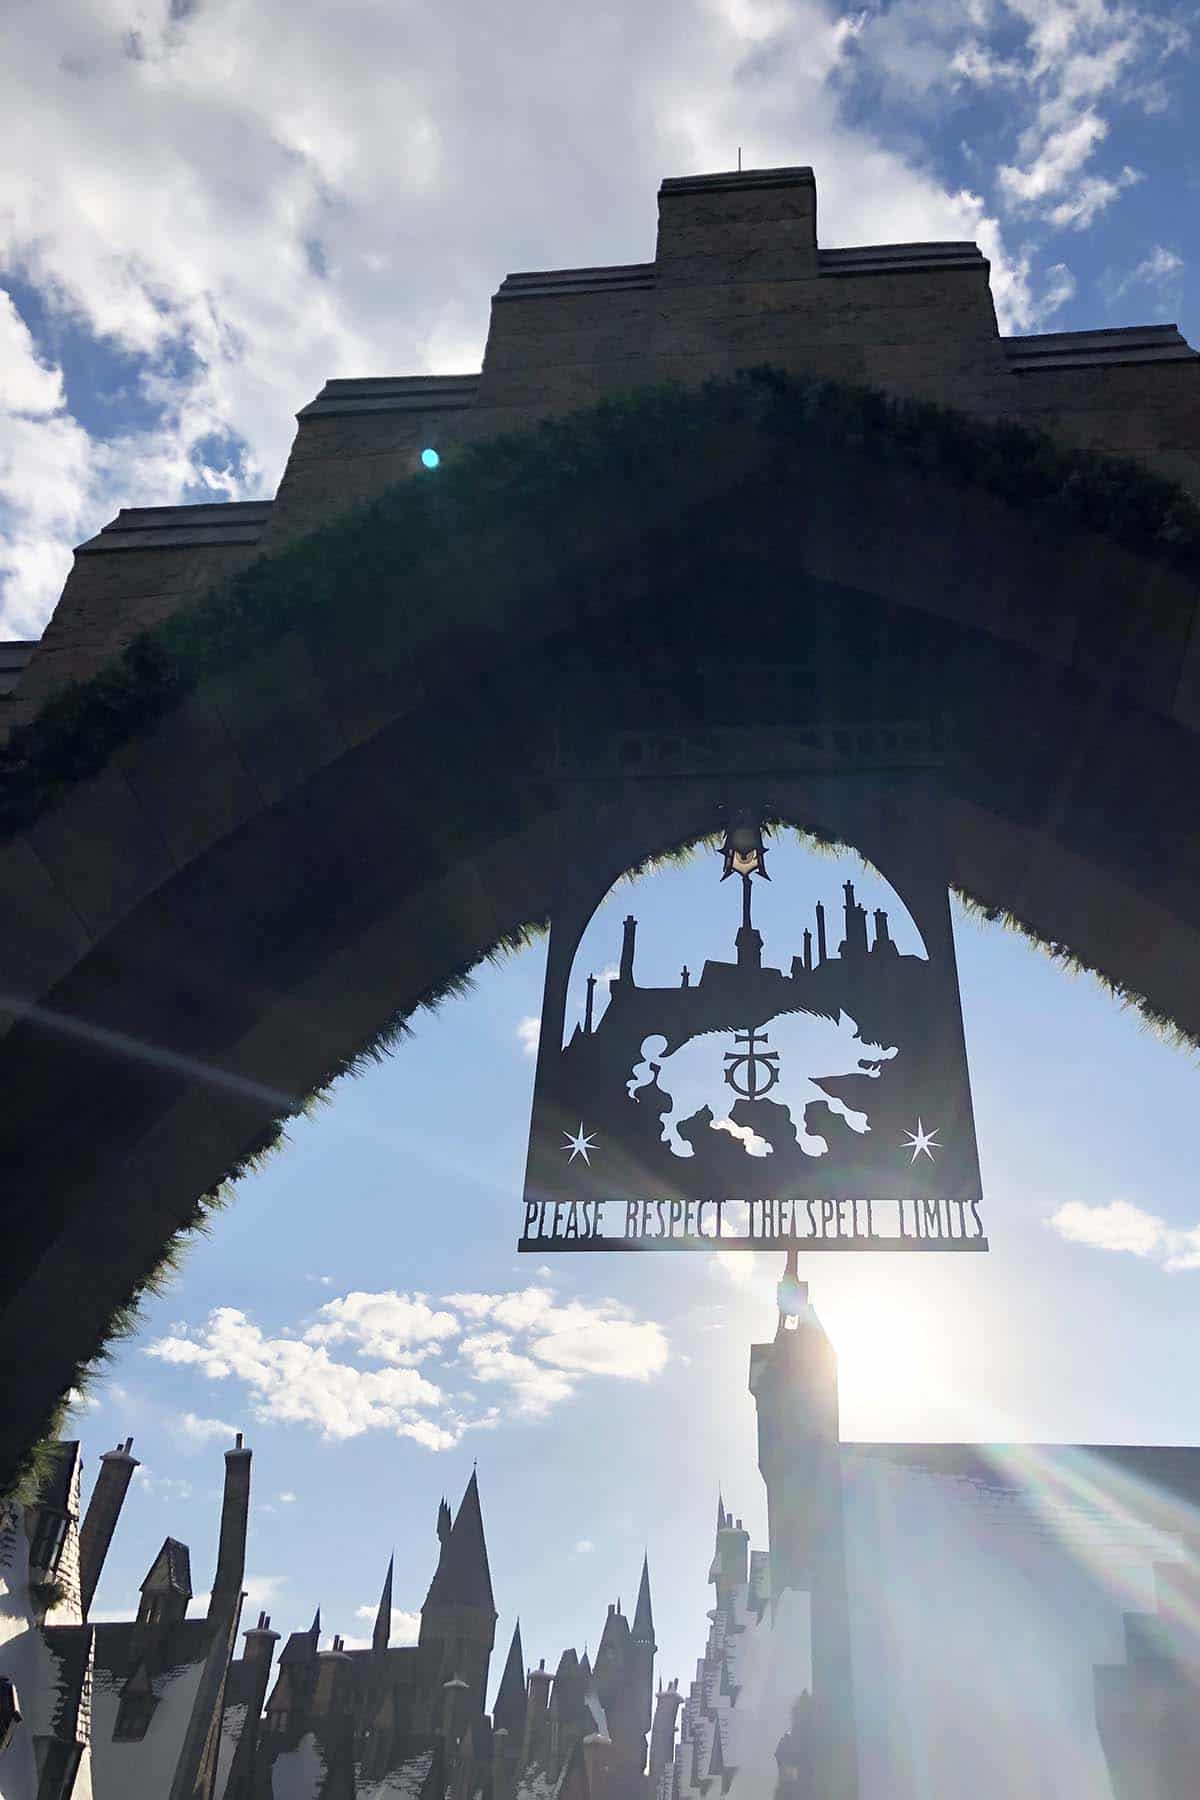
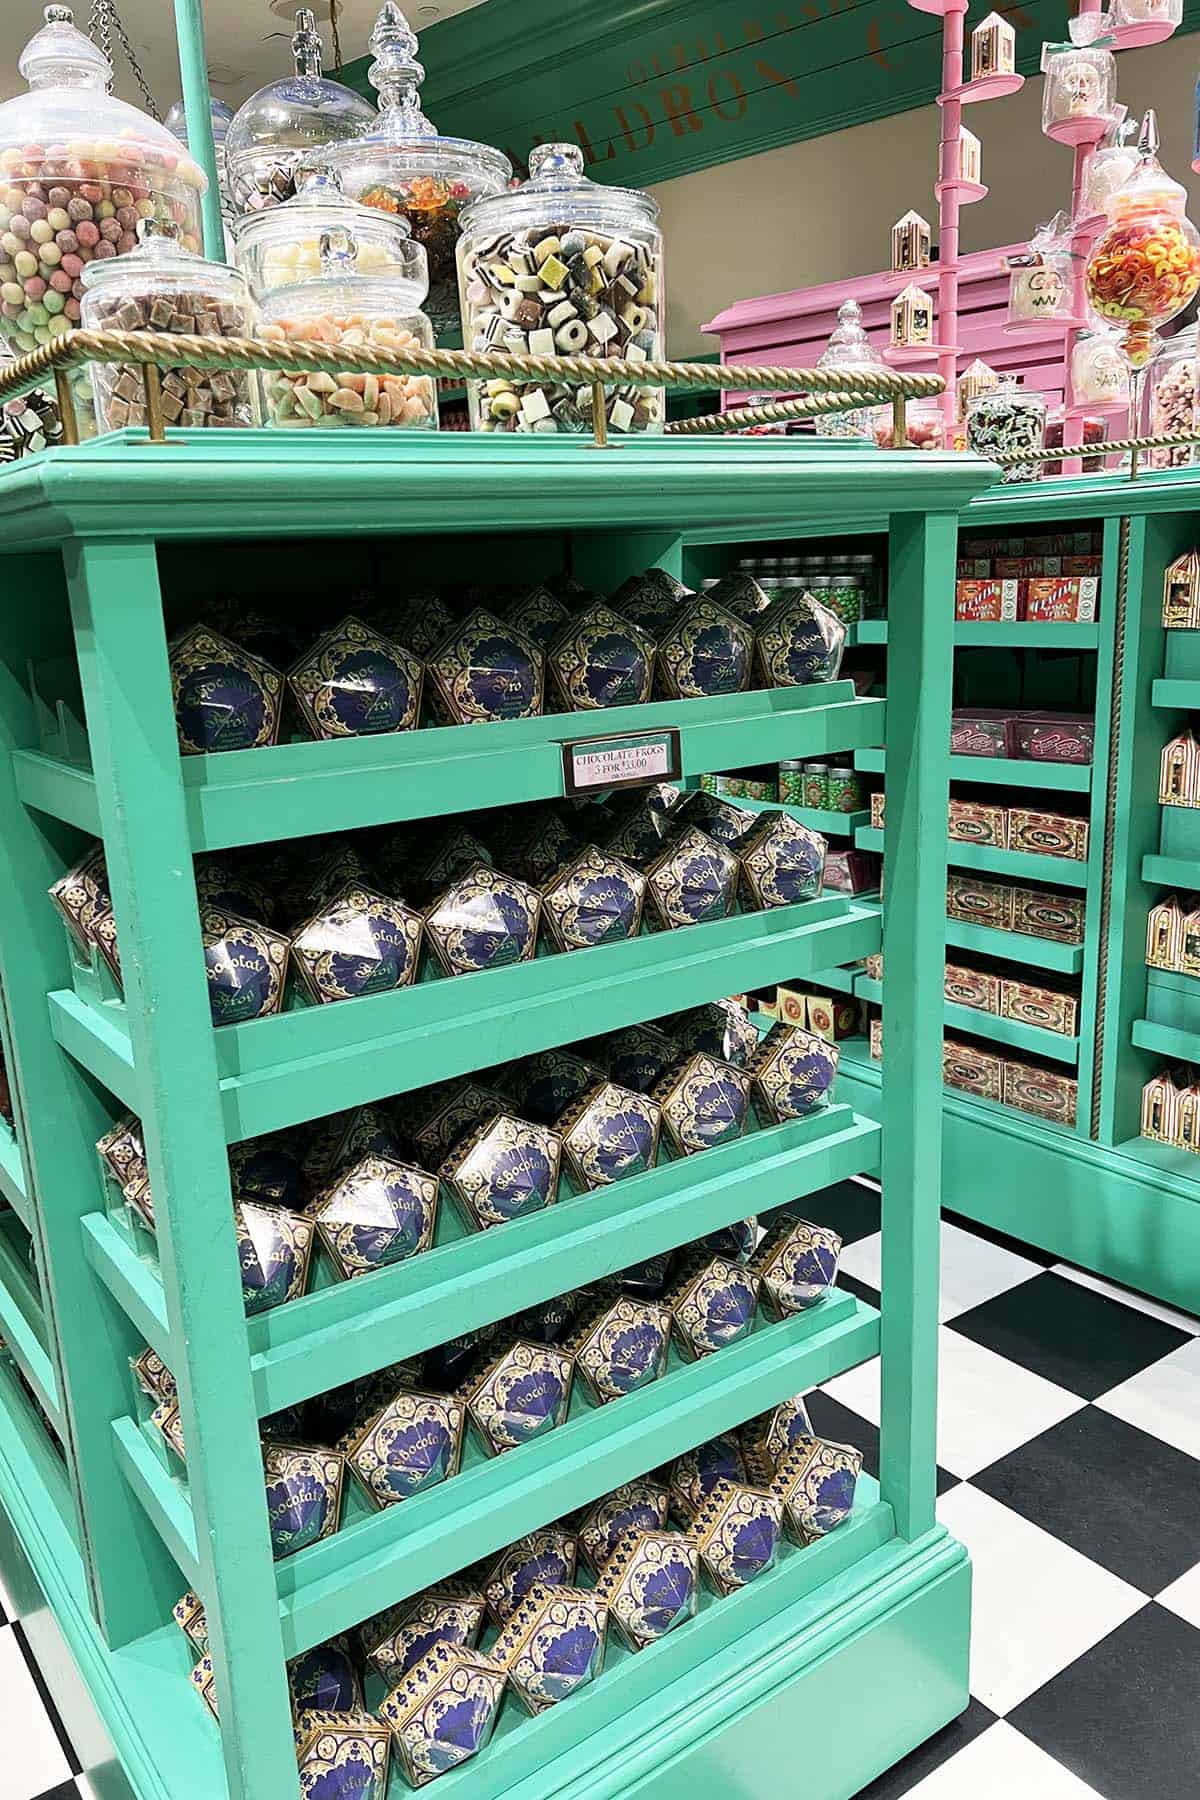
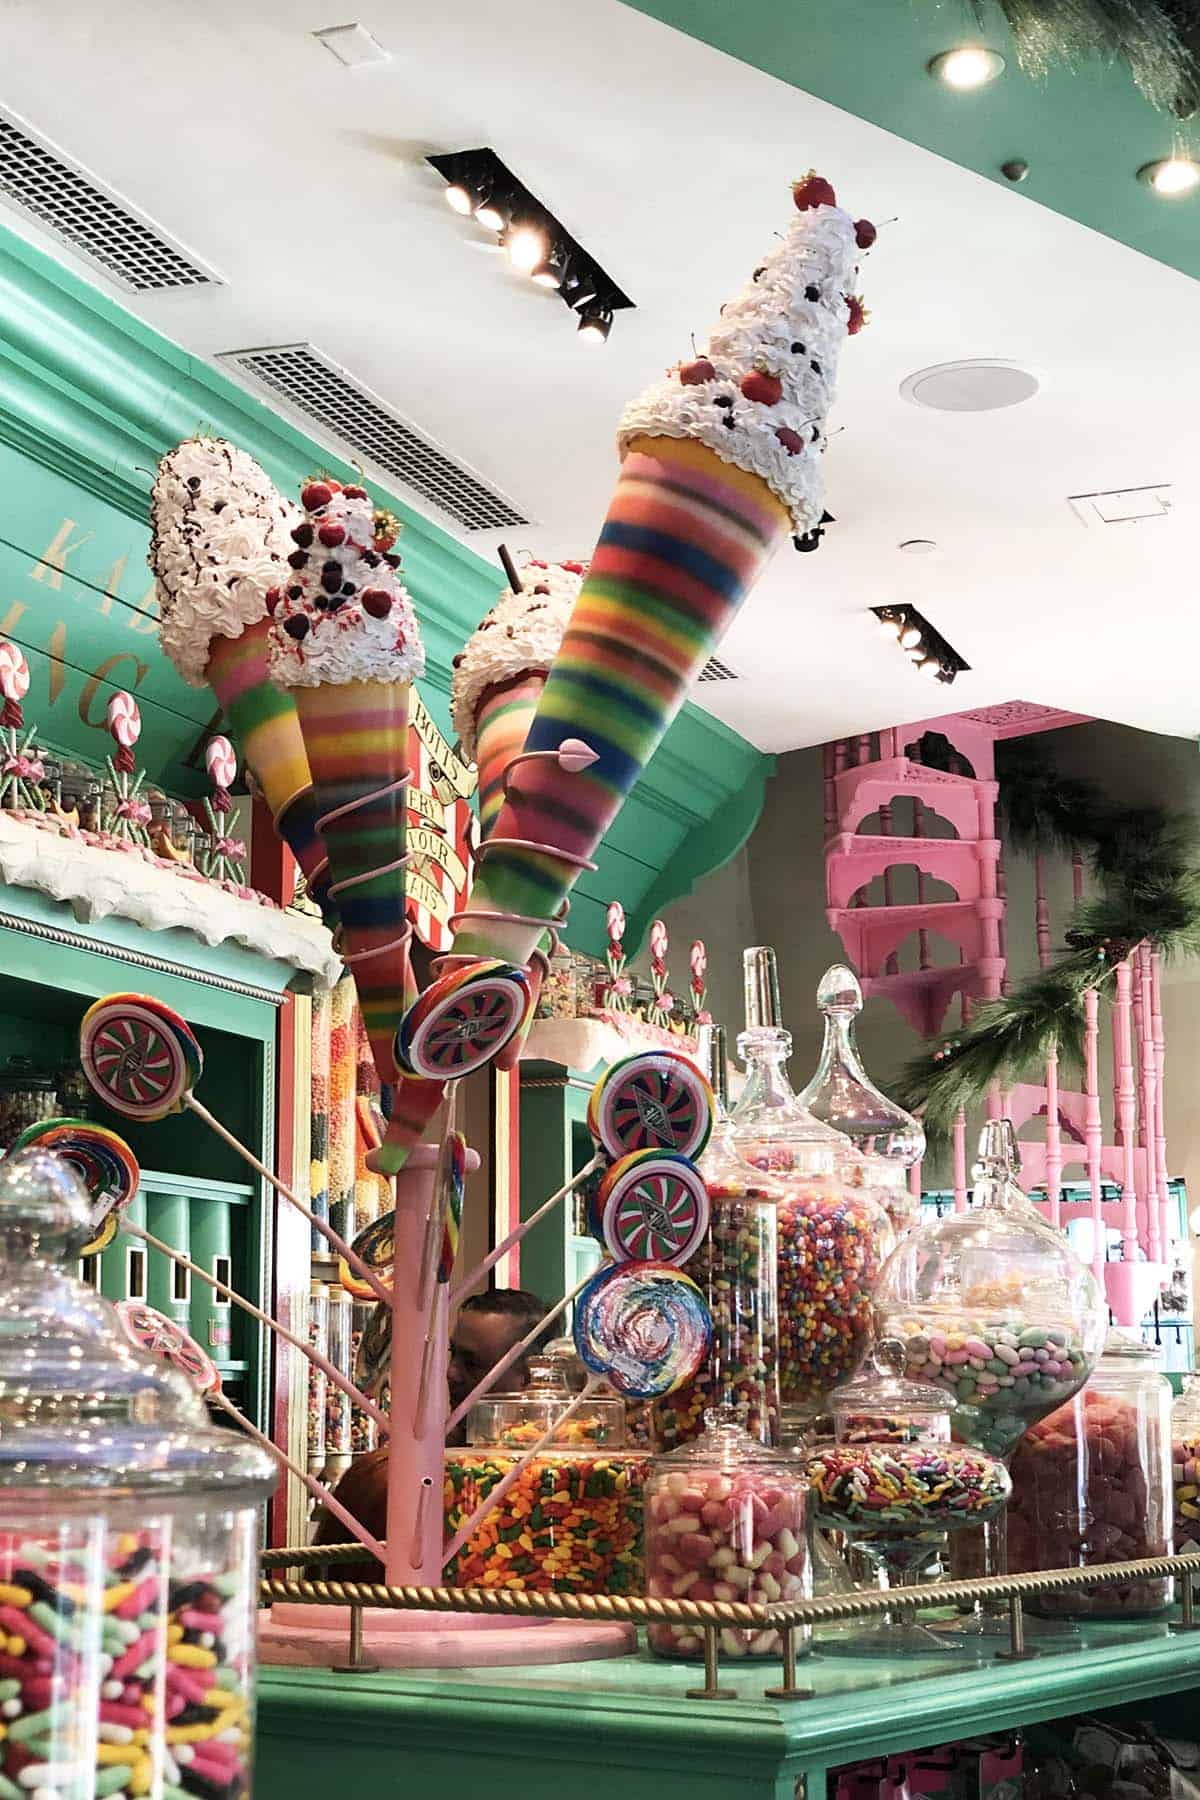
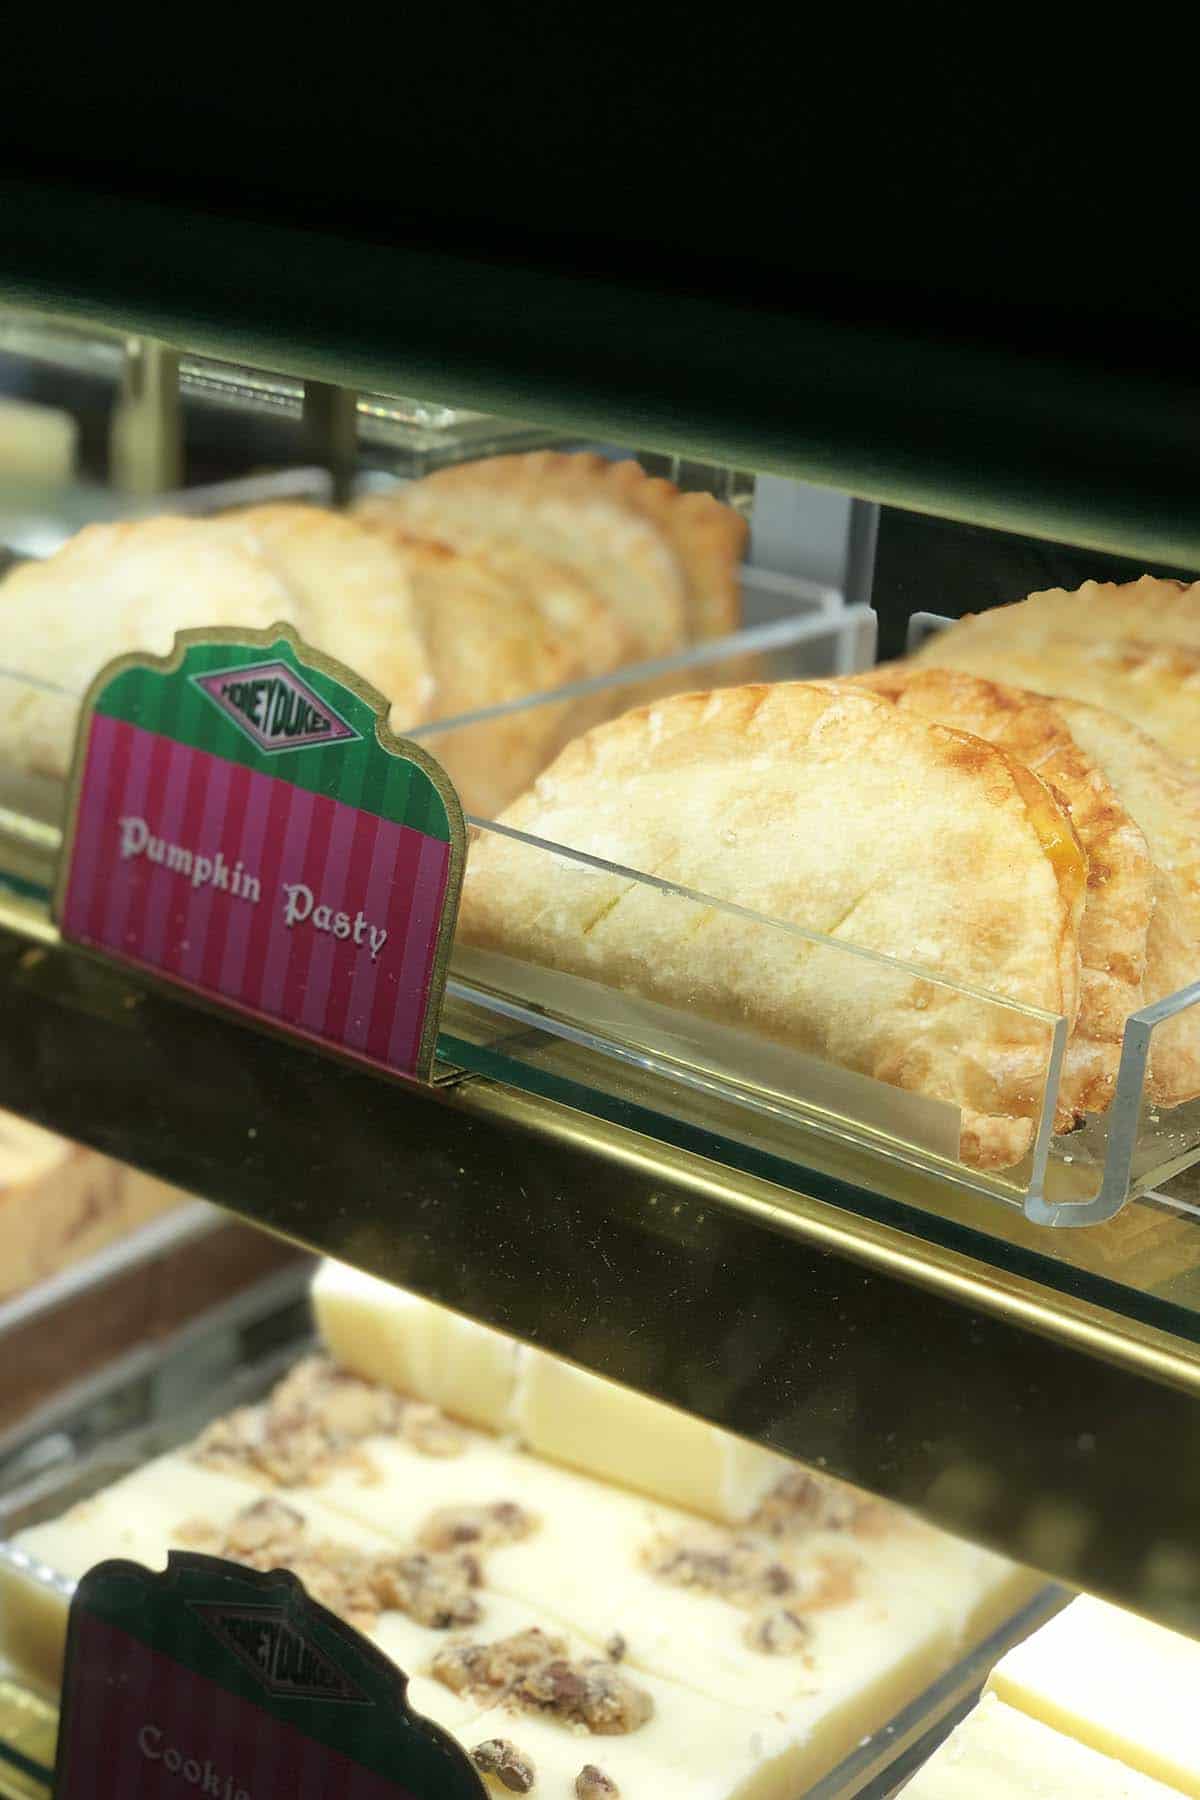
Honeydukes Harry Potter
Honeydukes, a sweet shop on High Street in the all-wizard village of Hogsmeade in the Harry Potter series, is also a real candy store in The Wizarding World of Harry Potter™ – Hogsmeade™ in Universal’s Islands of Adventure.
It’s a fun place to walk around because you can see your favorite fictional treats come to life. And even try a few if you fancy!
I wanted to share a few photos of Honeydukes from one of my visits there. I took some of these pictures during the holiday season, and you’ll notice the green bough and garland decorations.


Let’s Connect

Did you enjoy this post? Please let me know in the comments below. You can also tag @anediblemosaic on social media.
To stay up-to-date, follow me on Facebook, Instagram, Pinterest, and Twitter!


I’m the writer, recipe developer, photographer, and food stylist behind this blog. I love finding the human connection through something we all do every day: eat! Food is a common ground that we can all relate to, and our tables tell a story. It’s my goal to inspire you to get in the kitchen, try something new, and find a favorite you didn’t know you had.
Free Bonus


This is the most creative and cute candy board I hav ever seen. I love it and cannot wait to make a few of these treats!
This is brilliant! Love it! Adding a link to my Harry Potter cake!