

This post may contain affiliate links, view our disclosure.
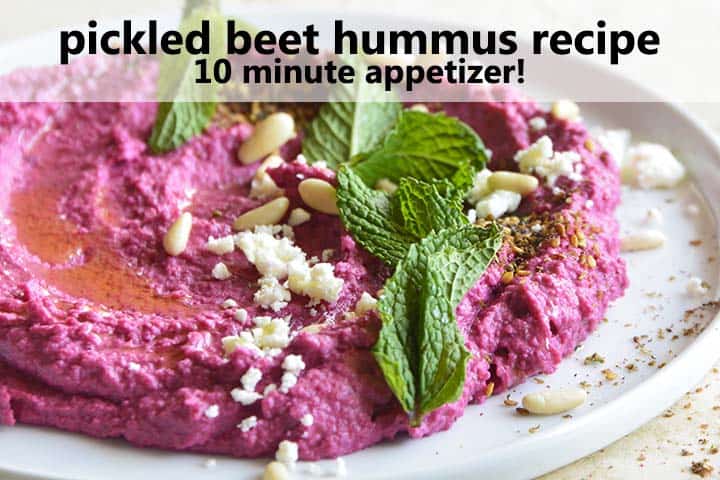
Bright and tangy with an earthy sweetness, this Pickled Beet Hummus recipe has white beans, za’atar, feta, and mint, and is as pretty as it is delicious.

This surprising combination of flavors is a pairing that works well.
In this Pickled Beet Hummus recipe, the natural sweetness and earthy flavor of beets is brightened with fresh lemon juice and garlic. Cannellini beans provide a great canvas/backdrop flavor. Tahini, a traditional hummus ingredient, adds creamy texture and subtle bitter nuttiness to balance out the sweetness of beets. And za’atar adds complexity.
The beauty of this recipe is that it comes together for a lovely melding of flavors and it whips up in just 10 minutes!

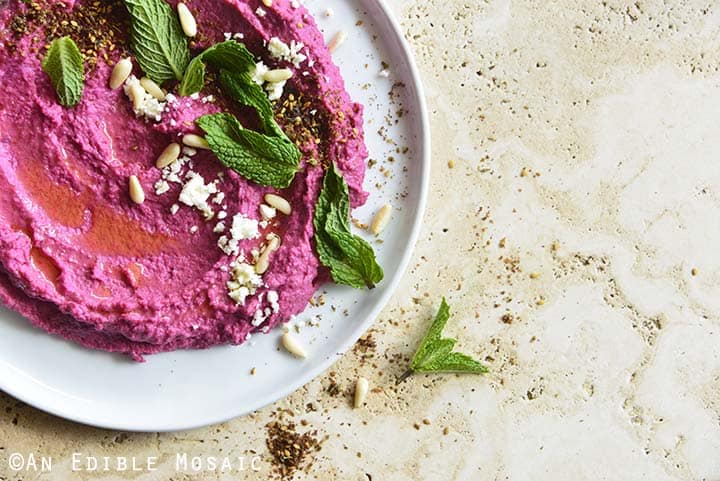
This gem is a wonderful recipe to have up your sleeve for summer entertaining. Its stunning pink color is impressive with minimal effort, and it packs beautifully to take on a picnic. You can even liven up your brown bag lunch routine with this!
There’s absolutely no need to buy store-bought hummus when you discover just how easy it is to make at home. To make hummus, I simply add all ingredients to a food processor or blender and process until smooth and creamy. It couldn’t be any easier.
Beetroot Hummus
Hummus is already a healthy snack and appetizer choice, but adding beets to hummus is a great way to bump up the nutrition even more! Beets are loaded with vitamins and minerals, and are thought to have a variety of health benefits (read up on the details on Healthline and Health). The earthy sweetness of beets is a great pairing with beans in a hummus recipe.
What is Beetroot?
Beetroot refers to the taproot part of a beet plant; here in the U.S. we usually just call beetroot “beets”. This term differentiates the root from beet greens, which are also edible.
Surprisingly, beet greens are delicious, especially in recipes like Beet Greens Pasta with Walnuts and Parmesan Cheese.
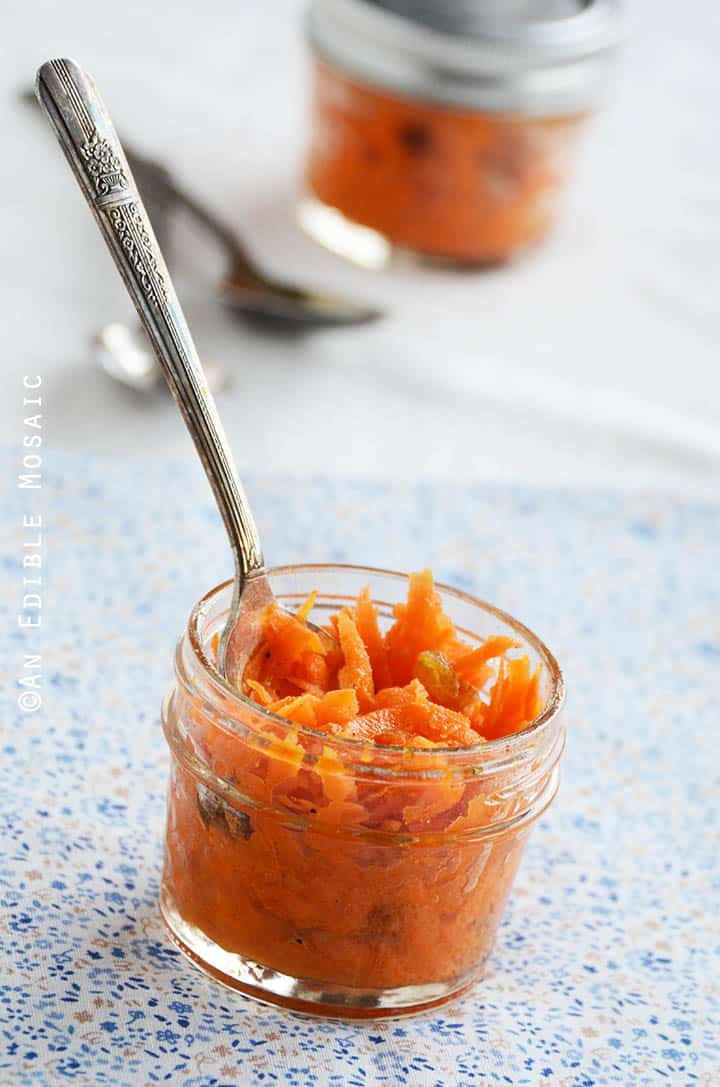
Pickled Beets
The beauty of pickled beets is that it marries the sweetness of beets with the tang from vinegar for a perfect balance. I used pickled beets in this recipe, which is a huge time-saver instead of using fresh beets.
Keep a jar of pickled beets in your cupboard along with a can of white beans, and you’re reading to whip up this pantry staple Pickled Beet Hummus recipe anytime!
More Recipes Using Pickled Beets:
- Pickled Beet Salad with Pears, Walnuts, and Goat Cheese
- Tomato and Pickled Beet Salad
- Pickled Beet and Cucumber Salad with Horseradish Yogurt Sauce
- Egg Salad Recipe with Pink Mayo and Pickled Beets
- Pickled Beet Vinaigrette
Did you make this recipe? Please rate it and leave a comment below because I love hearing from you! You can also tag @anediblemosaic on social media. To stay up-to-date FOLLOW ME on Instagram, Twitter, and Facebook. Xoxo, Faith
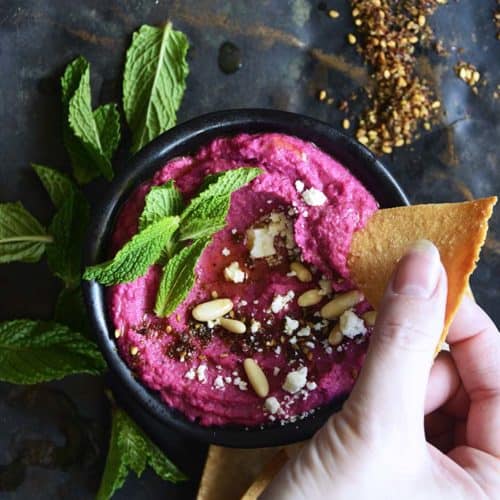
Pickled Beet Hummus White Bean Dip with Za’atar, Feta, and Mint
Email This Recipe
Get this recipe link emailed straight to your inbox!
Ingredients
- 16 oz jar whole pickled beets drained
- 14 oz can no-salt-added cannellini beans rinsed and drained
- 4 tablespoons tahini
- 2 tablespoons fresh lemon juice
- 2 cloves garlic peeled
- 1 1/2 teaspoons za’atar divided
- 1/2 teaspoon salt
- 1/4 teaspoon black pepper
- 3 tablespoons crumbled feta divided
- 1 tablespoon extra-virgin olive oil
- 1 tablespoon toasted pine nuts
- 4 tablespoons fresh mint leaves
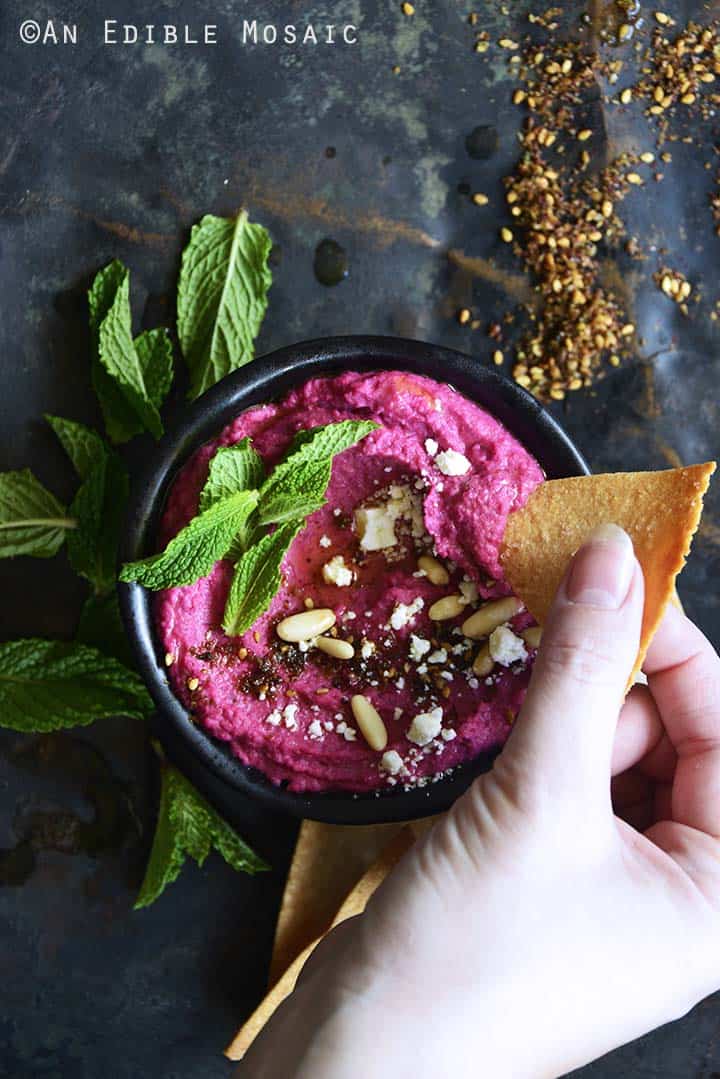
- Chopped vegetables, pita chips, or tortilla chips for dipping
Instructions
- Add the beets, beans, tahini, lemon juice, garlic, 1 teaspoon za’atar, salt, black pepper, and 2 tablespoons feta to a food processor and process until smooth, scraping down the sides of the bowl as necessary.
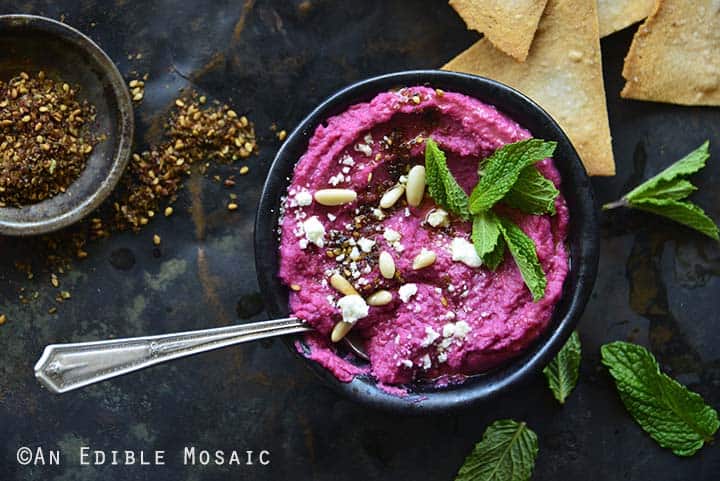
- Transfer the dip to a serving bowl and top with the extra-virgin olive oil, pine nuts, mint leaves, remaining 1 tablespoon crumbled feta, and remaining 1/2 teaspoon za’atar.
- Serve with chopped vegetables or tortilla chips for dipping.
Notes
- How to Store This in the Fridge: Keep this dip in an airtight glass container in the fridge for up to 5 days.
- Freezer-Friendly: Put the dip into a freezer-safe container. Lay a piece of plastic wrap directly on top of the dip, and then put the lid on it before freezing. When you want to eat it, thaw it at room temperature, but don’t heat it. It will keep in the freezer like this for up to 3 months.
Nutrition
Nutritional information is automatically calculated and should be used as an approximate.
Share it with me on Instagram and leave a comment to let me know your thoughts!

Disclosure: This post contains Amazon affiliate links to products I believe in, which means that even though it doesn’t cost you anything extra, I will receive a small amount of money from the sale of these items. Thank you for helping to support An Edible Mosaic!


I’m the writer, recipe developer, photographer, and food stylist behind this blog. I love finding the human connection through something we all do every day: eat! Food is a common ground that we can all relate to, and our tables tell a story. It’s my goal to inspire you to get in the kitchen, try something new, and find a favorite you didn’t know you had.
Free Bonus


delicious, I loved the recipe